
The Angevins:
The Plantagenet Era
From Anarchy to Angevin
Additional Information: The House of Plantagenet
The accession of the Angevin dynasty in 1154 AD shattered the administrative lawlessness of the Anarchy, launching a new era defined by rapid legal reformation and the birth of a sprawling continental empire. By installing a disciplined judicial system, this political shift paved the way for undisputed royal supremacy over the Kingdom, allowing the Crown to aggressively harness its professional mercenary armies and centralized taxation networks to project power from the Scottish borders to the Pyrenees while suppressing intense baronial rebellions at home.
While exploring this Plantagenet era, we track the transition from traditional feudal customs to the world’s first common law framework, examine the constitutional battles of the Magna Carta uprising alongside the devastating onset of the Hundred Years' War, and witness the sweeping social shifts of the Black Death that permanently altered the agrarian economy.
Page Contents:
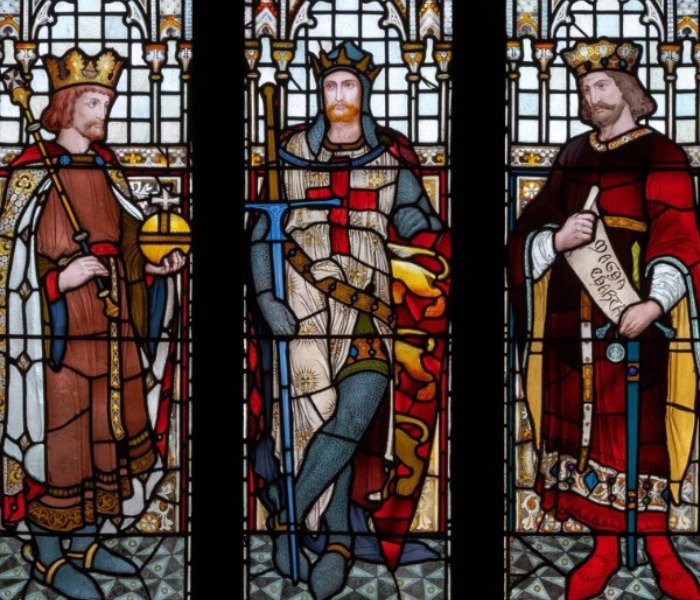
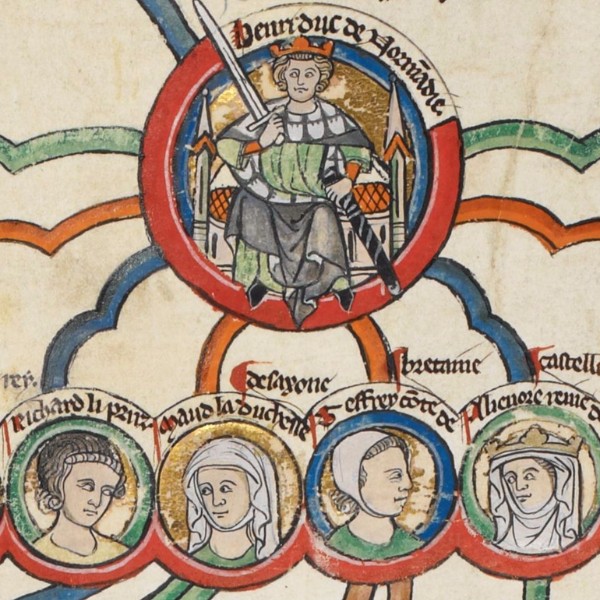
The Anarchy Settlement and Treaty of Wallingford
1153 AD
Additional Information: Norman England / The Treaty of Wallingford and Rise of the Angevins
The foundation of the Plantagenet dynasty was secured in November 1153 with the ratification of the Treaty of Wallingford, a settlement which ended The Anarchy—the nineteen-year civil war between the Empress Matilda and King Stephen of Blois that had fractured the Anglo-Norman state. For nearly two decades, central royal authority had collapsed, allowing local barons to exploit the vacuum by erecting over one thousand unlicensed stone fortifications, known as adulterine castles, while withholding county taxes, minting fraudulent currency, and depleting the treasury.
To restore stability and prevent fragmentation, the treaty forced a dynastic compromise. Brokered by Theobald of Bec, Archbishop of Canterbury, and Henry of Blois, Bishop of Winchester, the agreement allowed King Stephen to retain the English crown for the remainder of his natural life on the condition that he disinherit his own surviving son, William of Blois, 4th Earl of Surrey. Instead, Stephen was forced to formally adopt Matilda’s eldest son, Henry of Anjou, naming the young count as his sole legal heir and adoptive successor. This concession ended the ambitions of the House of Blois, transferring the crown of England to a new continental line: the House of Anjou, known as the Plantagenets.
Enforcing the peace required an administrative reordering of the country. When Stephen died of illness in October 1154, his adoptive heir ascended the throne unopposed as King Henry II, utilizing the financial and military resources of his continental domains to bring the realm under royal control. Crowned at Westminster Abbey on 19 December 1154, the new King moved with speed to restore public order and reclaim the rights of the monarchy.
Henry II issued royal writs mandating the demolition of all adulterine baronial castles, the expulsion of foreign Flemish mercenaries who had terrorized the shires, and the seizure of all ancestral royal lands and revenues that had been taken by lords during the civil war, laying the foundations for his legal and judicial reforms.
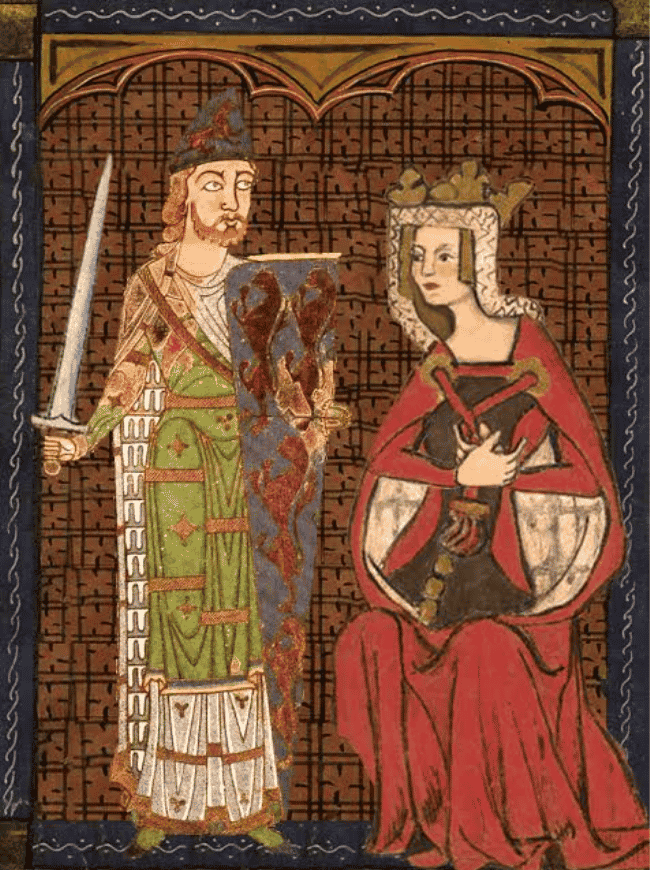
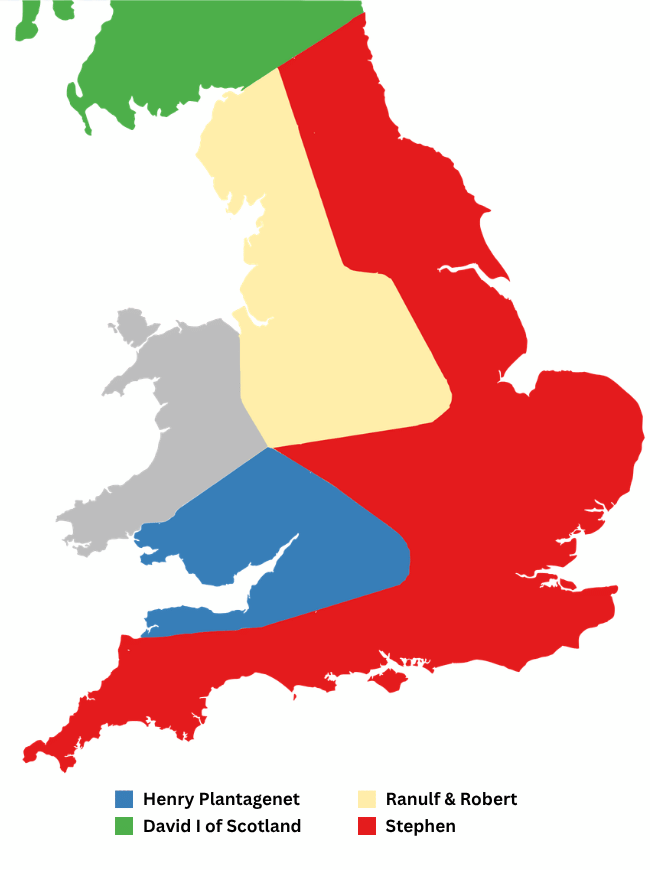
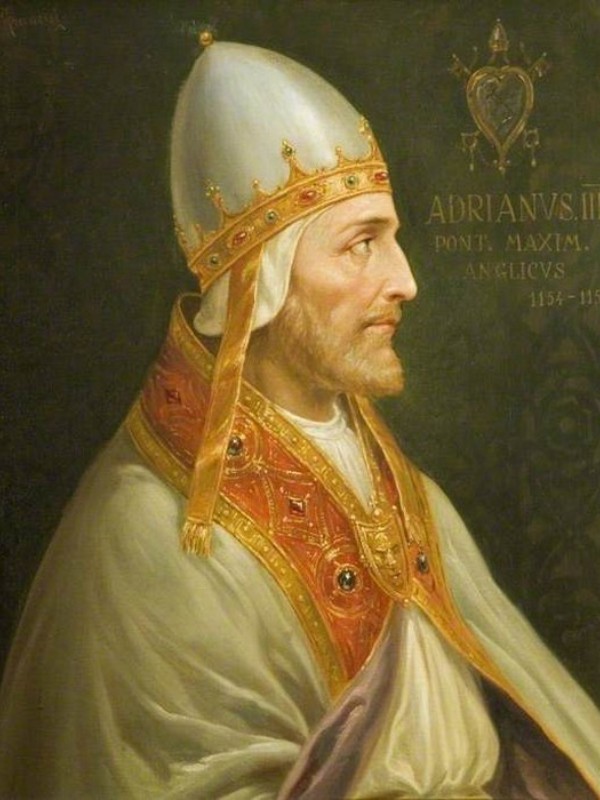
Nicholas Breakspear, the English Pope
1154 - 1159 AD
The final years of the Norman era coincided with a milestone in the history of the English Church when, in December 1154, a clergyman named Nicholas Breakspear was elected to the papal throne in Rome, adopting the title of Pope Adrian IV. To this day, he remains the only English pontiff in the history of the Roman Catholic Church. Born around 1100 in Bedmond, near St Albans in Hertfordshire, Breakspear’s path to spiritual office was unconventional, as he was initially rejected from entering St Albans Abbey due to his poverty and a lack of formal education.
Undeterred, he travelled to France as a wandering scholar, entering the house of canons regular at St Rufus near Avignon, where his administrative ability led to his election as Abbot. Recognizing his talent, Pope Eugenius III appointed him Cardinal-Bishop of Albano in 1149 and dispatched him as a papal legate to Scandinavia, where Breakspear implemented church reforms, establishing the independent archbishopric of Nidaros for Norway and creating numerous cathedral schools.
Adrian IV’s papacy was short but contentious, defined by an unyielding defence of papal supremacy that alienated the ruling elite in Rome and the college of cardinals. Upon his election, he faced an open rebellion by the Roman populace led by the religious reformer Arnold of Brescia, which the King countered by placing the entire city under an unprecedented papal interdict, shutting down churches and breaking the pilgrim economy until the city capitulated. This rigid approach to governance extended to his interactions with the Holy Roman Emperor, Frederick I Barbarossa, with whom the King clashed over ceremonial protocol when the Emperor initially refused to hold the Pope's stirrup.
This unyielding posture rankled the Roman administrative core so thoroughly that following his death in September 1159, the cardinals determined to block the appointment of foreign outsiders. This resistance hardened into an unwritten rule in Vatican diplomacy that there would never be another English pope, a sentiment reinforced for centuries by the college’s desire to keep the papacy centered on Italian control and, later, by England's definitive break from Rome during the Protestant Reformation.
Most notably for the British Isles, Adrian IV issued the papal bull Laudabiliter in 1155. This document granted the young Angevin King Henry II of England the legal authority to enter and govern Ireland. The explicit objective was to enforce church reforms on the semi-autonomous Irish Church, bringing its independent networks under the centralized administrative control of Rome.
Though Henry II delayed the campaign for over a decade, Laudabiliter ultimately provided the legal and spiritual justification for the Anglo-Norman invasion of Ireland in 1169. This intervention altered the political trajectory of the neighboring island and bound its ecclesiastical structures to the wider European network, while cementing Adrian IV's legacy as a pontiff who utilized the spiritual authority of the Holy See to reshape the borders of western Christendom.
Further Information: Nicholas Breakspear, the English Pope

Henry II and the Creation of the Angevin Empire
1154 - 1189 AD
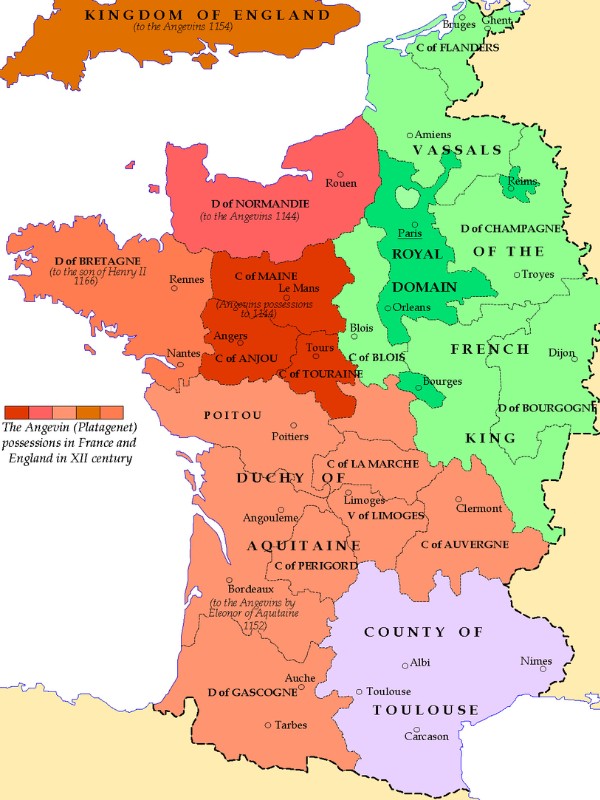
The accession of King Henry II to the English throne at twenty-one years old altered the balance of power in Western Europe, consolidating a vast territory through ancestral inheritance and marriage to tie his English kingdom to extensive lands on the continent. From his mother, Empress Matilda, he inherited the Duchy of Normandy, and through his 1152 wedding to Eleanor of Aquitaine, he assumed control over the wealthy territory of Aquitaine and Gascony. His father, Geoffrey Plantagenet, Count of Anjou, provided the core counties of Anjou, Maine, and Touraine, creating a geographic bloc now known as the Angevin Empire.
Instead of operating as a centralized state with uniform laws, this empire functioned as a loose federation of distinct duchies and independent counties stretching from the Scottish border to the Pyrenees. Henry ruled as a mobile monarch, spending more than half of his thirty-five-year reign travelling across his trans-Channel domains with a royal retinue to defend his frontiers from the Capetian kings of France.
The peaceful transfer of these continental lands was remarkable given that Geoffrey of Anjou had become a common enemy to the rulers of Western Europe through decades of aggressive warfare. For over twenty years, Geoffrey had engaged in expansionist border campaigns, conquering Normandy by force from King Stephen and invading the neighbouring territories of Poitou, Maine, and Touraine. This relentless expansion alienated the Anglo-Norman barons, who held an ancient hostility toward the Angevins and resented the loss of their continental estates.
Concurrently, Geoffrey had fought continuous skirmishes against King Louis VII of France over the borders of the Vexin, while sparking internal rebellions within his own family by refusing to grant his younger son, Geoffrey of Nantes, his promised inheritance. By the time Henry inherited these lands, he faced a hostile coalition of the French King, his own brother, and the Anglo-Norman nobility, who had all been warring on the continent to check Angevin expansion and partition the family's lands.
The scale of this hostility escalated into an armed coalition when Louis VII allied with Prince Eustace, King Stephen’s eldest son, alongside Geoffrey of Nantes and Robert de Dreux, to launch a multi-front invasion of the Angevin borders in the summer of 1152. This alliance intended to exploit Henry's recent marriage to Eleanor, which had deprived Louis VII of the vast Duchy of Aquitaine following their royal divorce. While Louis VII marched his armies directly into the Norman Vexin, burning towns along the Seine, Prince Eustace attacked the southern frontier of Normandy, and Geoffrey of Nantes fortified his rebel strongholds at Chinon, Loudun, and Mirebeau to slice the Angevin lands in two.
At the same time, the Anglo-Norman barons refused to recognize Henry’s authority, maintaining private wars on the continent to protect their autonomous lordships from Angevin centralisation. Henry broke this encirclement through a rapid military counter-offensive. He marched south into Anjou, captured his brother's castles within weeks, and forced Geoffrey into a settlement before turning north to devastate the Capetian supply lines in the Vexin, compelling a sick Louis VII to agree to a truce. Following the sudden deaths of both Prince Eustace and King Stephen within the subsequent two years, this universal opposition collapsed, leaving the twenty-one-year-old Henry to inherit the entire cross-Channel network unopposed.
To fund the protection of this vulnerable territory, Henry reorganised the military structures of the English state to turn it into a source of revenue for continental warfare. The King expanded scutage—a customary payment that allowed barons to pay a direct silver fee to the Crown instead of physically supplying quotas of feudal knights. This continuous influx of silver allowed the treasury to bypass short-term feudal levies, enabling Henry to hire disciplined, professional mercenary armies that could fight year-round along the exposed frontiers of the Vexin and Aquitaine.
Further Information: Henry II and the Creation of the Angevin Empire

The Constitutions of Clarendon
1164 AD
Additional Information: The History of the Church in England / Crown Courts vs Church Tribunals
The expansion of Henry II’s royal justice system triggered a major constitutional clash with the Roman Catholic Church, remembered as the Thomas Becket crisis. Seeking to bring the independent church courts under royal control, Henry appointed his trusted chancellor, Thomas Becket, as Archbishop of Canterbury in 1162. Upon taking office, Becket changed his political allegiance, resigning his chancellorship and becoming an unyielding defender of ecclesiastical privileges. This sudden defiance ruptured the close administrative partnership that had previously united the crown and the church, setting off a bitter struggle over the boundaries of royal and canon law.
The conflict intensified in January 1164 when Henry summoned his bishops to Clarendon Palace, requiring them to accept a sixteen-clause statute known as the Constitutions of Clarendon. In this document, Henry demanded the removal of the legal protection known as benefit of clergy, mandating that any clergyman who committed capital crimes such as murder or robbery must be stripped of his holy orders and handed directly to royal justices for physical punishment. Becket rejected the statute, claiming that trying a cleric in a secular court violated canon law by enforcing a double punishment for a single offence, a disagreement which led to a total breakdown in relations and forced Becket into six years of exile in France.
The dispute reached a violent conclusion following a fragile reconciliation that allowed Becket to return to England in December 1170. Becket immediately utilized his spiritual authority to excommunicate several pro-royal bishops who had assisted in the coronation of Henry's son, Henry the Young King, an act that violated the traditional rights of Canterbury. Hearing of this at his Christmas court in Normandy, Henry II fell into a fit of rage, shouting: "What miserable drones and traitors have I nourished and brought up in my house, who let their lord be treated with such shameful contempt by a low-born clerk?"
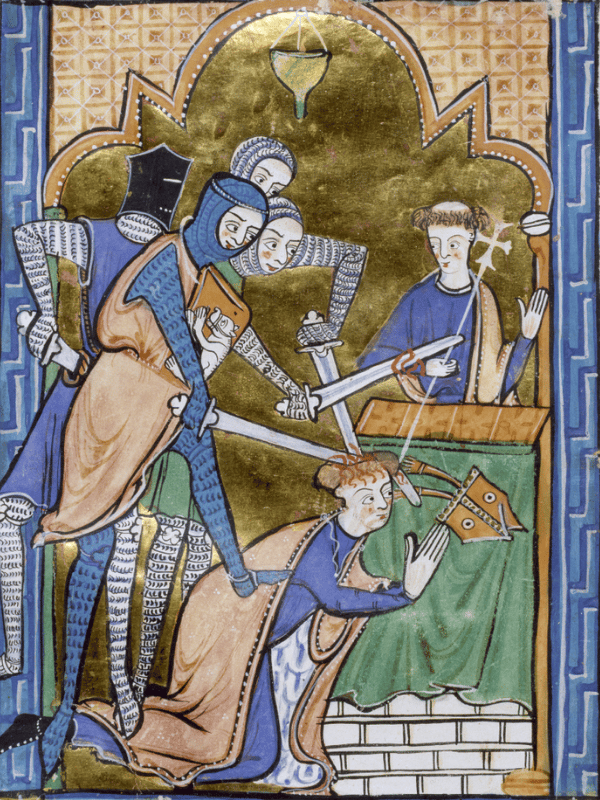
Taking the King's words as an instruction, four royal knights rode straight to the Kentish coast, entering Canterbury Cathedral on the afternoon of 29 December 1170 to confront the Archbishop before the altar. When Becket refused to lift the excommunications, the knights assassinated him with their swords, striking multiple blows to his head until his brains were scattered across the stone floor.
The murder provoked immediate condemnation across Europe, damaging Henry's international standing and threatening his dominions with papal interdict. Becket was rapidly canonised as a martyr, forcing King Henry to perform a public, barefoot penance at Canterbury in July 1174, where he walked through the cobblestone streets to submit to being scourged by the local monks. The Crown was forced to abandon the core clauses of the Constitutions of Clarendon, preserving the legal independence of the church courts and the benefit of clergy loophole for centuries.
Further Information: The Constitutions of Clarendon


The Great Revolt
1173 - 1174 AD
The outbreak of an internal rebellion across England and France in the spring of 1173 broke the security of the Angevin Empire, threatening the crown of King Henry II. Known as the Great Revolt, this conflict was organized by Henry II's family: his eldest son, Henry the Young King, his younger sons Richard and Geoffrey, and his consort, Queen Eleanor of Aquitaine. The family formed a military alliance with King Louis VII of France, Count Philip of Flanders, and King William the Lion of Scotland to launch campaigns to depose the monarch.
The rebels aimed to partition the territory into independent domains, exploiting the resentment of the Anglo-Norman barons who believed that Henry’s administrative reforms and legal oversight restricted their traditional privileges. In 1173, Scottish armies crossed the northern border into Northumberland, baronial rebellions erupted across the Midlands and East Anglia, and French forces besieged castles across Normandy, testing the defensive resources of the country.
The rebellion escalated when the great earls of England, led by Robert de Beaumont, 3rd Earl of Leicester, and Hugh Bigod, 1st Earl of Norfolk, mobilized their forces to support the young King. Leicester landed French mercenaries in Norfolk in late 1173, intending to march through the Midlands to join forces with the rebel Earl of Ferrers, but his column was intercepted and defeated by royal forces at the Battle of Fornham on 17 October 1173. Concurrently, King William the Lion besieged the royal strongholds at Prudhoe and Alnwick, unleashing his forces to plunder the northern shires.
Henry II responded with speed, utilizing his silver reserves to hire thousands of Brabant mercenaries. Leaving his justiciars to manage the defense of England, the King focused his army on the continent, breaking the French sieges at Verneuil and Rouen before forcing Louis VII to retreat.
The conflict reached its turning point in July 1174 when the English Justiciar, Ranulf de Glanvill, marched northern knights through a morning fog to surprise the Scottish army at the Battle of Alnwick. King William was unhorsed and captured during the melee, breaking the momentum of the northern invasion. Henry II crossed the Channel to England, riding directly to Canterbury Cathedral to perform a public penance at the tomb of Thomas Becket to restore his moral authority.
The King then marched his forces into the Midlands and East Anglia, dismantling the remaining rebel strongholds at Framlingham and Northampton and forcing the Earl of Norfolk to surrender. By the autumn of 1174, his defeated sons submitted to his authority at Montlouis, bringing a conclusion to the insurrection.
The Great Revolt ended in a decisive victory for Henry II, who used the settlement to strengthen the authority of the Crown. He placed Queen Eleanor under house arrest, confining her to royal apartments for the remainder of his reign to prevent further conspiracies. Furthermore, he forced the captured Scottish monarch to sign the Treaty of Falaise in December 1174, which required William the Lion to perform direct feudal homage to the English Crown and placed English garrisons inside the strategic Scottish castles of Edinburgh, Stirling, and Roxburgh at Scotland's expense, turning the northern kingdom into a formal dependency.
Further Information: The Great Revolt
The Ascension of Richard I
1189 - 1199 AD
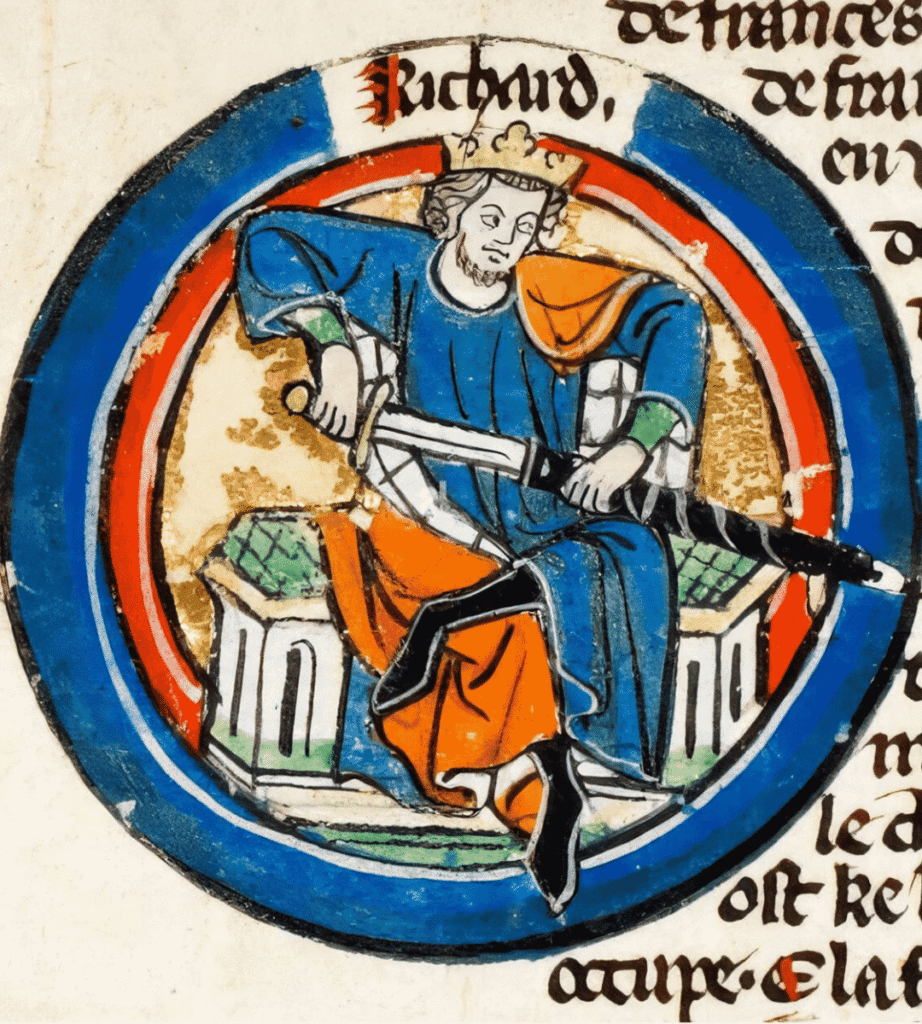
The transition of authority reshaped the Angevin Empire on 6 July 1189, when the death of King Henry II at the fortress of Chinon left his domains in the hands of his eldest surviving son, King Richard I.
Known as Richard the Lionheart, the new monarch belonged to the medieval warrior class—a tactician and commander who viewed the island nation primarily as a source of revenue, recruitment, and logistics for his overseas campaigns. Richard spent less than six months of his ten-year reign within England, leaving the daily governance of the country in the hands of a civil service trained under his father's legal frameworks.
Despite the King's prolonged absence, the domestic administration remained resilient, outmanoeuvring the subversion of his younger brother, Prince John. The execution of royal justice was directed by a succession of justiciars, most notably William Longchamp, Bishop of Ely, and Hubert Walter, Archbishop of Canterbury.
Walter refined the county court networks, issuing the Edictum Regium in 1195 to establish keepers of the peace, while introducing the office of the coroner to investigate local deaths and preserve royal financial rights. This judicial infrastructure ensured that the authority of the Crown remained unchallenged, maintaining public order while the sovereign was absent.
To clear the path for his crusade, Richard reordered provincial boundaries, replacing sheriffs with loyal appointees to secure the peace of the shires before his departure.
By strengthening the judicial authority of the Westminster courts and ensuring that the machinery of the Exchequer could process revenues without a royal presence, the administration insulated the domestic realm from internal rebellion, preserving a stable executive baseline that anchored the survival of the Crown during a decade of royal absenteeism.
The Conquest of Cyprus
May 1191 AD
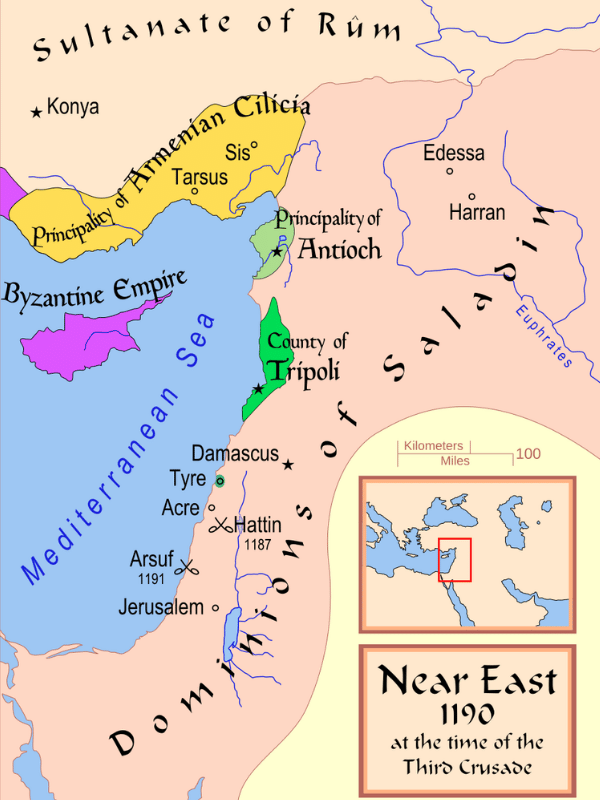
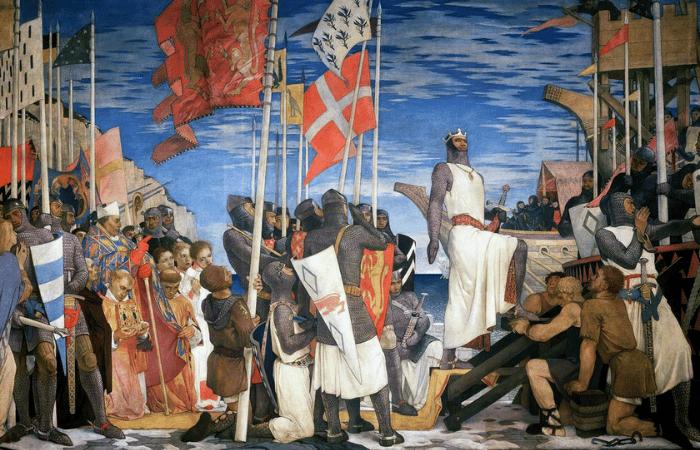
The success of the Third Crusade depended on securing the sea lanes of the eastern Mediterranean, a logistical requirement that prompted King Richard I to launch an amphibious invasion of Cyprus. While sailing from Sicily to the Holy Land in April 1191, a severe storm scattered the royal fleet, driving several transport ships ashore on the southern coast of the island. Isaac Komnenos, the independent Byzantine ruler of the territory, treated the shipwrecked survivors with open hostility, confiscating their property and blocking the harbor of Limassol to trap the King’s sister, Joan, and his betrothed, Berengaria of Navarre.
Arriving with the main body of the fleet in May 1191, Richard demanded the immediate release of the royal captives and the restoration of the plundered goods. When Komnenos refused the terms, the English King ordered an immediate beachhead assault, leading his galley crews to wade through the surf and rout the local defenders from the shore.
The initial landing was followed by a rapid overland campaign that broke the island's resistance within weeks. Utilizing the mobile cavalry forces of Guy de Lusignan, the English columns pursued the fleeing Byzantine troops into the interior, capturing the formidable stone strongholds of Nicosia, Kyrenia, and Buffavento. Facing total encirclement, Isaac Komnenos offered his unconditional surrender on the condition that Richard would not place him in iron chains; the King honored the request by confining the fallen tyrant in specially forged silver fetters.
Richard capitalized on his conquest, marrying Berengaria of Navarre at Limassol on 12 May 1191 before selling the island to the Knights Templar for a massive sum of one hundred thousand bezants. This maritime conquest established a secure Christian supply depot and military staging ground that guaranteed a continuous flow of grain, horses, and reinforcements to the mainland ports, transforming the island into the primary logistical anchor for the western presence in the Levant before Richard sailed north to join the siege of Acre.

The Siege of Acre and Massacre at Ayyadieh
1191
Additional Information: Norman England / The First Crusade
The arrival of King Richard I at the naval port of Acre on 8 June 1191 instantly broke the tactical deadlock of the Third Crusade, injecting vital fresh manpower and massive financial resources into a grueling two-year war of attrition. For twenty-four months, a multi-national Christian army under Guy de Lusignan had remained trapped in a desperate double-encirclement, blockading the fortified city walls while being pinned from behind by Sultan Saladin’s massive Ayyubid field army.
Richard rapidly altered the stagnant pace of operations. By using his deep treasury reserves to pay premium daily wages, he secured the absolute loyalty of the multi-national army and hired elite engineers to construct a terrifying battery of stone-throwing artillery pieces. These towering timber mangonels and trebuchets—including legendary engines named "God's Own Sling," "The Bad Neighbour," and "The Bereft"—unleashed a continuous, multi-week bombardment that pulverized the masonry of the curtain walls and sent the critical Accursed Tower crashing into the defensive ditches.
This relentless artillery pounding systematically dismantled the inner defenses, pushing the starving, exhausted Muslim garrison to the point of collapse. Realizing that Saladin’s external cavalry forces could no longer break the crusader encirclement, the garrison commanders surrendered the city on 12 July 1191. Under the strict terms of the capitulation, the defenders purchased their survival by promising to surrender the fortress alongside a massive ransom of 200,000 gold pieces, the return of the True Cross captured at the Battle of Hattin, and the immediate release of 1,500 Christian captives. To guarantee absolute compliance with these terms, Richard detained roughly 2,700 elite garrison troops and their immediate families as hostages inside the captured city.
The diplomatic settlement dissolved over the subsequent weeks as Saladin deliberately delayed the gold payments, failed to produce the True Cross, and altered the verification lists of Christian captives to buy time for his armies. The political balance shifted further on 31 July 1191 when King Philip II abandoned the campaign, sailing for France to plot against English continental lands alongside Prince John and leaving Richard as the sole commander of the crusade. As the final payment deadline of 20 August 1191 arrived, Richard recognized that Saladin was attempting to stall the army until the winter rains could disrupt the advance south toward Jaffa. Refusing to allow his military mobility to be compromised by a massive hostage-guarding operation, the King determined to break the impasse through immediate, decisive force.
On the afternoon of 20 August 1191, Richard ordered his knights to bind the 2,700 Muslim prisoners with thick cords and march them out of the city gates straight to the low hills of Ayyadieh, in full view of Saladin’s forward cavalry outposts. Before the startled Saracen scouts could organize a rescue charge, the English knights and heavy infantry fell upon the bound captives, slaughtering them with swords and lances.
This mass execution permanently terminated the ransom negotiations and incited Saladin to order retaliatory killings of Christian prisoners along his lines. However, by clearing the immense logistical burden of guarding, feeding, and transporting thousands of hostages, Richard successfully preserved his grain supplies, secured his rear lines from internal betrayal, and unified his lightened army to march south along the Mediterranean coast just two days later.
The Campaign for Jerusalem and the Battle of Arsuf
1191 - 1192 AD
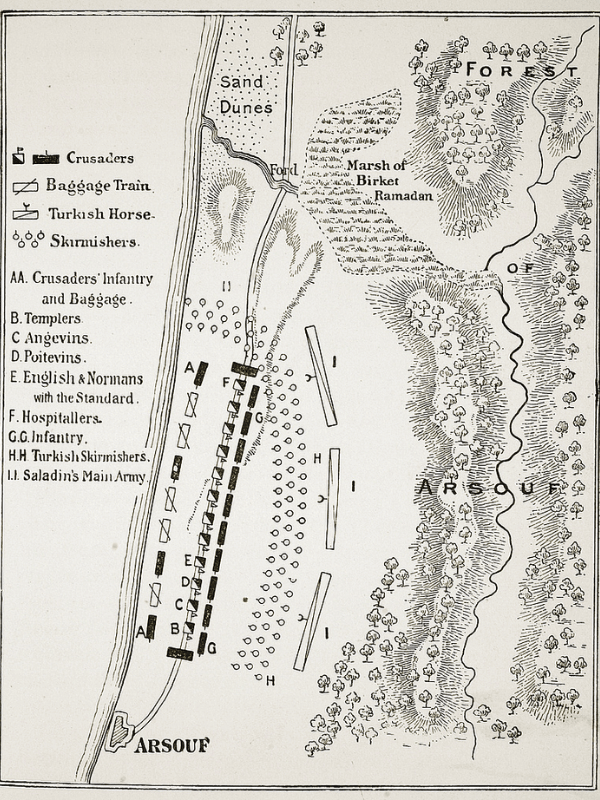
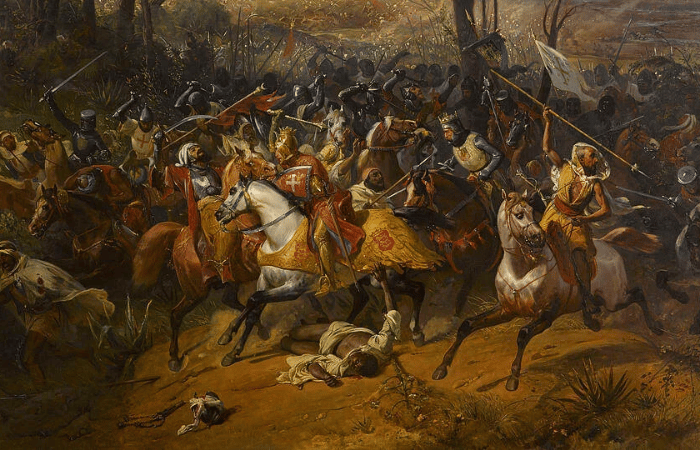
Following the execution of the captives at Acre, King Richard I marched his army south along the Mediterranean coast toward the strategic port of Jaffa. To protect his forces from the heat and the constant harassment of Saracen horse archers, the King organized the columns into a disciplined defensive formation, keeping his infantry on the landward flank to shield his heavily armoured knights while the fleet tracked their progress with supplies from the sea.
Saladin attempted to break this march on 7 September 1191 by launching an assault in the forest of Arsuf, unleashing over twenty thousand Turkish and Nubian troops to encircle the crusader rearguard. Despite intense pressure on the Knights Hospitaller, who held the rear lines under a continuous storm of arrows, Richard enforced strict battlefield discipline until the Saracen cavalry exhausted their horses. The King then ordered a cavalry charge that shattered the enemy lines, resulting in a victory at the Battle of Arsuf that forced Saladin to retreat and restored the military reputation of the Christian forces.
By October 1191, the army took possession of the ruined fortifications of Jaffa, utilizing the port to establish a supply base for an advance into the interior toward Jerusalem. Over the subsequent winter, Richard led his forces up the Judaean hills, reaching Beit Nuba, just twelve miles from the Holy City, by January 1192. However, the King faced a strategic dilemma: his military advisors, including the Knights Templar, warned that even if they successfully breached the walls of Jerusalem, they lacked the manpower to hold the city once the transient crusader knights returned to Europe, while their supply lines back to the coast remained vulnerable to Saracen counter-attacks. Exercising pragmatic military judgment over religious sentiment, Richard made the decision to turn his army back to the coast to refortify the city of Ascalon, a move that created deep-seated resentment among the rank-and-file soldiers.
The final phase of the campaign occurred in the summer of 1192, when Saladin launched a surprise attack to recapture Jaffa while Richard was preparing to dismantle his army. Receiving the news at Acre, the King sailed south with a small relief fleet, leaping into the surf with his personal retinue to lead a counter-charge that drove the Saracen forces out of the town. Recognizing that a military stalemate had been reached and receiving urgent intelligence reports that his brother Prince John was plotting with the French King to seize his crown, Richard opened direct diplomatic negotiations with Saladin.
The conflict ended on 2 September 1192 with the signing of the Treaty of Jaffa. Under the terms of this three-year truce, Saladin retained control of Jerusalem, but agreed to dismantle the fortifications of Ascalon and guaranteed Christian merchants and unarmed pilgrims free access to the holy sites, securing the survival of the Crusader States before Richard embarked on his dangerous overland journey back to Europe.
Further Information: The Campaign for Jerusalem and the Battle of Arsuf
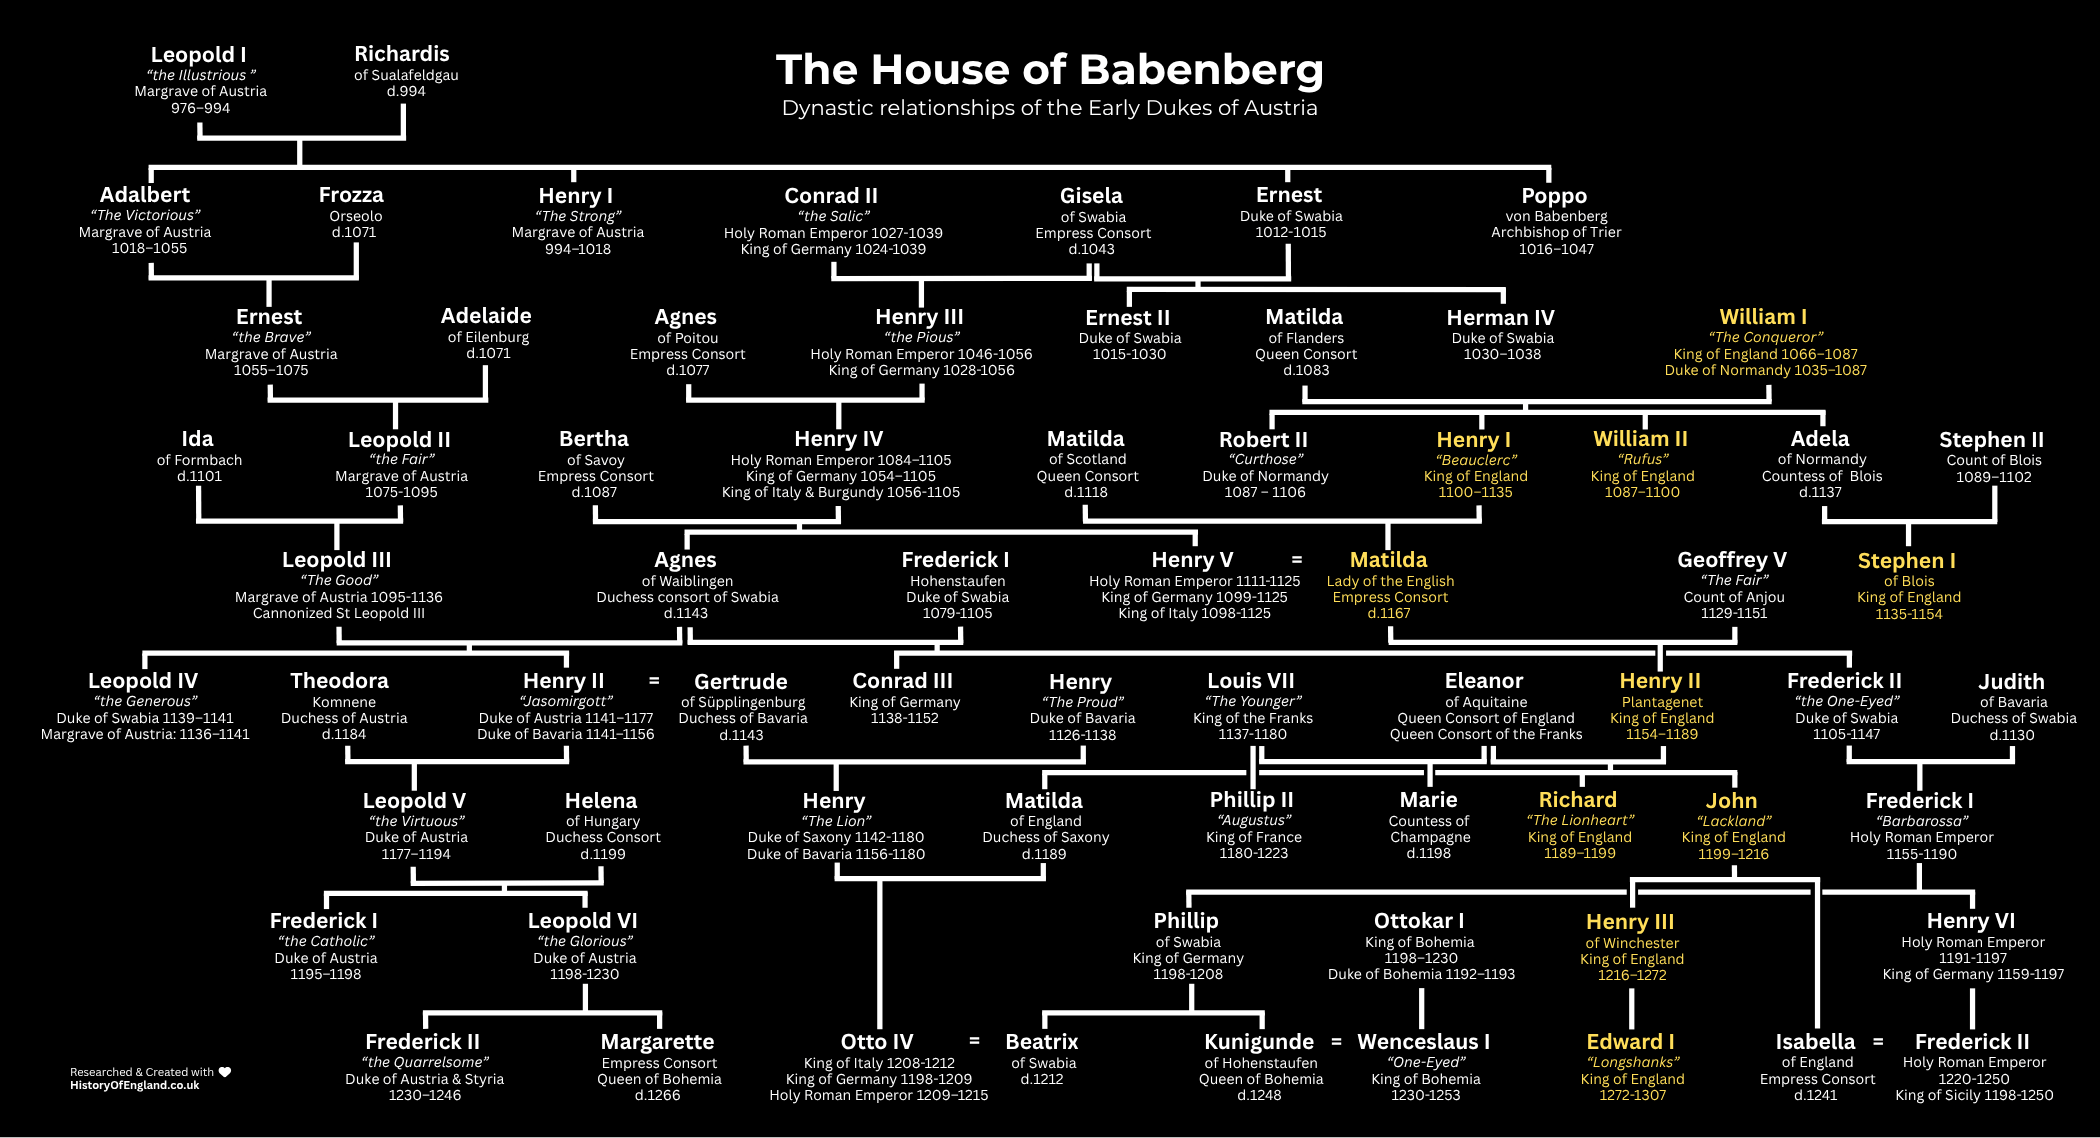
Imperial Captivity and the Saladin Tithe
1192 - 1194 AD
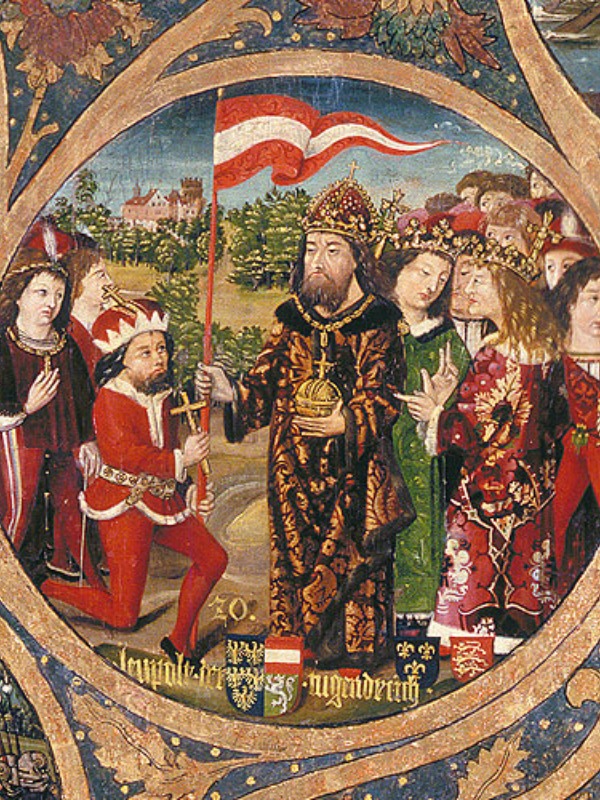
The overland journey back to Europe exposed King Richard I to immediate danger, as his conflict with various continental princes during the crusade left him without a safe route home. Attempting to travel through central Europe disguised as a merchant, the King was discovered and captured in December 1192 near Vienna by Duke Leopold of Austria, whom Richard had insulted during the siege of Acre by casting the ducal banner into the city ditches.
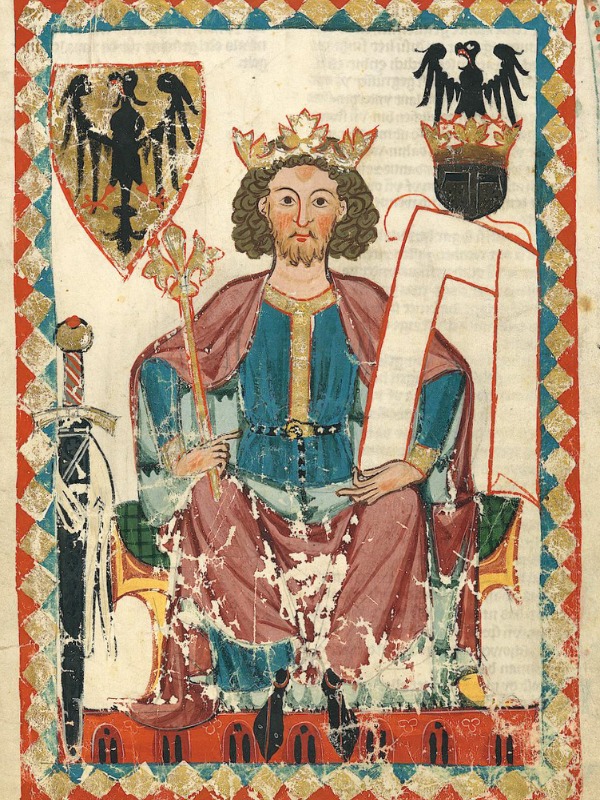
Leopold transferred his royal captive to the Holy Roman Emperor, Henry VI, who imprisoned the English monarch in the strongholds of Trifels and Ochsenfurt. The Emperor used this captivity to demand a ransom of one hundred and fifty thousand marks—equivalent to roughly three times the annual income of the English treasury—threatening the Crown with financial exhaustion if the funds could not be produced.
The extraction of this ransom triggered a mobilization across England, directed by the royal justiciar, Hubert Walter, and the King’s mother, Eleanor of Aquitaine. To raise the silver, the government implemented a public levy based on the mechanics of the Saladin Tithe, a tax that demanded a portion of all moveable goods and revenues from both the laity and the clergy across the shires. The collection was thorough; the Crown confiscated the gold and silver plate of all churches and monasteries, removed the shrines of their decorative treasures, and enforced an additional tax on wool production, the country's primary export. This financial exploitation caused resentment among the clergy and the baronial elite, but the administrative machinery established by Henry II successfully funneled the silver directly into London, where it was melted down and verified before being dispatched across the Channel.
While the treasury struggled to accumulate the ransom, Prince John capitalized on his brother's imprisonment to launch a rebellion, allying with King Philip II of France to offer the Emperor a bribe of eighty thousand marks to keep Richard in custody. However, the German princes refused to support this scheme, forcing the Emperor to honor his original agreement once the initial payment of one hundred thousand marks arrived in Germany. Richard was formally released from his captivity on 4 February 1194, having spent over a year in imperial custody.
Further Information: Imperial Captivity and the Saladin Tithe
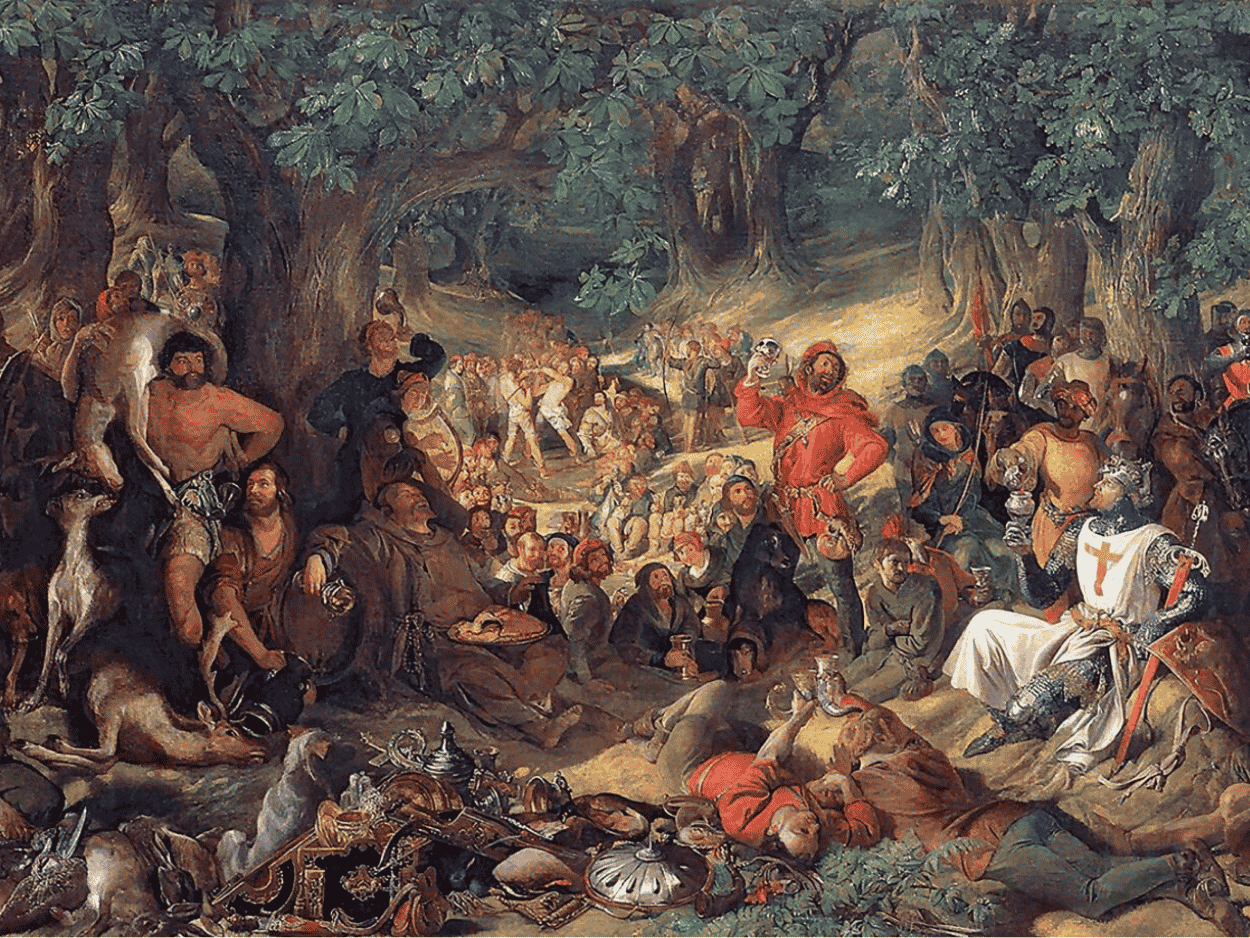
The Sack of Nottingham
1194 AD
The stability of the Angevin administration collapsed in the winter of 1194 when the prolonged captivity of King Richard I in Germany triggered a violent domestic insurrection. Exploiting his brother's imprisonment, John, Count of Mortain, launched an aggressive conspiracy with King Philip II of France, attempting to seize the vacant throne and partition the continental territories of the Crown. Backed by a volatile faction of rebellious barons, Prince John fortified his strategic strongholds across the Midlands, letting his private garrisons plunder royal lands and openly challenge the regency government.
To halt the collapse of royal authority, the chief justiciar, Hubert Walter, Archbishop of Canterbury, acted with immense speed. He mobilized the local shire levies and led a rapid counter-offensive that systematically encircled and isolated the rebel castles before the baronial network could coordinate a unified front.
The final phase of this domestic campaign required a massive concentration of veteran military force to crush the last pocket of armed resistance within the Midlands. Upon his release from imperial captivity in March 1194, King Richard I landed in England and marched his war-train straight to Nottingham Castle, the primary rebel stronghold on the island. Discovering that the garrison, commanded by the stubborn rebel captain William de Vendœuvres, refused to believe the reports of his release, the King ordered the immediate assembly of heavy siege engines and launched a fierce, direct assault on the outer gates.
To break the resolve of the defenders, Richard erected gallows within plain sight of the battlements and publicly hanged captured rebel scouts outside the walls. These brutal operations shattered the garrison's morale, forcing a complete surrender within three days on 28 March 1194. Following this victory, Richard overhauled the local administration, stripping the rebel sheriffs of their titles and auctioning their offices to the highest bidders to rapidly replenish the depleted treasury.
The swift reduction of Nottingham consolidated royal authority and brought an immediate end to this period of dynastic rebellion. Realising that he no longer possessed the resources or baronial backing to resist, the Count of Mortain fled the country to seek refuge on the continent, eventually throwing himself at the King’s feet to plead for mercy in Normandy, where a dismissive Richard I granted him a formal pardon.
To secure his domestic base before returning to his border wars against France, Richard celebrated a magnificent second coronation at Winchester on 17 April 1194. This elaborate crown-wearing ceremony, carefully engineered by Archbishop Hubert Walter, successfully restored the wounded prestige of the monarchy and erased the humiliation of his foreign imprisonment. This assertion of absolute power restored administrative order across the shires, ensuring that the domestic government remained secure and fully capable of collecting the heavy silver revenues required to fund the final years of the cross-Channel conflict.

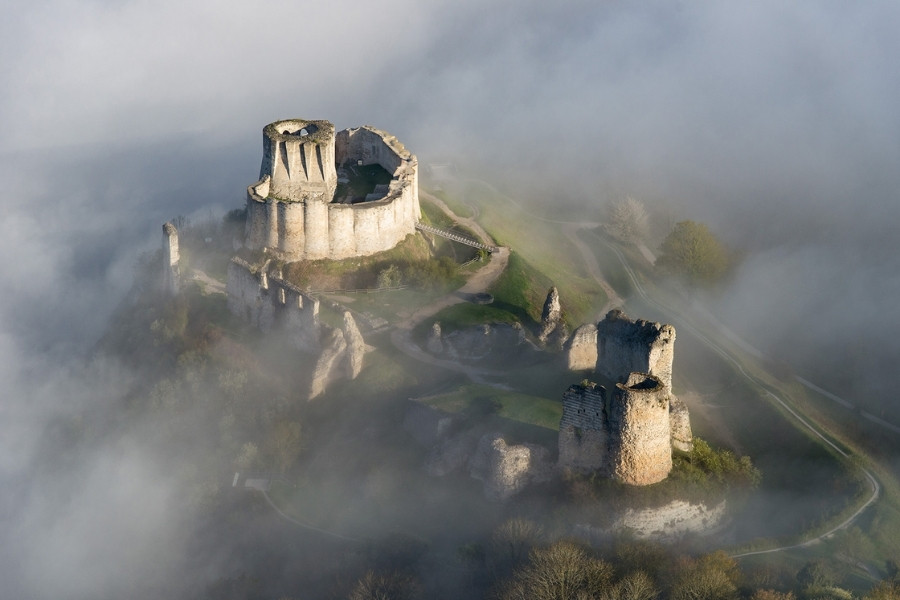
The Defence of Normandy and Death of Richard I
1194 - 1199 AD
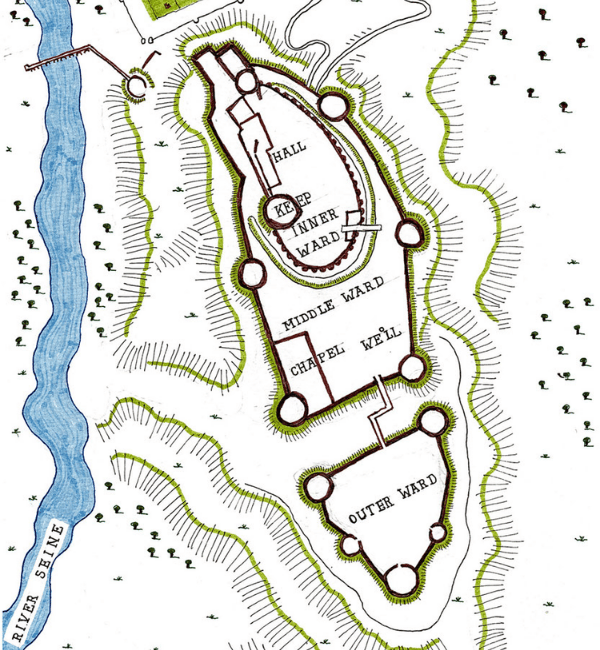
The final years of Richard I’s reign were consumed by a war in northern France to protect his ancestral lands from the expansion of King Philip II. To anchor his defensive line along the border of Normandy and secure the river approach to the ducal capital at Rouen, Richard personally oversaw the design and construction of Château Gaillard between 1196 and 1198. Erected on a high rock cliff overlooking a bend of the River Seine above the town of Les Andelys, this fortress featured new military architecture, including a corrugated curtain wall that eliminated blind spots for defensive archers and a stone keep built to withstand prolonged artillery bombardment.
The construction of this fortification cost the royal treasury £15,000, an expenditure that exceeded the total amount spent on all English castles combined during the thirty-five-year reign of his father, Henry II. To fund this building project, Richard I diverted financial revenues, extracting silver from the shires through judicial fines and selling royal offices to accumulate liquid capital. This financial investment barred the French advance, providing Richard with a secure base to launch counter-offensives into the French Vexin.
These operations culminated in his victory over Philip II at the Battle of Gisors in September 1198. Leading a swift cavalry charge from his frontier fortress, Richard caught the French army unprepared outside the town walls, forcing Philip II to retreat in panic toward the fortress of Gisors. The French King was forced to flee across the River Epte when the town bridge collapsed under the weight of his retreating knights, plunging the monarch into the waters alongside heavily armoured lords. Richard captured over ninety French knights and two hundred chargers during the melee, writing in his official report to the treasury that he had made the King of France drink the river water. This victory forced Philip II to accept a temporary truce and preserved the cross-Channel borders of the monarchy.
With his northern border secured, Richard marched his mercenary army south to the Limousin in March 1199 to suppress a rebellion led by Aimar, Viscount of Limoges, who refused to hand over a discovered treasure trove of Roman gold that belonged to the King by feudal law. While besieging the castle of Châlus-Chabrol on the evening of 26 March 1199, the King walked along the trenches without wearing his body armour to inspect the progress of the sappers. A lone defender on the battlements, identified as Pierre Basile, used a frying pan as a makeshift shield while firing a crossbow bolt that struck Richard in the shoulder near the neck. The injury appeared minor, but a surgeon's clumsy attempt to extract the iron arrowhead in the dark mangled the tissue, causing the wound to become infected with gangrene.
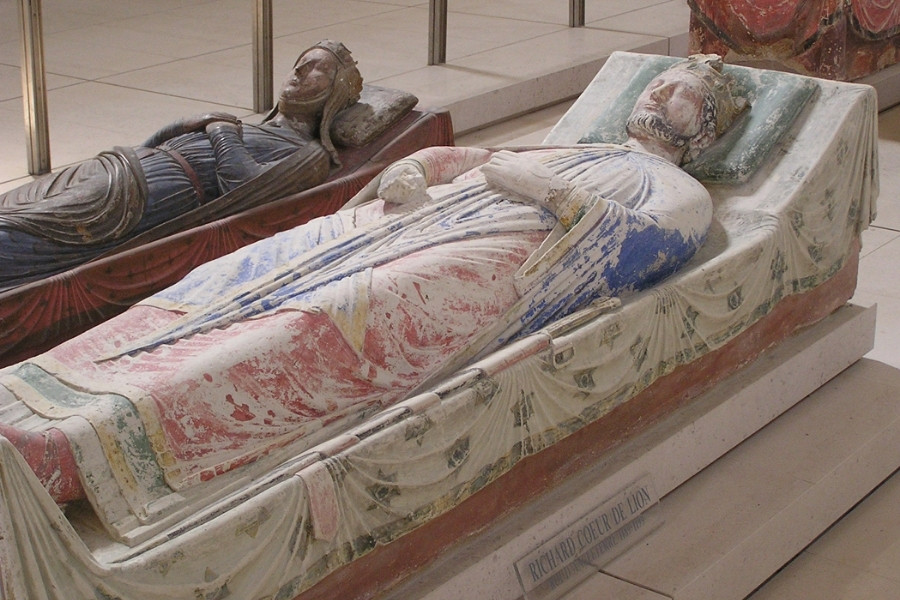
Realizing his death was imminent, the forty-one-year-old monarch summoned the archer to his bedside, pardoned him for the deed, and ordered his release with a gift of one hundred shillings. Despite the King's pardon, his mercenary captain, Mercadier, seized the archer after Richard's death, flaying him alive and hanging him in sight of the camp. Richard died on 6 April 1199 in the arms of his mother, Eleanor of Aquitaine, leaving the empire to his younger brother, King John. In accordance with his final wishes, his brain was buried at Charroux in Poitou, his heart was interred at Rouen Cathedral to honour his Norman subjects, and his body was laid to rest at the feet of his father at Fontevraud Abbey.
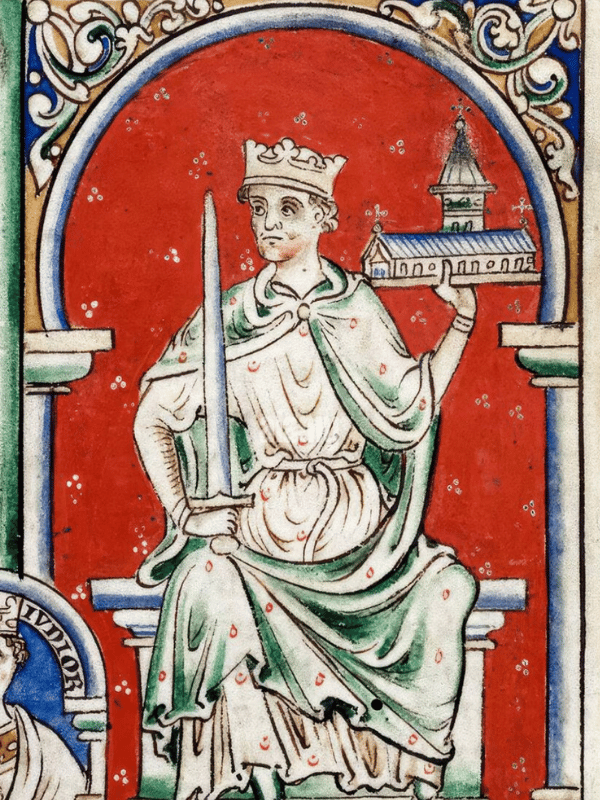
King John and the Loss of Normandy
1200 - 1213 AD
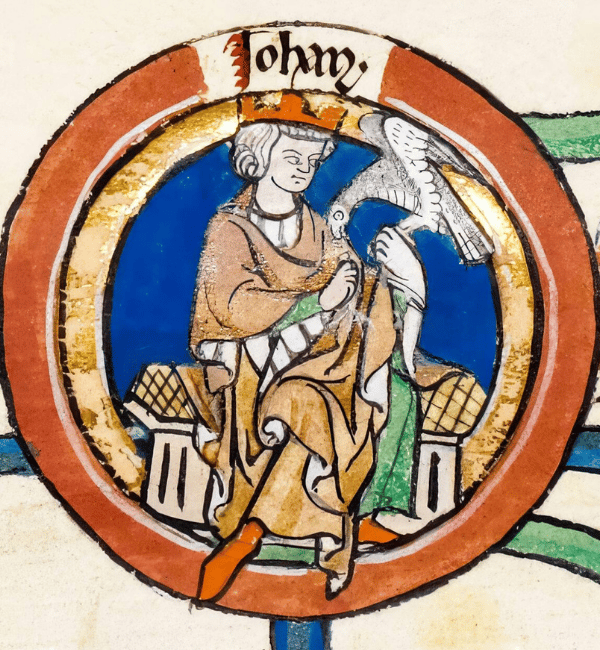
The collapse of the continental empire began after King John's accession, as King Philip II of France exploited dynastic divisions by backing the rival claim of John's nephew, Arthur of Brittany. The conflict hit an inflection point in August 1202 when John executed a relief march to rescue his mother, Eleanor of Aquitaine, at the Siege of Mirebeau, capturing Arthur alongside hundreds of rebel knights. However, the King lost the political leverage of this victory by ordering the murder of Arthur at Rouen in April 1203, an act that alienated his own cross-Channel barons and caused defections among the Norman nobility.
Philip II capitalized on this loss of support by launching an invasion, using siege trains to encircle the English border fortress of Château Gaillard, which fell in March 1204 after a seven-month siege. With the defensive key to the duchy destroyed, French armies swept across the remaining territories, capturing Rouen in June 1204 and stripping the English Crown of Normandy, Anjou, Maine, and Touraine.
This loss of territories left the kingdom facing a domestic crisis due to financial depletion. Having lost the revenues of these provinces, King John was confronted with the necessity of funding a military reconquest, a challenge that required a mobilization of silver. To fill the treasury, the royal exchequer implemented fiscal measures, collecting traditional feudal dues, demanding scutage levies on military tenants who refused to campaign abroad, and imposing taxes on moveable goods. This financial extraction alienated the northern nobility and challenged the traditional property rights of the landowning elite, creating resentment across the shires.
The underlying tension escalated into a constitutional crisis in 1208 when a dispute over the appointment of Stephen Langton as Archbishop of Canterbury prompted Pope Innocent III to place England under a formal Papal Interdict. For five years, the public execution of Christian sacraments was suspended, church bells remained silent, and the dead were buried in unconsecrated fields, a spiritual isolation designed to break the King’s defiance.
John responded by confiscating agricultural lands and revenues of the Church to feed the royal treasury. While this action provided the Crown with financial assets, the prolonged spiritual suspension alienated the populace and left the government exposed to foreign invasion, forcing John to capitulate in 1213 by submitting his crown directly to the Pope and agreeing to hold England as a papal vassal.
Further Information: King John and the Loss of Normandy

The Battle of Bouvines and the Collapse of the Empire
1214 AD
To execute his military campaign to recover the continental territories lost to France, King John used his accumulated church wealth to organize a grand European alliance with the Holy Roman Emperor Otto IV and Count Ferrand of Flanders. While John launched a secondary diversionary campaign in Gascony to draw away French troops, the primary allied army struck from the north, marching a formidable force of nearly 9,000 men into Flanders to confront the forces of King Philip II.
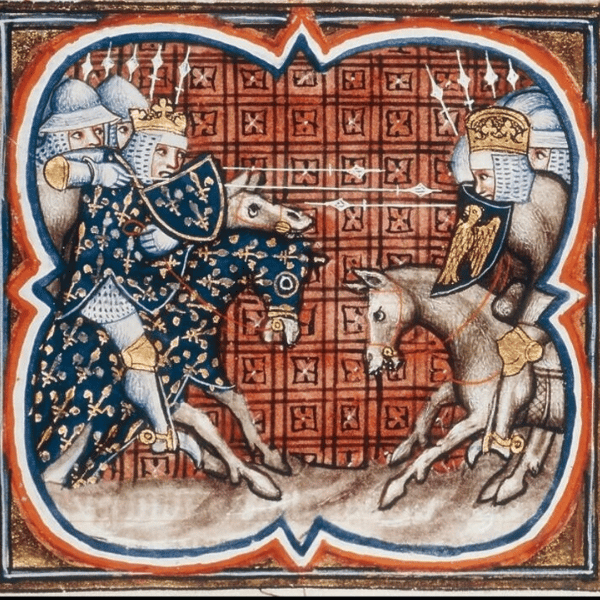
The opposing hosts met on 27 July 1214 at the Battle of Bouvines, an engagement that ended in a catastrophic defeat for the allied coalition. Outnumbered nearly three-to-two by the coalition, the French army of 6,000 troops relied on superior discipline and devastating tactical counter-charges. The French heavy cavalry systematically broke the allied infantry ranks, unhorsing the Count of Flanders and capturing Emperor Otto’s imperial standard, which featured a gilded eagle carried on a massive chariot.
Though the strength of contemporary chainmail limited casualties among the high nobility—resulting in only 169 allied knights killed—the defeat was total. Twenty-five imperial barons along with over one hundred knights were captured and paraded in humiliation into the dungeons of Paris. Among the most prominent captives dragged from the field in chains were Renaud de Dammartin, Count of Boulogne, and King John's own half-brother, William Longespée, 3rd Earl of Salisbury. The Emperor fled the field into permanent political ruin, while the captured Count of Flanders spent the next twelve years in a royal cell.
This crushing defeat permanently ended John's hopes of recovering Normandy, spending the vast reserves of the royal treasury and forcing the King to return to England in October 1214 with his prestige and authority entirely broken.
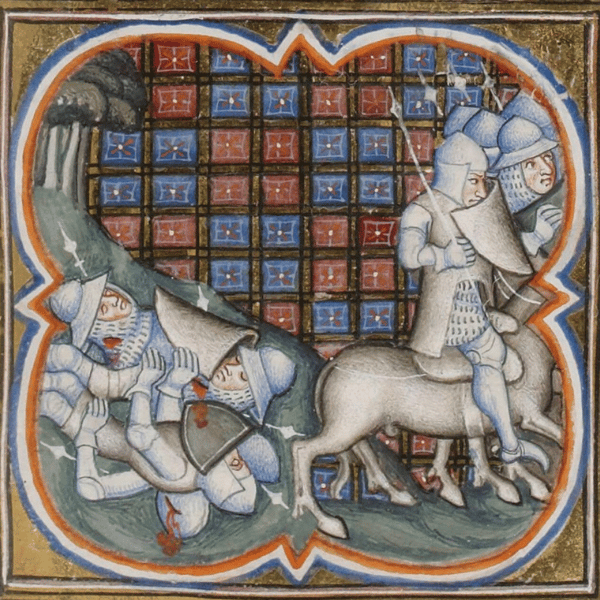
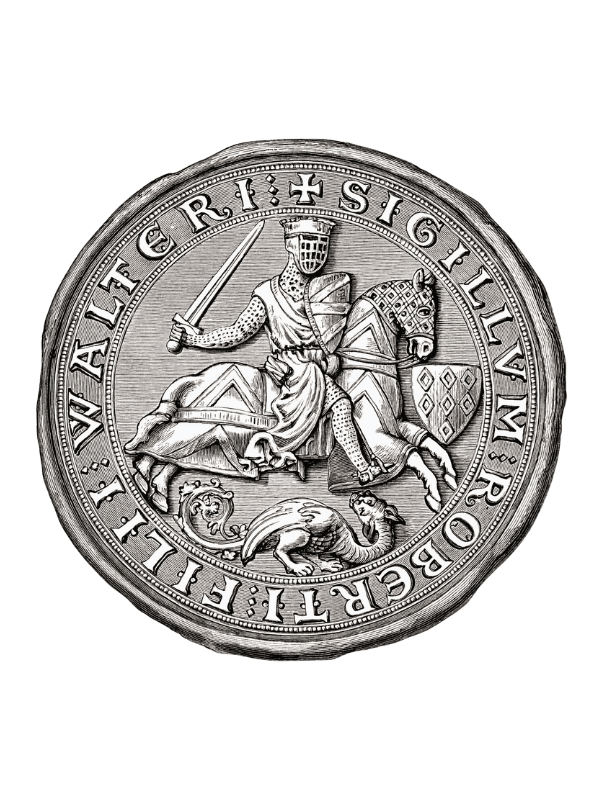
The news of the disaster at Bouvines ignited an internal rebellion across the country, as the northern barons realized the King no longer possessed the military power or wealth to enforce his financial demands. Refusing to pay further scutage or feudal taxes to fund a failed war, an armed coalition of eastern and northern lords formally renounced their fealty to the Crown on 5 May 1215. They elected Robert Fitzwalter, feudal baron of Little Dunmow, to lead the uprising under the title of Marshal of the Army of God and Holy Church. The rebels marched on the capital, where sympathetic citizens opened the gates on 17 May 1215, allowing baronial forces to occupy London, fortify its walls using materials torn from the homes of Jewish residents, and completely isolate the King at Windsor Castle.
Outmanoeuvred and lacking the loyal regiments to defend his remaining strongholds, John was forced to open negotiations, meeting the rebel leaders on 15 June 1215 at a meadow near the River Thames known as Runnymede.

King John and the Magna Carta
1215 AD
Additional Information: Evolution of English Law and Governance / Magna Carta and the Subjection of the Crown
The gathering at Runnymede on 15 June 1215 forced King John to capitulate to an armed baronial coalition led by Robert Fitzwalter, Eustace de Vesci, and Saer de Quincy, 1st Earl of Winchester. This rebel coalition presented a list of grievances, the Articles of the Barons, which was formalised into the sixty-three clause charter of liberties known as Magna Carta.
Designed to address decades of arbitrary financial extraction by the Crown, the document established the first explicit boundary between royal prerogative and customary law, declaring that even the sovereign was subject to the law of the land. The provisions sought to protect landowning classes, the Church, and urban merchants, establishing a baseline for legal due process. The text declared in Clause 39 that no free man could be seized, imprisoned, or stripped of his lands except by the lawful judgment of his equals or by the law of the land.
To protect the commercial networks of the country, the charter guaranteed the traditional liberties of the city of London, whose mayor, William Hardel, had joined the baronial opposition, and banned the imposition of unlawful tolls on traders. Furthermore, it protected the wealth of noble widows, preventing the King from forcing them into marriages to consolidate Crown patronage.
To ensure the King adhered to these legal concessions, the barons inserted an enforcement mechanism known as Clause 61, or the Security Clause. This provision authorised baronial leaders to elect a Council of Twenty-Five Barons, a tribunal that included Roger Bigod, 2nd Earl of Norfolk, Richard de Clare, 3rd Earl of Hertford, and William de Mandeville, 3rd Earl of Essex, who held the legal right to seize the King's castles and properties if he violated the terms of the agreement. This limitation of executive power proved unacceptable to the monarchy. Within weeks of the meeting at Runnymede, King John sent envoys to Rome, convincing Pope Innocent III to issue a papal bull on 24 August 1215 that formally annulled the charter on the grounds that it had been extracted under duress.
By declaring the document illegal and forbidding the King to observe it under threat of excommunication, the papacy dismantled the political settlement. This cancellation triggered an immediate resumption of hostilities, launching the country into the First Barons' War and establishing the document as the primary focus for constitutional conflict.
Further Information: King John and the Magna Carta


The First Barons' War
1215 - 1217 AD
The papal annulment of Magna Carta in August 1215 plunged the realm into a civil war known as the First Barons' War, a conflict that brought the English monarchy to the brink of collapse. Realising that their forces could not match King John’s mercenary armies in open battle, the rebel baronial coalition, under the advice of Saer de Quincy, Earl of Winchester, offered the English crown to Prince Louis, the eldest son and heir of King Philip II of France. Louis possessed a dynastic claim to the throne through his marriage to Blanche of Castile, a granddaughter of Henry II.
In May 1216, Louis accepted the invitation, assembling a French invasion fleet of over two hundred vessels to cross the English Channel. The French vanguard landed on the Kent coast at Thanet, bypassing royal naval patrols. The invasion shattered the King's defensive plans, forcing John to execute a retreat into the west rather than risk a battle on the beaches. Prince Louis entered London unopposed on 2 June 1216. In a ceremony inside St Paul's Cathedral, the rebel barons, the citizens of London, and King Alexander II of the Scots swore oaths of fealty to the French prince, who promised to uphold the traditional liberties of the realm and restore the laws of Edward the Confessor, a coup that split the governance of the state in two.
The French invasion partitioned the geography of England, forcing local communities to choose between a foreign prince and a widely hated King. Prince Louis secured military control over the home counties and the agricultural zones of the south and east, capturing regional hubs such as Winchester, Marlborough, and the fortress of Rochester Castle. Rochester had already been the site of a seven-week royal siege in late 1215, during which King John’s engineers used the fat of forty pigs to fire a subterranean mine, collapsing the southeastern tower of the keep. While Louis consolidated his hold on southern ports and urban centers, King John launched a scorched-earth campaign across the Midlands and the northern shires. John's mercenary captains—most notably Falkes de Bréauté—burned rebel baronial estates, slaughtered livestock, plundered monastic treasuries, and dismantled local farming infrastructure to starve out the opposition while protecting the King's mobile personal treasury lines.
The strategic center of the war focused on the coastal fortress of Dover Castle, the gateway to England. Hubert de Burgh, the royal Justiciar, took personal command of the stronghold, stubbornly holding the chalk cliffs against a French siege that began in July 1685. Utilizing a disciplined garrison of roughly 140 knights and a contingent of longbowmen, de Burgh blocked Louis's engineers from breaking the defenses.
The French deployed their largest siege engine, a trebuchet nicknamed "Malvoisine," to bombard the stone curtain walls, while French sappers dug a subterranean mine that collapsed the eastern tower of the barbican gatehouse. Despite the breach, de Burgh’s men constructed a timber palisade behind the ruined stone, repelling a series of French hand-to-hand assaults. This defensive stand prevented Louis from securing the deep-water port required to land heavy continental reinforcements, stalling the French campaign in a stalemate as the autumn of 1216 approached.

The Death of John I, and Battle of Lincoln
1216 - 1217 AD
The conflict over the crown took a turn on 19 October 1216 when King John died of illness at Newark Castle following his crossing of the estuary known as the Wash, where his baggage train and royal treasure were lost to the rising tide. John's passing altered the political justification for the rebellion, as the barons were no longer fighting an adult monarch accused of tyranny, but his minor heir. The loyalist regency council, led by the seventy-year-old William Marshal, 1st Earl of Pembroke, acted to preserve the dynasty. They crowned John’s nine-year-old son as King Henry III at Gloucester Cathedral on 28 October 1216 and reissued a modified version of Magna Carta to win back moderate barons, shifting the moral consensus away from the French prince.
The end of the French occupation was achieved through two military victories across the summer of 1217. On 20 May 1217, William Marshal led a royalist army to a victory over the combined French and rebel host at the Battle of Lincoln. The French forces, under the command of the Count of Perche, had occupied the city and were besieging the royal garrison inside Lincoln Castle, which was held by the noblewoman Nicola de la Haye.
Marshal's forces breached the city walls when Fawkes de Bréauté led his crossbowmen through a side gate to rain bolts onto the defenders, allowing the royalist cavalry to charge through the narrow streets. The encounter turned into a rout, historically remembered as "Lincoln Fair" due to the plundering that followed; the Count of Perche was killed when a sword blade pierced his helmet eye-slit, and the rebel baronial leadership was captured.
The final encounter occurred on 24 August 1217 at the naval Battle of Sandwich off the coast of Kent. Hubert de Burgh led a fleet of sixteen English warships to intercept a French reinforcement armada of eighty ships commanded by the pirate Eustace the Monk, who was carrying reinforcements and siege engines to Prince Louis. Utilizing superior seamanship, the English fleet gained the windward position before charging the enemy transports, throwing powdered quicklime across the decks to blind the French crews. The English sailors boarded the vessels, cutting the rigging to trap the defenders and executing Eustace the Monk on the deck of his flagship.
This double failure broke Prince Louis's campaign, destroying his supply lines and forcing him to open negotiations. The war ended on 12 September 1217 with the signing of the Treaty of Lambeth, which required Louis to renounce his claim to the English crown, accept a financial payout of ten thousand marks, and withdraw his forces across the Channel, leaving the young Henry III on an undisputed throne.
Henry III and the Re-issue of the Charter
1216 - 1225 AD
Additional Information: The Chronicles of Britain / Matthew Paris and the Chronica Majora
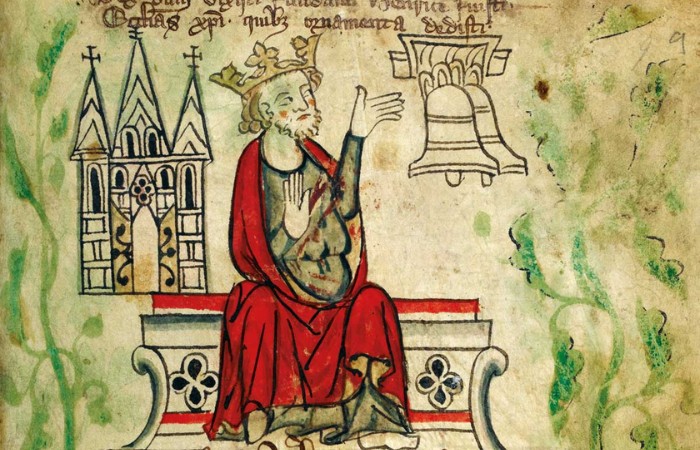
The minority of King Henry III was marked by constitutional negotiation over the enforcement of Magna Carta, transforming a failed peace treaty into an instrument of government. Ascending the throne as a nine-year-old child following the death of King John in October 1216, Henry was placed under the guardianship of William Marshal, 1st Earl of Pembroke, who was appointed by loyalist barons to serve as Rector Nostri et Regni (Rector of England).
The regency faced a crisis: Prince Louis of France had invaded the country, occupying London and commanding the backing of more than half the English peerage. To strip away aristocratic support from the French prince, the Earl of Pembroke’s regency government used successive reissues of the Great Charter to prove that the young King’s administration would respect customary liberties.
The regency council reissued a modified version of the document at Bristol on 12 November 1216. This text was sealed under the authority of the papal legate Guala Bicchieri and the Earl of Pembroke, as the young King lacked a personal seal. The council removed the radical Clause 61—the security clause that had authorised the Council of Twenty-Five Barons to seize royal castles—and suspended other provisions regarding Crown debts and foreign merchants to make the document acceptable to the monarchy. Following the defeat of the French forces at the Battle of Lincoln and the signing of the Treaty of Lambeth, the council reissued the charter a second time on 6 November 1217. To ensure compliance reached the margins of the realm, the government issued royal writs requiring sheriffs to read the provisions aloud in every county court to pacify the shires.
Simultaneously, the regency council issued a standalone companion statute on 6 November 1217 known as the Charter of the Forest to resolve provincial grievances regarding royal land monopolies. This legislation rolled back the forest boundaries established under Henry II and Richard I, which had placed nearly a third of England under Crown law. The statute deforested tracts of woodland, returning timber-cutting, pannage foraging, and turf-cutting rights to local agrarian communities. Crucially, it abolished the death penalty or blinding traditionally inflicted for hunting the King’s deer, replacing execution with financial fines or banishment.
The definitive version of the Great Charter was issued on 11 February 1225. This reissue occurred after Pope Honorius III declared that Henry III was old enough to use his own personal seal on certain charters, though he had not yet ended his formal minority. Facing a military crisis after King Louis VIII of France captured the border province of Poitou, the King required funds to defend his remaining Gascon territories.
This 1225 text, sealed by the King's own sovereign authority, became the baseline version embedded into English statute law. The King granted these liberties in exchange for a national tax of one-fifteenth on all moveable property and household goods, a political compromise that tied the Crown's extraction of extraordinary taxes to the preservation of common liberties.
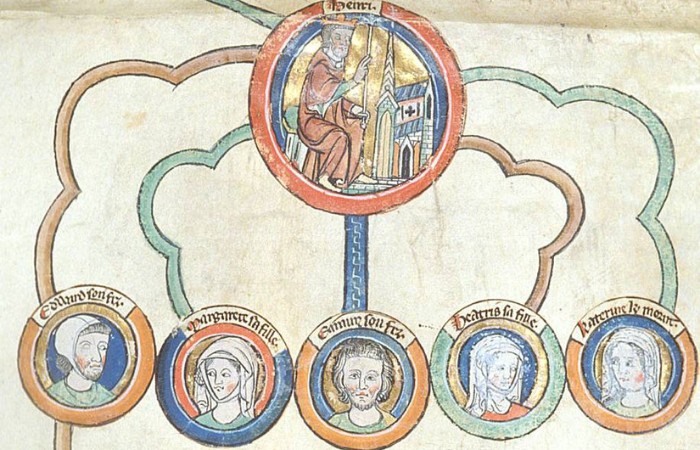
The Fall of Hubert de Burgh and the Marshal Rebellion
1227 – 1234 AD
The formal declaration of Henry III’s royal majority in January 1227 ended the minority regency but launched a period of political instability, as the young King struggled to assert his authority over the entrenched ministers of his childhood. For the first five years of his rule, governance remained dominated by the Justiciar Hubert de Burgh, 1st Earl of Kent, who consolidated his grip on domestic patronage and offices. However, Henry grew resentful of his minister’s overbearing custody and blamed the Earl of Kent for the military failure of the 1230 royal expedition to Brittany, which failed to reclaim any ancestral Angevin lands from the French Crown.
Seizing on this discontent, the Earl's rival, the Poitevin bishop Peter des Roches, returned from a crusade to undermine the Justiciar. In July 1232, Henry dismissed the Earl of Kent from office, stripped him of his lands, and had him removed from a sanctuary chapel to be imprisoned inside the Tower of London.
The fall of the Earl of Kent triggered a constitutional crisis, as Peter des Roches and his nephew, Peter des Rivaux, seized control of the royal exchequer and judicial courts. They replaced native English sheriffs and castle keepers with foreign Poitevin and Breton mercenaries, bypassing the customary consultation of the baronial assembly. This consolidation provoked an aristocratic reaction led by Richard Marshal, 3rd Earl of Pembroke, son of William Marshal. Citing the protections of the 1225 Great Charter, the Earl of Pembroke accused the King's Poitevin favorites of stripping native subjects of their property rights without the judgment of their peers. When Henry declared the Earl of Pembroke a traitor, the Earl launched a military rebellion in 1233, forging an alliance with Prince Llywelyn the Great of Wales to ambush royalist supply columns and defeat the King's mercenary armies across the Welsh Marches.
The conflict ground to a halt in the spring of 1234 through a combination of battlefield tragedy and church intervention. While fighting a rearguard action against royalist forces in Ireland, the Earl of Pembroke was mortally wounded and died in captivity. Recognizing the military deadlock and the widespread public anger across the shires, the newly consecrated Archbishop of Canterbury, Edmund of Abingdon, intervened directly. He threatened Henry III with excommunication unless the King banished his foreign ministers and restored the customary laws of the land.
Henry capitulated to the demands in May 1234, dismissing Peter des Roches and Peter des Rivaux from the court, pardoning the Earl of Pembroke's remaining followers, and agreeing to rule through his native baronial council, an administrative climbdown that stabilized the English interior.
Stay Connected
The Treaty of York
1237 AD
While the southern Welsh frontiers remained volatile, the internal security of the northern English counties was anchored through a diplomatic settlement with the Kingdom of Scotland. Signed on 25 September 1237 by King Henry III and King Alexander II of Scotland under the auspices of the papal legate, Cardinal Otto Candidus, the Treaty of York ended generations of frontier warfare.
For over a century, the rival royal lines had fought campaigns for control of the northernmost shires, with Scottish monarchs routinely invading to press hereditary claims to Northumberland, Cumberland, and Westmorland. The conflict had reached a crisis during the First Barons' War, when Alexander II marched his army south to Dover to swear fealty to Prince Louis of France, capturing the town of Carlisle and its strategic stone castle in the western Marches along his route. The 1237 accord executed a territorial compromise to resolve these grievances under the mediation of Walter de Gray, Archbishop of York.
In exchange for abandoning his ancestral claims to the three northern English counties, King Alexander II was granted several royal manors within Cumberland and Northumberland—collectively known as the Honor of Penrith. This grant included the specific agricultural lordships of Penrith, Sowerby, Langwathby, Great Salkeld, Carlatton, and Scotby. This land package, yielding an annual value of two hundred pounds, was held by the Scottish King under an oath of feudal fealty to the English Crown. This arrangement made the Scottish monarch a tenant-in-chief within England for those specific holdings, meaning he held the lands as a vassal of Henry III while remaining a sovereign king in Edinburgh.
This trade-off allowed both states to establish a fixed legal boundary line running across the terrain from the Solway Firth in the west, along the Cheviot Hills, to the mouth of the River Tweed in the east. This line created an international border that remains largely unchanged, allowing the English Crown to dismantle its expensive temporary invasion levies and focus its resources on its remaining Gascon domains in France.
The Saintonge War and the Treaty of Paris
1242 - 1259 AD
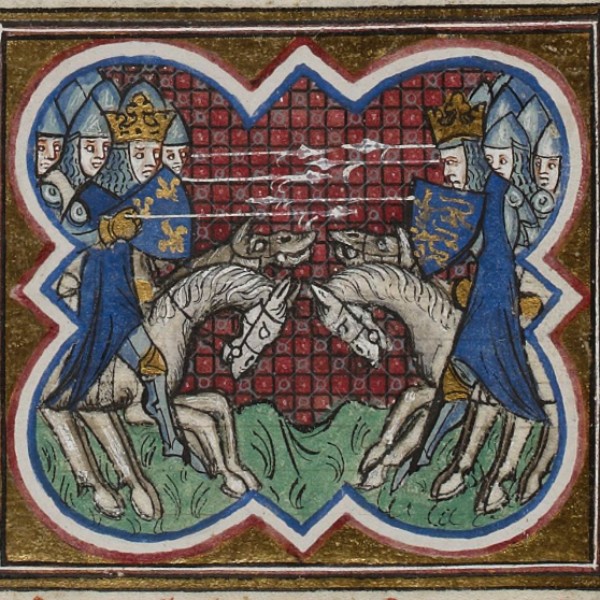
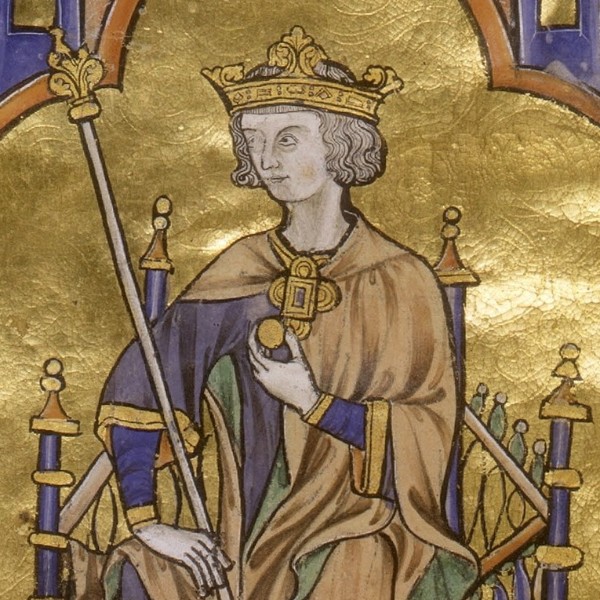
A breakdown in cross-Channel diplomacy shattered the continental security of King Henry III in the spring of 1242, when the monarch launched an underfunded military campaign to recover the ancestral Plantagenet lands of Poitou and Normandy from King Louis IX of France. Encouraged by his mother, Isabella of Angoulême, and her second husband, Hugh X of Lusignan, 5th Count of La Marche, Henry III allied with a coalition of rebellious Poitevin barons and Raymond VII, Count of Toulouse, to challenge Capetian authority in west-central France. The war over the Saintonge region began in the summer of 1242, but the campaign deteriorated into a humiliating military disaster for the English Crown.
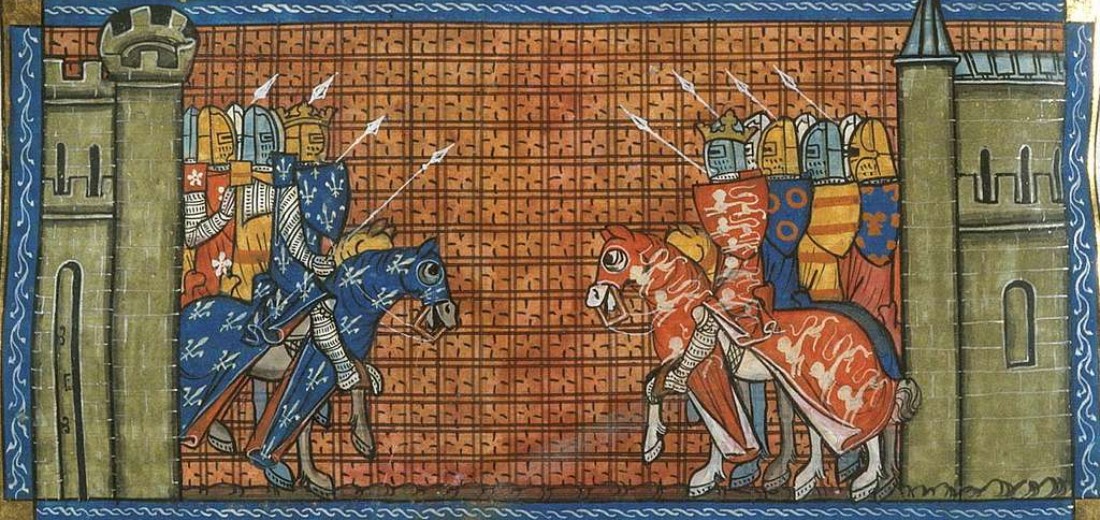
On 21 July 1242, the opposing armies collided at the bottleneck of the bridge of Taillebourg over the Charente River, where the disciplined forces of Louis IX routed the allied infantry and forced Henry III to execute a panicked retreat to the town of Saintes. Deserted on the field by the Lusignan barons, the English King was chased south into Gascony, narrowly escaping capture by the French cavalry and spending the remaining financial reserves of the treasury to garrison Bordeaux before returning to England in October 1243.
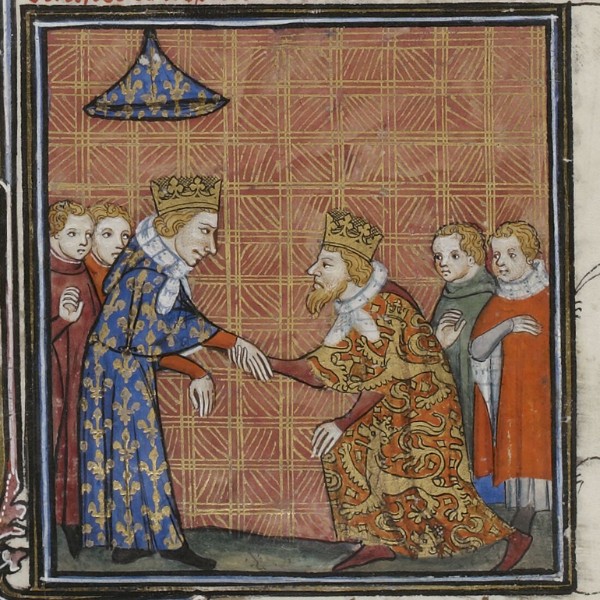
This defeat on the continent led to a decades-long diplomatic freeze that was resolved on 4 December 1259 with the ratification of the Treaty of Paris. Recognizing that he lacked the military resources, financial capacity, or domestic support to recover the lost northern provinces, Henry III agreed to a peace settlement that reordered the cross-Channel map. Under the terms of this statute, the English monarch formally renounced all hereditary Plantagenet claims to the duchies of Normandy, Anjou, Touraine, Maine, and Poitou. In return, Louis IX restored the reduced duchy of Guyenne—consisting of Gascony and parts of Aquitaine—to English control.
Crucially, the treaty forced a constitutional change onto the English monarchy; Henry III was required to perform direct feudal homage to the French King as a vassal duke for these remaining southwestern shires. This arrangement meant that for his French lands, the English Crown was bound to foreign judicial oversight and Capetian court appeals, effectively holding Guyenne as a peer of France under Louis IX while remaining a sovereign king at Westminster.
Although Louis IX provided a financial subsidy to fund five hundred knights for two years to sweeten the compromise, the surrender of his ancestral empire damaged Henry III's reputation among his own aristocracy, sealing the financial depletion of the state and providing the disgruntled barons with the political leverage required to launch a constitutional challenge back home.
Further Information: The Saintonge War and the Treaty of Paris
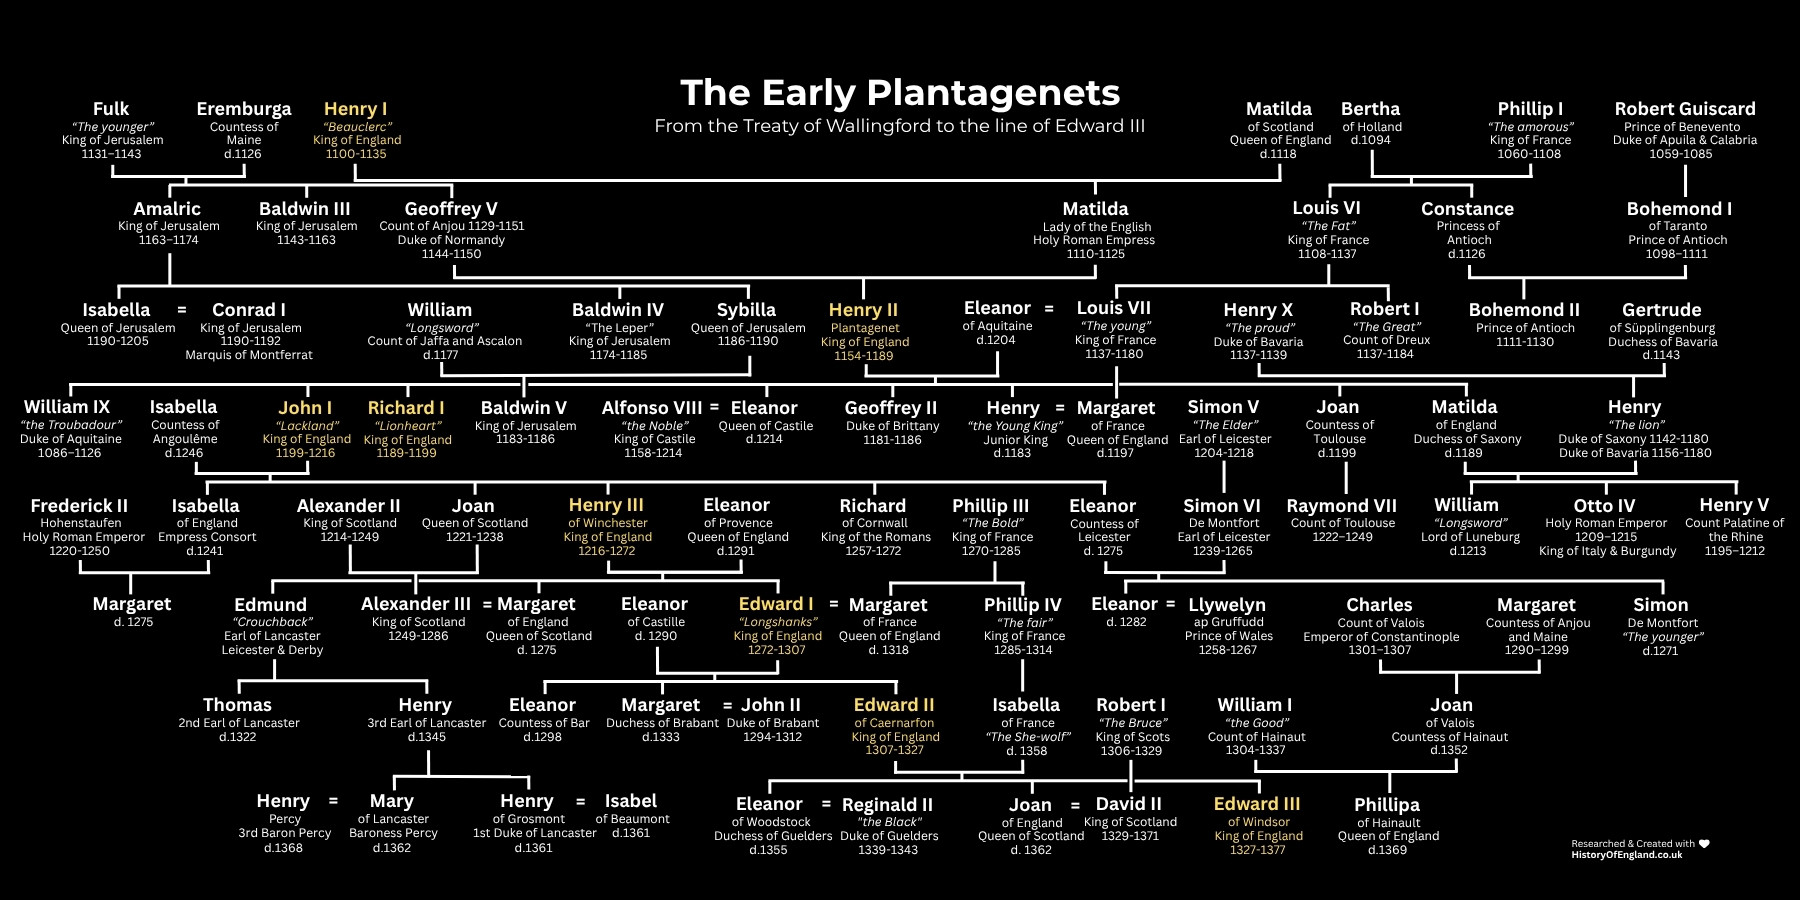
The Sicilian Crisis and Provisions of Oxford
1245 - 1258 AD
The financial vulnerabilities of the Crown reached a domestic crisis point due to Henry III’s involvement in a costly diplomatic entanglement known as the Sicilian Crisis. In 1254, Pope Innocent IV offered to sell the vacant crown of the Kingdom of Sicily to Henry’s second son, Prince Edmund, in exchange for the English monarchy funding papal military campaigns against the Hohenstaufen dynasty.
Driven by dynastic ambition, Henry III accepted the agreement, committing the royal treasury to a debt of 135,000 marks to the Papacy. When the new Pope, Alexander IV, threatened the King with excommunication and an interdict on the country if the silver was not paid by 1258, the English government faced bankruptcy, as the treasury had already been depleted by campaigns in Gascony and Wales.
Unable to extract further funds from the country without baronial consent, Henry III was forced to summon an assembly to Westminster in April 1258, requesting a tax of one-third on all moveable goods across the country. The request provoked a baronial reaction; a cohort of seven senior magnates, led by Simon de Montfort, 6th Earl of Leicester, and Hugh Bigod, entered Westminster Hall in full armour, clanking their swords on the floor to intimidate the monarch. Outmanoeuvred and lacking the military support to resist, Henry III capitulated, agreeing to delegate his powers to a reform committee of twenty-four barons and bishops to reorder the governance of the country.
The committee convened at Oxford in June 1258, drafting a series of constitutional documents known as the Provisions of Oxford. This document altered the layout of the monarchy, replacing personal rule with a system of collective governance and legislative oversight. Under these terms, executive authority was placed in the hands of a permanent Council of Fifteen, who controlled the appointment of the Lord Chancellor, the Treasurer, and the local sheriffs.
Crucially, the provisions mandated that a representative Parliament must meet three times a year—in February, June, and October—to audit the financial accounts of the Crown and handle the grievances of the shires. By forcing the King to accept this system of baronial monitoring, the Provisions of Oxford established a major constitutional challenge to the royal prerogative, breaking the unchecked power of the Plantagenet Crown and setting the lines for the upcoming Second Barons' War.
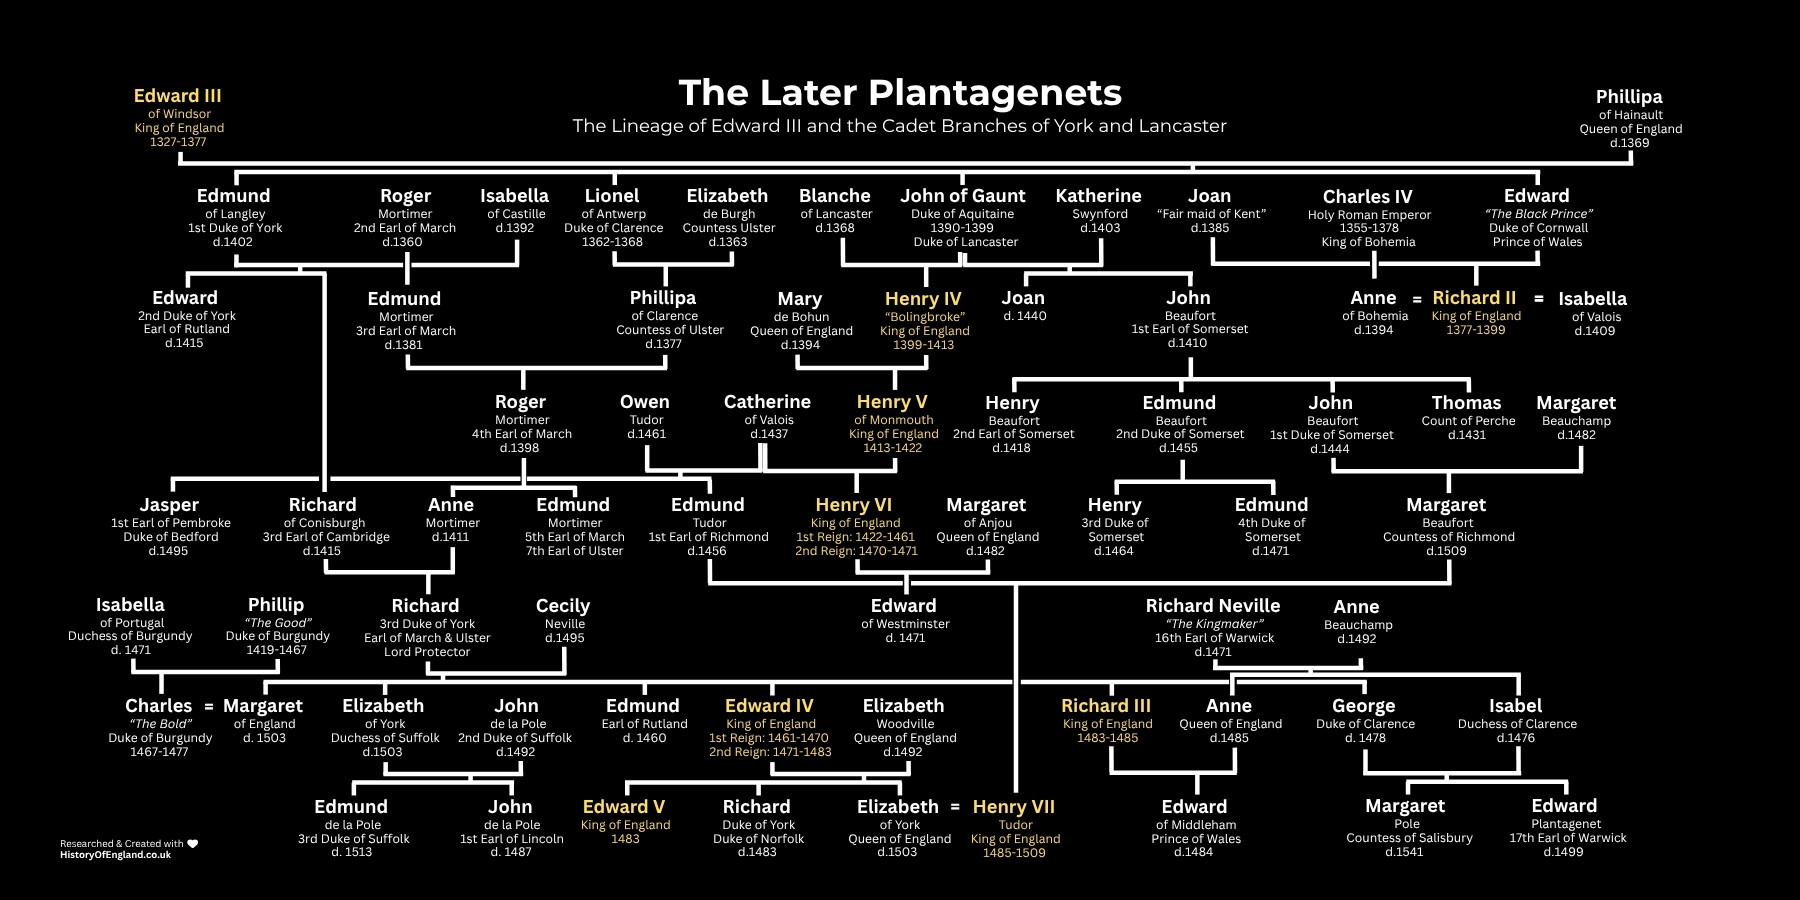
The Second Barons' War
1264 - 1267 AD
The deadlock created by constitutional constraints escalated into an open civil war in July 1261, when King Henry III dismantled the baronial monitoring system. Backed by a papal bull issued by Pope Alexander IV that absolved him of his oath to the Provisions of Oxford, the King seized control of the Tower of London, dismissed baronial officials, and restored his personal authority across the shires. This cancellation of the legal frameworks alienated the reform faction, forcing Simon de Montfort, 6th Earl of Leicester, to flee to France before returning in the spring of 1263 to mobilize baronial networks for an armed counter-offensive.
In May 1264, the Earl of Leicester achieved a victory over the royalist host at the Battle of Lewes in Sussex. Utilizing the high ridges of the South Downs, de Montfort's forces routed the royalist vanguard, which had broken its lines when Prince Edward—the future King Edward I—launched an undisciplined cavalry pursuit of the London militia. This separation allowed the rebel infantry to descend the slopes and overwhelm the remaining royalist divisions, capturing King Henry III and Prince Edward inside the Priory of St Pancras. Taking administrative command of the country, de Montfort ruled as a de facto governor.
To legitimise his regime, he summoned a parliamentary assembly to Westminster in January 1265, known as Montfort's Parliament. For the first time in English history, royal writs mandated that alongside traditional barons and bishops, every county must send two elected knights of the shire, and every major trading borough must send two elected citizens, known as burgesses.
This integration of the commons altered the layout of English governance, establishing a precedent for the future House of Commons by recognizing that national taxation required the collective consent of the merchant and landed classes. However, this expansion of the political community alienated conservative earls—most notably Gilbert de Clare, 7th Earl of Gloucester—who viewed the inclusion of the common classes as a threat to their traditional aristocratic privileges and began plotting with exiled royalists to overthrow the regime.
Further Information: The Second Barons' War
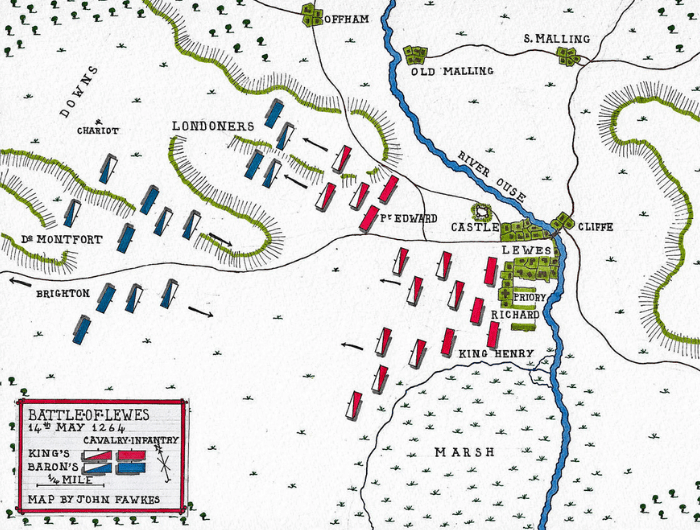

The Battle of Evesham and Restoration of Henry III
1265 AD
The baronial government collapsed months after the January assembly due to internal desertions and a royalist counter-offensive. Prince Edward escaped from captivity at Hereford during a hunting excursion, joining forces with the marcher lord Gilbert de Clare, Earl of Gloucester, to raise an army across the Welsh Marches. Leaving a portion of his forces under Roger Mortimer to defeat rebel reinforcements at Kenilworth Castle, Edward tracked Simon de Montfort's main force as it marched north from Newport, cutting off the Earl's path of retreat into the English Midlands.
Edward trapped de Montfort’s smaller army within a bend of the River Avon at the Battle of Evesham on 4 August 1265, clashing during a summer thunderstorm. To deceive the rebels, Edward advanced under baronial banners taken from Montfort's son at Kenilworth, delaying de Montfort's deployment until the royalist divisions had secured the high ground of Green Hill. Edward's cavalry executed a defeat of the enemy forces, routing the five thousand Welsh infantry who fled to the river banks.
The royalists bypassed ransom customs to target the rebel leadership, forming a squad of twelve knights—including Mortimer—dedicated to killing the Earl of Leicester. Simon de Montfort was unhorsed, stabbed through the neck by a lance, and killed in the melee, before the royalists mutilated his corpse on the field. During the same engagement, Montfort’s son Henry and the Justiciar Hugh Despenser were cut down, while King Henry III, who had been dressed in rebel armour, escaped death when a knight recognized his shouts for mercy.
Although the victory at Evesham restored Henry III to his crown, the seizure of rebel properties prevented immediate peace, as the disinherited barons launched a guerrilla campaign across the shires. The center of this resistance focused on the stronghold of Kenilworth Castle, where Simon de Montfort's remaining garrison withstood a six-month royal siege, the longest in English medieval history. To end the stalemate, Prince Edward pressured the King's council to offer terms of moderation, resulting in the declaration of the Dictum of Kenilworth on 31 October 1266. Under this statute, the Crown abandoned the confiscation of rebel lands, allowing the disinherited nobility to buy back their seized estates by paying a financial fine scaled between one and seven years of their land's annual value. Following the surrender of the last baronial remnants at the Isle of Ely in July 1267, this compromise restored stability, ending the Second Barons' War.
The precedent of elected representation could not be erased by the royalist military victory. When Prince Edward ascended the throne as King Edward I in 1272, he recognized that the administrative expansion of the state required a reliable method of financial collection. Rather than risking the arbitrary extractions that had ruined his father's reign, Edward I adopted de Montfort’s representative system to legitimize his governance.
This policy culminated in November 1295 with the summoning of the Model Parliament to Westminster, which mirrored the layout of the 1265 assembly by requiring every county to send two elected knights and every borough to send two burgesses. By standardizing this representative framework to fund his military campaigns in Wales and Scotland, Edward I cemented the role of the Commons within the political community, converting an emergency rebel device into a legislative counterweight to the Crown.
Further Information: The Battle of Evesham and Restoration of Henry III


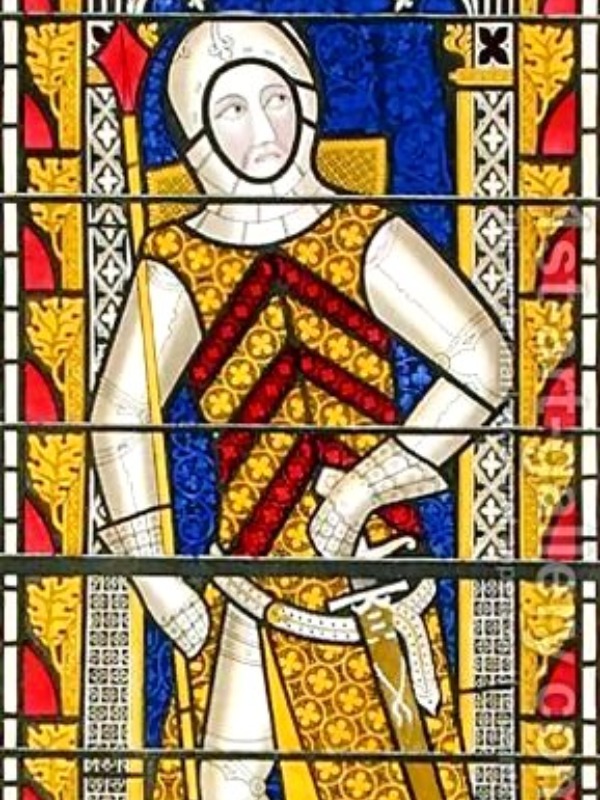
The Conquest of Wales
1272 – 1284 AD
Upon his accession to the throne in 1272, King Edward I directed the administrative and military focus of the Crown toward the conquest of Wales. For generations, the independent Welsh principalities, consolidated under Llywelyn ap Gruffudd, Prince of Wales, had utilized English internal conflicts to secure their border territories, refusing to perform feudal homage to the new English King.
In 1277, Edward I launched a land and sea offensive, marching an army of over fifteen thousand men—comprising English infantry and allied Welsh marchers—along the northern coast. He used the Royal Navy to seize the grain-rich Isle of Anglesey, cutting off Llywelyn’s food supplies within the mountainous Snowdonia massif and forcing a surrender under the Treaty of Aberconwy.
When Llywelyn’s brother, Dafydd ap Gruffudd, launched a second rebellion in March 1282 by attacking Hawarden Castle, Edward I launched a campaign of conquest. Welsh resistance broke when Llywelyn ap Gruffudd was killed in a skirmish at Orewin Bridge on 11 December 1282 by forces under Roger Mortimer, 1st Baron Mortimer. His brother Dafydd ap Gruffudd was captured in the mountains months later and became the first noble in English history to be hanged, drawn, and quartered for high treason following a trial before Parliament at Shrewsbury in October 1283. Welsh independence ended under the Statute of Rhuddlan in 1284, which partitioned the land into English counties.
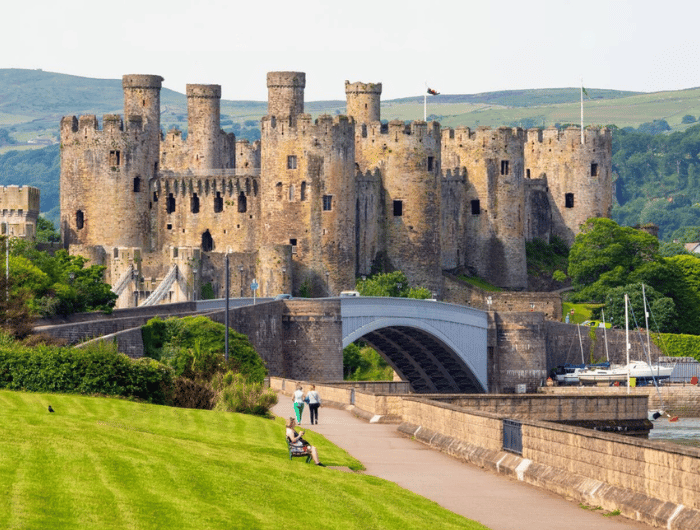
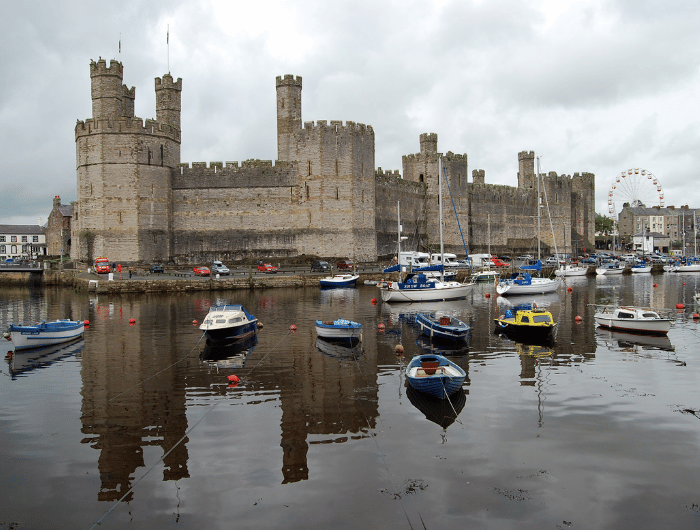
To secure his victory and suppress future insurrections, Edward I ordered the construction of a network of stone fortresses at key geographical bottlenecks, including Conwy, Caernarfon, Beaumaris, and Harlech, known as the iron ring. Designed by the military architect Master James of Saint George, these fortifications introduced concentric design to the island, utilizing walls-within-walls, thick projecting drum towers, and fortified gatehouses that allowed small English garrisons to hold out against Welsh forces.
Each castle was paired with a fortified plantation town populated by English merchants, establishing economic control over the countryside while cutting off traditional lines of Welsh communication and land tenure. By absorbing the principalities into the administrative and legal oversight of the English Crown, Edward I stabilized the western border, creating a secure base that allowed him to turn his financial and military resources toward his upcoming campaigns in Scotland.
Further Information: The Conquest of Wales
Edward I and the Scottish Wars of Independence
1296 – 1307 AD
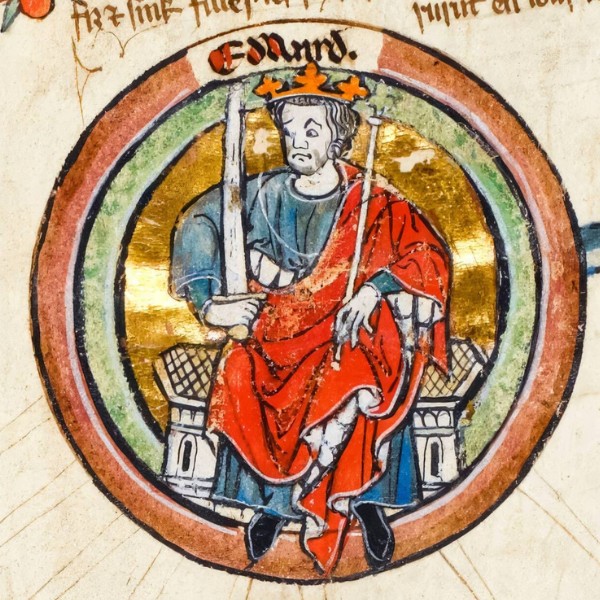
A dynastic crisis developed along the northern frontier following the final annexation of the Welsh principalities, as King Edward I directed the military resources of the Crown toward Scotland. The death of King Alexander III in March 1286, followed by the demise of his infant granddaughter, Margaret, the Maid of Norway, left the Scottish throne without a successor, triggering the succession dispute known as the Great Cause.
Summoned by the Scottish Guardians to act as an arbitrator to prevent an internal civil war, Edward I took control of the legal proceedings at Norham Castle. He required the thirteen claimants to formally accept his feudal over-lordship of Scotland before installing John Balliol as king in November 1292. When Balliol attempted to break free from this English dominance by signing a defensive pact with King Philip IV of France—initiating the Auld Alliance—Edward I launched a campaign of conquest, earning the title the Hammer of the Scots.
In March 1296, the English army captured the trading port of Berwick-upon-Tweed, executing its citizens to break local resistance before defeating the Scottish nobility at the Battle of Dunbar. Edward I forced John Balliol to abdicate at Montrose Castle, stripping the King of his royal robes before confiscating the historic Stone of Scone, which he transported to Westminster Abbey to place beneath the English coronation chair as a symbol of conquest. This military occupation triggered a resistance movement led by the knight William Wallace.
In September 1297, Wallace defeated English forces at the Battle of Stirling Bridge, utilizing the narrow wooden river crossing to trap the heavy vanguard cavalry under Hugh de Cressingham before the main army could deploy on the marshy plain. By waiting until nearly half the English forces had crossed the bridge, Wallace ordered a flank assault that cut off the river passage, routing the army and killing over one hundred English knights and approximately five thousand infantrymen.
The rebel forces left no avenue of escape for the vanguard; they killed Hugh de Cressingham in the melee and flayed his body on the field, splitting his skin into strips to serve as trophies for the Scottish captains. Furthermore, Wallace's men captured several prominent noble prisoners, including Sir William FitzWarin, the constable of Stirling Castle, and the royal judge Sir Richard Waldegrave, while capturing the entire English baggage train and forcing John de Warenne, 6th Earl of Surrey, into a rapid retreat toward Berwick. This victory shattered the reputation of English military dominance, exposing the northern border to raids across Northumberland and Cumberland.
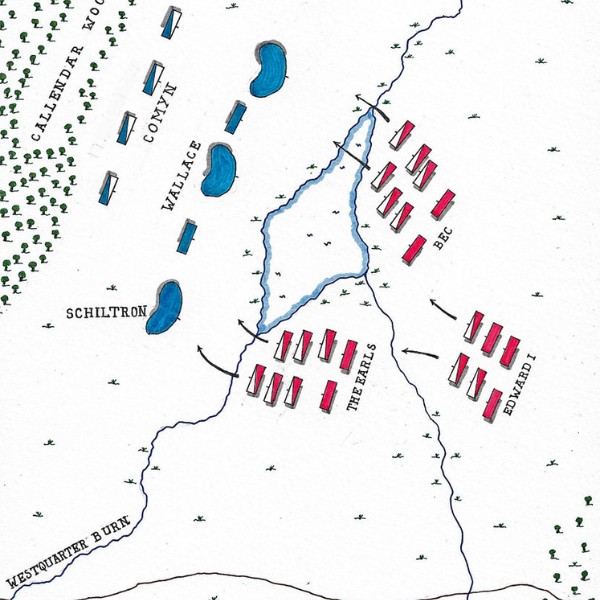
Edward I responded by leading an army north, winning a victory at the Battle of Falkirk in July 1298. The King deployed his Welsh and English longbowmen to fire arrows into the static Scottish spear rings, known as schiltrons, breaking the lines as his heavy cavalry charged the remaining infantry. Although William Wallace was captured in August 1305 by Sir John de Menteith, transported to London, and executed for high treason at Smithfield, the northern frontier remained a war zone.
In March 1306, Robert the Bruce killed John Comyn, 3rd Lord of Badenoch, at Dumfries and crowned himself King of Scots at Scone, renewing resistance. Utilizing guerrilla ambush tactics and avoiding open fields, Bruce harassed English supply lines across the western shires. When the seventy-year-old Edward I died on campaign at Burgh-by-Sands on 7 July 1307, the English Crown was left facing a war of attrition that disrupted the upcoming reign of King Edward II.
Further Information: Edward I and the Scottish Wars of Independence
The Edict of Expulsion
1275 – 1290 AD
Additional Information: The Stuart Era / The Whitehall Conference and Readmission of the Jews
The continuous military campaigns of Edward I in Wales, Scotland, and France created a financial strain for the English state, pushing the royal treasury into debt. To secure funding, the Crown directed its attention to the legal position of England’s Jewish community.
Under the Statutum de Judaismo of 1275 and medieval custom, the Jewish population held the status of servi camerae nostrae—servants of the King's chamber—meaning they were under the authority of the monarch. Because the Catholic Church banned Christians from engaging in usury, the Crown used the Jewish community to manage a credit system across the country, allowing them to provide loans to the Christian population through interest-bearing bonds, mortgages, and commercial credit lines.
Because Jewish people were barred from owning agricultural land or entering trade guilds, their economic activity was concentrated in finance, working as brokers, bankers, and credit agents who lived off interest dividends and commissions. This accumulation was extensive; the twelfth-century financier Aaron of Lincoln became so wealthy through his lending networks that his personal fortune was documented as larger than the income of King Henry II. However, this wealth was under oversight by the royal treasury. The Crown functioned as an extractive partner in these operations, routinely using tallages, forced loans, and death duties to extract silver out of Jewish coffers and transfer it into the treasury.
By the late 1270s, the economic friction between the Jewish population and the debt-ridden Christian baronies arrived at a turning point. In 1278, accusing the community of subverting the currency, the Crown launched a judicial raid. Royal officials arrested approximately 680 heads of households—representing a large portion of the adult Jewish population—and imprisoned them inside the Tower of London on charges of coin-clipping. Following the trials, 293 individuals were found guilty and executed by hanging in London, while the Crown confiscated their entire property and land assets to settle short-term debts.
The final phase of this process occurred in July 1290 through the Edict of Expulsion. By the end of the 1280s, decades of royal taxation had drained the liquidity of the Jewish lenders, rendering them less valuable to the treasury than the political support of the wealthy Christian knights and burgesses who sat in Parliament and held personal debts to Jewish estates.
By issuing the edict, Edward I commanded that every Jewish individual—amounting to roughly two thousand people—must leave the country by 1 November 1290, cancelling outstanding baronial debts and making England the first nation in medieval Europe to execute an expulsion of its Jewish population. This policy was welcomed by the indebted barons and merchants in Parliament, who rewarded the King by voting for a land tax of one-fifteenth, providing the silver influx needed to fund the military campaigns across the northern frontier.
Further Information: The Edict of Expulsion


Edward II and the Ordinances of 1311
1307 - 1312 AD
The accession of Edward II in July 1307 instantly destabilised the royal court. Edward II alienated his natural counsellors by granting extensive royal patronage, Crown treasury funds, and the prestigious Earldom of Cornwall to his favourite, a flamboyant Gascon knight named Piers Gaveston. Gaveston's total monopoly over royal decisions, coupled with his systematic exclusion of the nobility from council meetings, pushed the cross-Channel magnates into open political resistance. To aggressively halt the rapid decline of state finances and eliminate the favourite, a powerful coalition of barons and bishops forced the King to accept a twenty-one-member legislative committee known as the Lords Ordainers, directed by Archbishop Robert Winchelsey of Canterbury.
In October 1311, the Ordainers marched on London, seized control of Parliament at Westminster, and compelled the monarch to ratify a forty-one-clause reform code known as the Ordinances of 1311. This sweeping statute severely restricted Edward II's power to make high administrative appointments, demanded the immediate and permanent exile of Gaveston, and mandated that all customs revenues be paid directly into the Exchequer rather than the King's private wardrobe to ensure public scrutiny. Furthermore, it required absolute parliamentary consent for any declarations of war or royal travel abroad.
The Ordinances radically altered the constitutional balance of power, positioning Parliament to oversee the treasury and manage national wealth. However, the structural settlement collapsed within months. In early 1312, Edward II flagrantly breached the treaty, traveling north to York to declare the Ordinances entirely void and recalling Gaveston from his continental exile. The baronial coalition instantly rose in arms to enforce the statute by force. Led by the King's wealthy cousin, Thomas, 2nd Earl of Lancaster, alongside Guy de Beauchamp, 10th Earl of Warwick, and Aymer de Valence, 2nd Earl of Pembroke, baronial forces pursued the favourite across the northern shires. Gaveston was cornered and besieged at Scarborough Castle, forcing his surrender to the Earl of Pembroke under a strict, negotiated promise of safe passage to face a legitimate trial before Parliament.
This compromise was shattered when the Earl of Warwick ambushed the royal escort at Deddington on 10 June 1312, seizing the prisoner by force and transporting him in triumph to Warwick Castle. Following a summary trial before a hostile panel of earls—which included Humphrey de Bohun, 4th Earl of Hereford—Lancaster’s radical faction escorted the captive to Blacklow Hill in Warwickshire. This specific site was selected because it sat squarely within Lancaster's private estates and outside the legal jurisdiction of the King's courts. On the morning of 19 June 1312, two Welsh soldiers acting under baronial command ran Gaveston through with a sword before beheading him on the hillside.
This extrajudicial execution deeply divided political factions across the realm, turning moderate allies like Pembroke back toward the defense of the Crown while setting a bloody precedent for internal warfare and the total breakdown of royal authority.
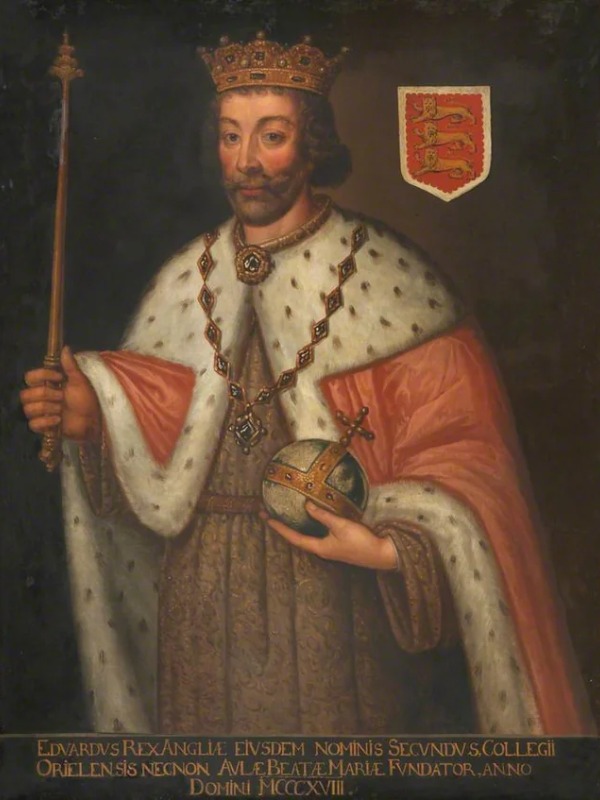
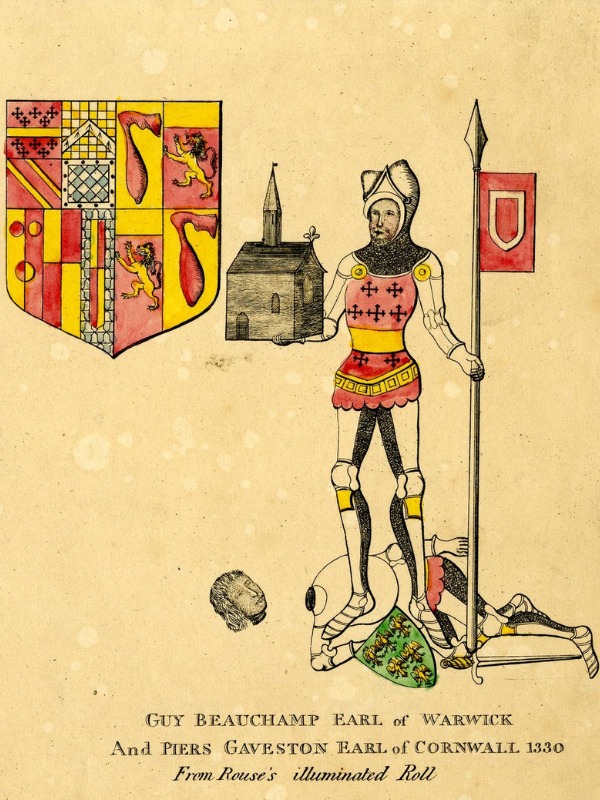
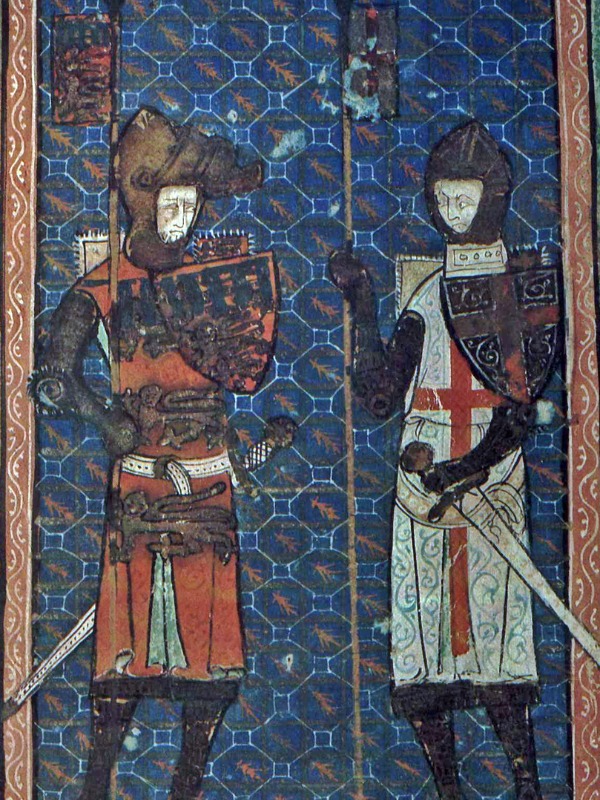
The Battle of Bannockburn
1314 AD
Internal factional disputes within England left the northern borders entirely unprotected, enabling Robert the Bruce to systematically recapture English-held garrisons across Scotland. In early 1314, the Scottish King's brother, Edward Bruce, laid siege to Stirling Castle, the final vital stronghold under English control north of the border.
The fortress constable, Sir Philip Mowbray, concluded a strict chivalric agreement with the besieging Scots, promising to surrender the castle outright if an English relief army did not arrive by Midsummer Day, 24 June. To prevent the catastrophic loss of this strategic gateway, Edward II hastily patched over his ongoing disputes with the English earls, gathering a massive army of over two thousand heavy men-at-arms and fifteen thousand foot soldiers to march north.
The two armies collided on 23 June 1314 near the Bannock Burn, a tidal stream just south of Stirling. Robert the Bruce positioned his vastly outnumbered force of roughly six thousand men within the dense woods of the New Park, blocking the main Roman road and organizing his disciplined infantry into mobile spear rings known as schiltrons. The initial engagement resulted in an immediate psychological victory for the Scots when the Scottish King killed the English knight Sir Henry de Bohun—nephew to Humphrey de Bohun, 4th Earl of Hereford—in single combat, splitting the challenger's helmet open with a single battleaxe blow. During the night, Edward II blundered by moving his entire force across the low-lying marshland of the Carse, leaving his heavy cavalry crowded, exhausted, and pinned helplessly between the loops of the Bannock Burn and the River Forth.
At dawn on 24 June 1314, Robert the Bruce advanced his aggressive schiltrons onto the narrow plain, catching the English army before it could form its battle lines. The dense, advancing walls of Scottish spears pressed the front ranks backward, trapping the heavy cavalry in the bogs and rendering their warhorses completely useless in the suffocating bottleneck. Edward II's celebrated longbowmen attempted to deploy and break the Scottish lines from the flank, but the Scottish King had anticipated the threat; he deployed his light cavalry reserve under Sir Robert Keith, Marischal of Scotland, to swiftly overrun and scatter the undefended archers.
Crushed by their own retreating foot soldiers and pushed back into the rising tidal rivers, the English lines broke into a panicked rout. Edward II fled the field with his personal guard, riding hard for Dunbar Castle to escape capture, while Gilbert de Clare, 8th Earl of Gloucester, along with hundreds of knights, was cut down or drowned in the marshy melee. This humiliating military disaster confirmed de facto Scottish independence, emptied the English royal treasury, and permanently shattered the remaining political authority of Edward II back home in England.
Further Information: The Battle of Bannockburn
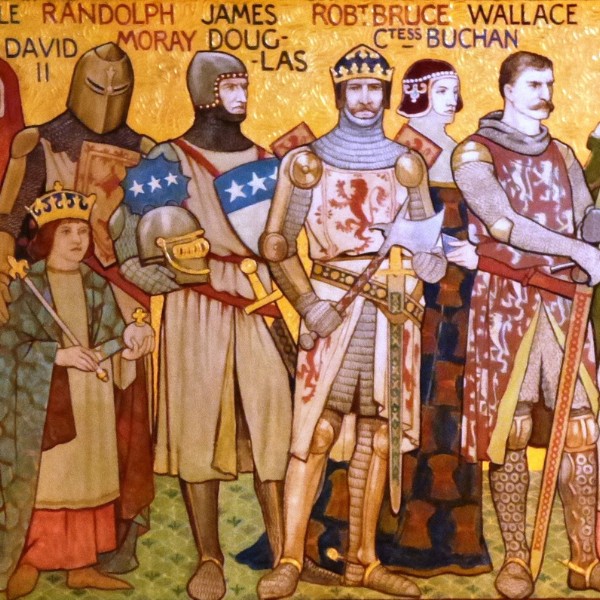
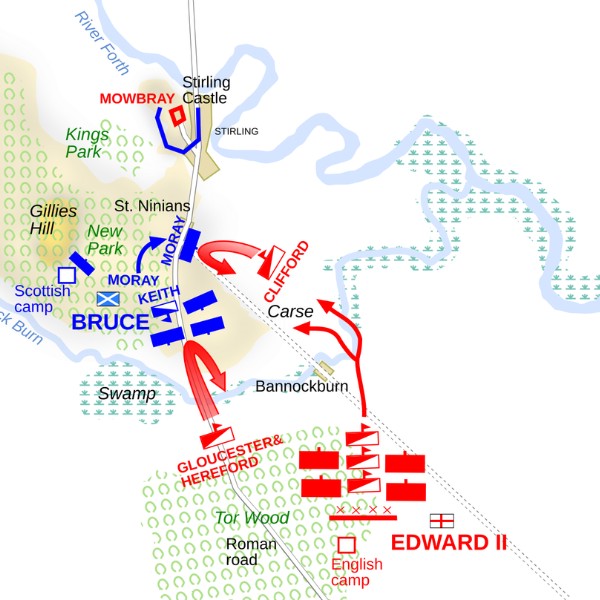
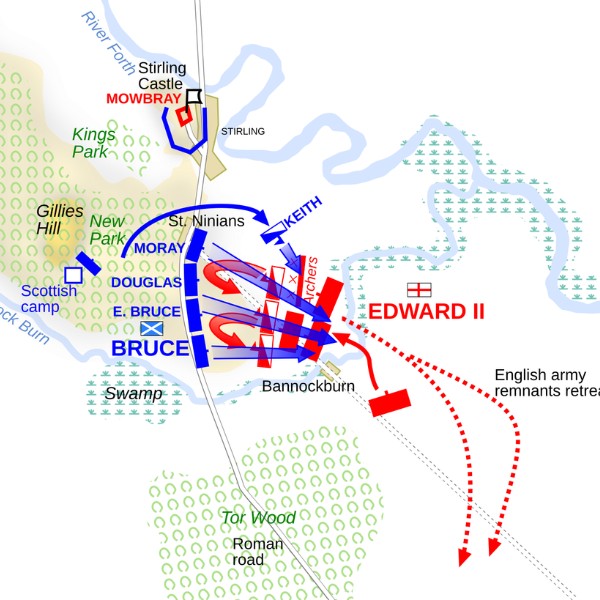
The Despenser War and the Battle of Boroughbridge
1318 - 1322 AD
Factional disputes within the court worsened following the defeat in Scotland, as Edward II elevated a new favourite, Hugh Despenser the Younger, appointing him royal chamberlain in 1318 alongside his father, Hugh Despenser the Elder, who later became the 1st Earl of Winchester. The King granted the younger Despenser properties in South Wales, including Glamorgan and the castles of Cardiff and Swansea, a shift in patronage that threatened the territory of the neighbouring lords and sparked a conflict known as the Despenser War.
In May 1321, a coalition of marcher lords, including Roger Mortimer, 3rd Baron Mortimer of Wigmore, and his uncle Roger Mortimer, 1st Baron Mortimer of Chirk, allied with the King's cousin, Thomas, 2nd Earl of Lancaster. The insurgent barons raised an army, plundered the Despenser estates across Glamorgan, and marched on London, surrounding Parliament at Westminster to force the King to banish the favourites.
The baronial victory lasted only months, as Edward II raised an army in late 1321, using the pretext of an insult to Queen Isabella at Leeds Castle—where the governor's wife, Margaret de Clare, Baroness Badlesmere, refused the Queen entry and fired upon her retinue—to launch a counter-offensive. Recalling the Despensers from exile, the King marched his forces into the Welsh Marches, forcing the Mortimers of Wigmore and Chirk to surrender at Shrewsbury in January 1322 before pursuing Lancaster’s remaining rebel forces north. The two armies met on 16 March 1322 at the Battle of Boroughbridge in Yorkshire, where the royalist commander, Sir Andrew Harclay, blocked the narrow timber bridge over the River Ure. Harclay deployed his infantry on foot using the Scottish schiltron formation, while his longbowmen rained arrows onto the crossing.
The rebel vanguard failed to breach the line; Humphrey de Bohun, 4th Earl of Hereford, was killed on the bridge when a royalist pikeman hidden beneath the timber planks thrust a lance up through a gap in the wood. Concurrently, Lancaster’s cavalry charge across the nearby ford was broken by archery fire. Lancaster surrendered the following morning, 17 March 1322, and the rebel earl was escorted to his own castle at Pontefract Castle, where he was subjected to a summary trial overseen by Edward II and the Despensers. He was led through the streets and executed by beheading on a hill outside the walls on 22 March 1322.
This victory restored the King's authority, but his reliance on the Despensers alienated the remaining moderate lords and Queen Isabella, setting the stage for the downfall of his reign.
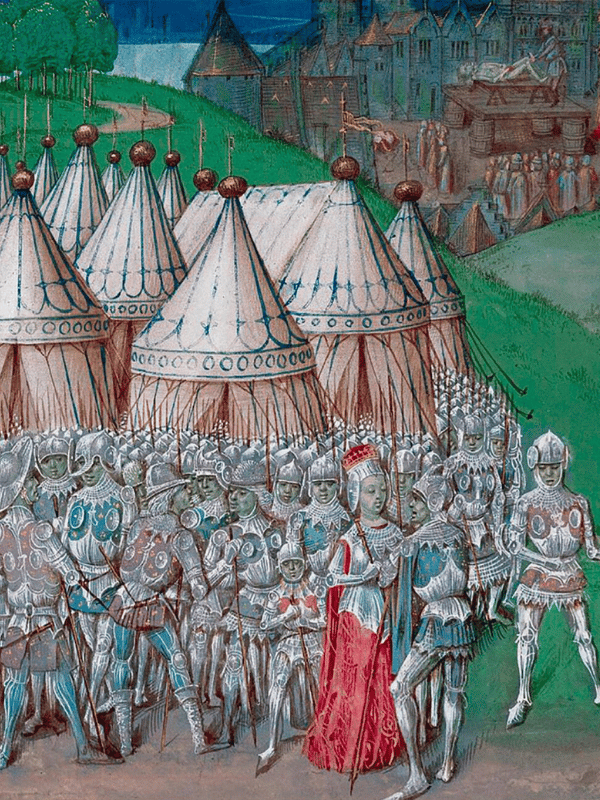

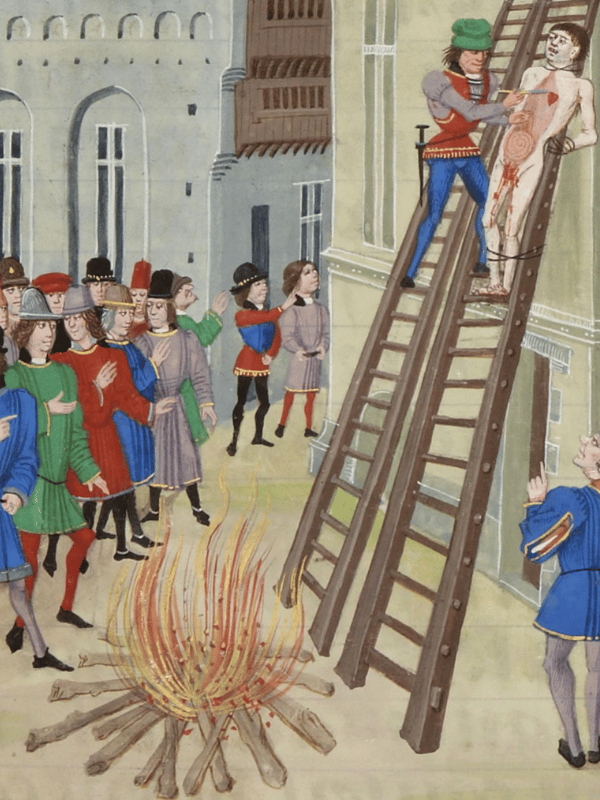
The Deposition of Edward II
1322 - 1327 AD
The victory at Boroughbridge allowed the Despensers to establish control over the royal administration, using their influence to extract wealth from the shires through confiscations and to imprison their political rivals. This domestic tyranny collapsed in September 1326 when Edward II's estranged consort, Queen Isabella, who had traveled to Paris on a diplomatic mission and refused to return, allied with her lover, the exiled marcher lord Roger Mortimer, Baron Mortimer of Wigmore. Raising a mercenary army of Hainault knights with funds secured from William I, Count of Hainault, they launched an invasion of England, landing on the coast of Suffolk at Orwell on 24 September 1326.
Deserted by his ministers, his half-brother Thomas of Brotherton, 1st Earl of Norfolk, and the citizens of London, the King fled westward into Wales with Hugh Despenser the Younger, hoping to raise an army among his Welsh tenants. However, the royal party was pursued across the Glamorgan hills and captured near Llantrisant by Henry, 3rd Earl of Lancaster, in November 1326. The elder favourite, Hugh Despenser the Elder, Earl of Winchester, was hanged at Bristol, while his son Hugh Despenser the Younger was executed at Hereford before the Queen's court on 24 November 1326. He was forced to wear a crown of nettles before he was hanged from a fifty-foot gallows, eviscerated while still conscious, and quartered as a traitor.
To formalise the removal of the monarch, Isabella and Mortimer summoned a Parliament to Westminster in January 1327. Adam Orleton, Bishop of Hereford, presented the assembly with six formal articles accusing Edward II of personal incompetence, reliance on corrupt counsel, the loss of Scotland, and the destruction of the Church. To secure an abdication, a baronial delegation consisting of bishops, earls, and judges traveled to Berkeley Castle in Gloucestershire to confront the imprisoned King. Led by the parliamentary proctor Sir William Trussel, the delegation withdrew their fealty to the monarch, forcing Edward II to renounce his royal rights and surrender his crown, sceptre, and rod in favour of his fourteen-year-old son, who ascended the throne as King Edward III on 25 January 1327.
Edward II remained in custody under the gaolership of Sir John Maltravers and Thomas Berkeley, 3rd Baron Berkeley, until 21 September 1327, when he died under mysterious circumstances inside the dungeons of Berkeley Castle. His death was traditionally reported as a murder engineered by Roger Mortimer to prevent a royalist counter-offensive by the Dunheved brothers—the Dominican friar Thomas Dunheved and his brother Stephen—who had breached the castle walls months earlier to rescue the deposed King.
According to the late-medieval chronicles of Thomas de la Moore and Geoffrey le Baker, the executioners—acting on ambiguous written instructions from Mortimer to avoid leaving visible marks on the royal corpse—pinned the former monarch down beneath a heavy table or mattress and killed him by inserting a red-hot iron rod into his rectum through a hollow horn tube, burning his internal organs while muffling his screams.
While this account became embedded in historical tradition, modern scholarship highlights that contemporary official records listed his death as a fatal illness driven by depression and imprisonment. Furthermore, the alternative "Fieschi Letter" has led some historians to suggest that Edward II actually escaped his captors with the help of royalist conspirators, surviving as a disguised hermit in Italy for over a decade.
Regardless of the reality of his demise, the formal proclamation of his death ended the reign of Edward II, establishing the constitutional precedent that an English monarch could be removed by Parliament for failing to defend the country, abusing the fiscal privileges of the Crown, or violating customary law.
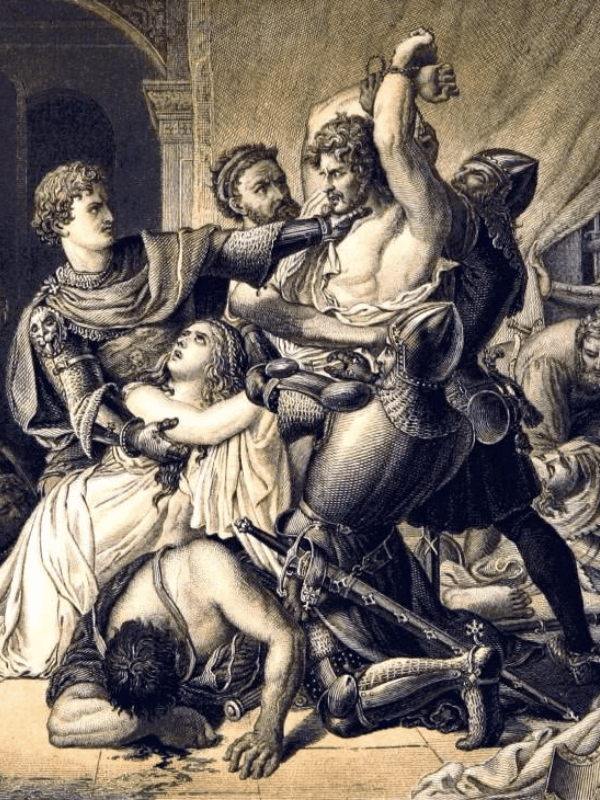
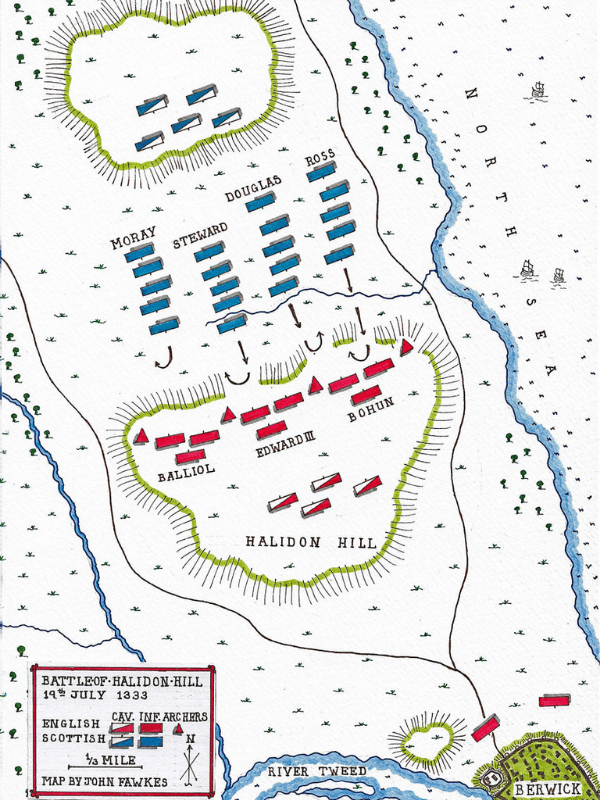
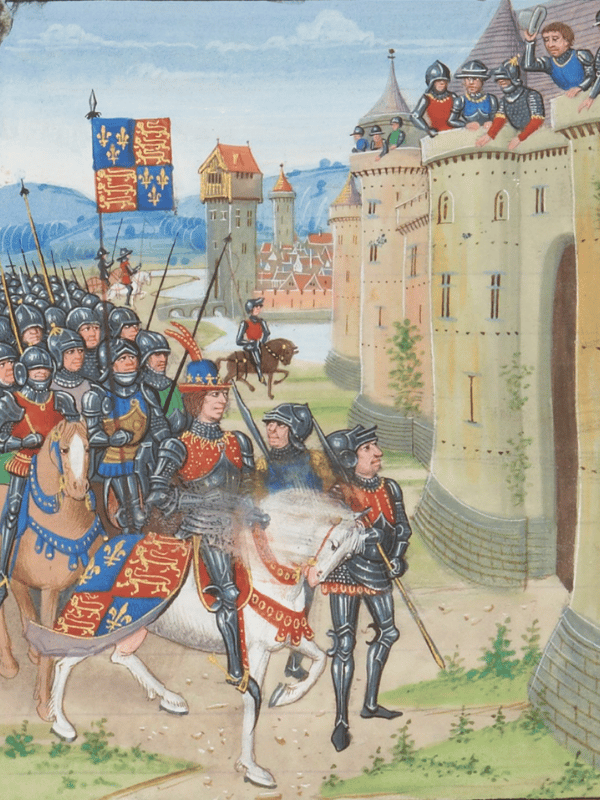
Edward III and the Outbreak of the Hundred Years' War
1327 - 1337 AD
Additional Information: The Chronicles of Britain / Jean Froissart and the Hundred Years' War
The accession of the fourteen-year-old Edward III in January 1327 followed the deposition of his father, Edward II, but the early court remained under the control of a regency council led by the Queen Mother, Isabella of France, and her lover, Roger Mortimer, Earl of March. This council lost its credibility by signing the Treaty of Edinburgh-Northampton in 1328, which recognized the independence of Scotland and surrendered English claims of over-lordship.
By October 1330, the King determined to end this custody by launching a coup during a meeting of the Great Council at Nottingham Castle. Accompanied by a cohort of knights led by William Montagu, 3rd Baron Montagu, the King entered the inner citadel through an underground sandstone passage—later known as Mortimer’s Hole—bypassing the fortress guards. Bursting into the state apartments, the King’s men captured the Earl of March in the Queen Mother's private chambers, despite her pleas to spare him.
The Earl of March was escorted to London, convicted of high treason by the parliament of peers, and hanged as a criminal at Tyburn on 29 November 1330. Isabella was stripped of her dower lands and political authority, receiving an annual pension of £3,000 before being placed under a retirement at Castle Rising in Norfolk, enabling Edward III to assume command of his government.
The King turned his military focus toward wiping away the shame of the Scottish treaty. Partnering with the disinherited northern barons, Edward III marched north in 1333 to lay siege to the border stronghold of Berwick-upon-Tweed. When a Scottish relief army advanced to break the blockade, the King deployed a combination of dismounted men-at-arms and blocks of longbowmen on the slopes of Halidon Hill on 19 July 1333. The resulting Battle of Halidon Hill was a rout; the English archers defeated the Scottish schiltrons before they could reach the lines, killing the Regent Archibald Douglas alongside six earls and thousands of spearmen. This victory restored the military reputation of the Crown and forced the infant King David II of Scotland to flee to France, a geopolitical shift that brought English interests into contact with the French court and led to the outbreak of the Hundred Years' War in 1337.
The cause for the trans-Channel conflict was a territorial and dynastic clash with the Valois dynasty. When King Philip VI of France confiscated the English-held Duchy of Gascony on 24 May 1337, accusing Edward III of a breach of duty for harboring the rebel French lord Robert of Artois, the English King responded by claiming the right to the French crown through his mother, Isabella of France, as the surviving grandson of the Capetian monarch Philip IV, bypassing the Valois line which relied on an interpretation of Salic law to exclude female succession. On 26 January 1340, Edward III formalized this claim in the market square of Ghent, quartering the French fleur-de-lis into the English royal coat of arms to broadcast his sovereign over-lordship to Europe.
To fund the campaigns required to enforce this claim, Edward III forged a fiscal agreement with the assembly of wool merchants in Parliament, known as the Estate of the Merchants. He established the Wool Subsidy, granting the Crown a financial levy on the export of English raw wool to the industrial processing looms of Flanders, while creating a trading monopoly known as the Company of the Staple at Saint-Omer. This commercial arrangement secured custom duties, generating a cash flow that enabled the royal treasury to pay his troops, purchase arms, and finance military alliances across the Low Countries without provoking a domestic baronial rebellion over land taxation.
---------------------------------------------------------------------------
The Battle of Halidon Hill (19 July 1333)
English Royalist Forces
Primary Commander: King Edward III of England (Supreme Commander)
Secondary Commanders / Notable Nobles: Edward Balliol (Scottish Pretender); Henry de Beaumont, 4th Earl of Buchan; and Thomas de Beauchamp, 11th Earl of Warwick
Total Forces: Roughly 8,000 to 9,000 disciplined soldiers (comprising approximately 3,000 dismounted knights and men-at-arms, 5,000 longbowmen, and a minor cavalry reserve)
Casualties: Exceptionally low; fewer than 15 men-at-arms and a small number of archers killed or wounded on the field, with the defensive line remaining entirely unbroken.
Scottish Bruce Loyalist Forces
Primary Commander: Sir Archibald Douglas (Guardian of Scotland)
Secondary Commanders / Notable Nobles: Hugh, Earl of Ross; Kenneth, Earl of Sutherland; and Alexander Bruce, Earl of Carrick
Total Forces: Approximately 14,000 to 15,000 massed soldiers (deployed in four dense infantry columns known as schiltrons, predominantly armed with pikes and spears, lacking dismounted knightly cohesion and effective archer support)
Casualties: Catastrophic and definitive; an estimated 4,000 to 5,000 regular soldiers and clansmen slaughtered on the slopes or cut down during the routing pursuit. High-profile deaths included the Guardian Sir Archibald Douglas himself, alongside six earls, seventy barons, and hundreds of lesser knights, completely breaking the political and military leadership of the Bruce loyalist faction.
Further Information: Edward III and the Outbreak of the Hundred Years' War
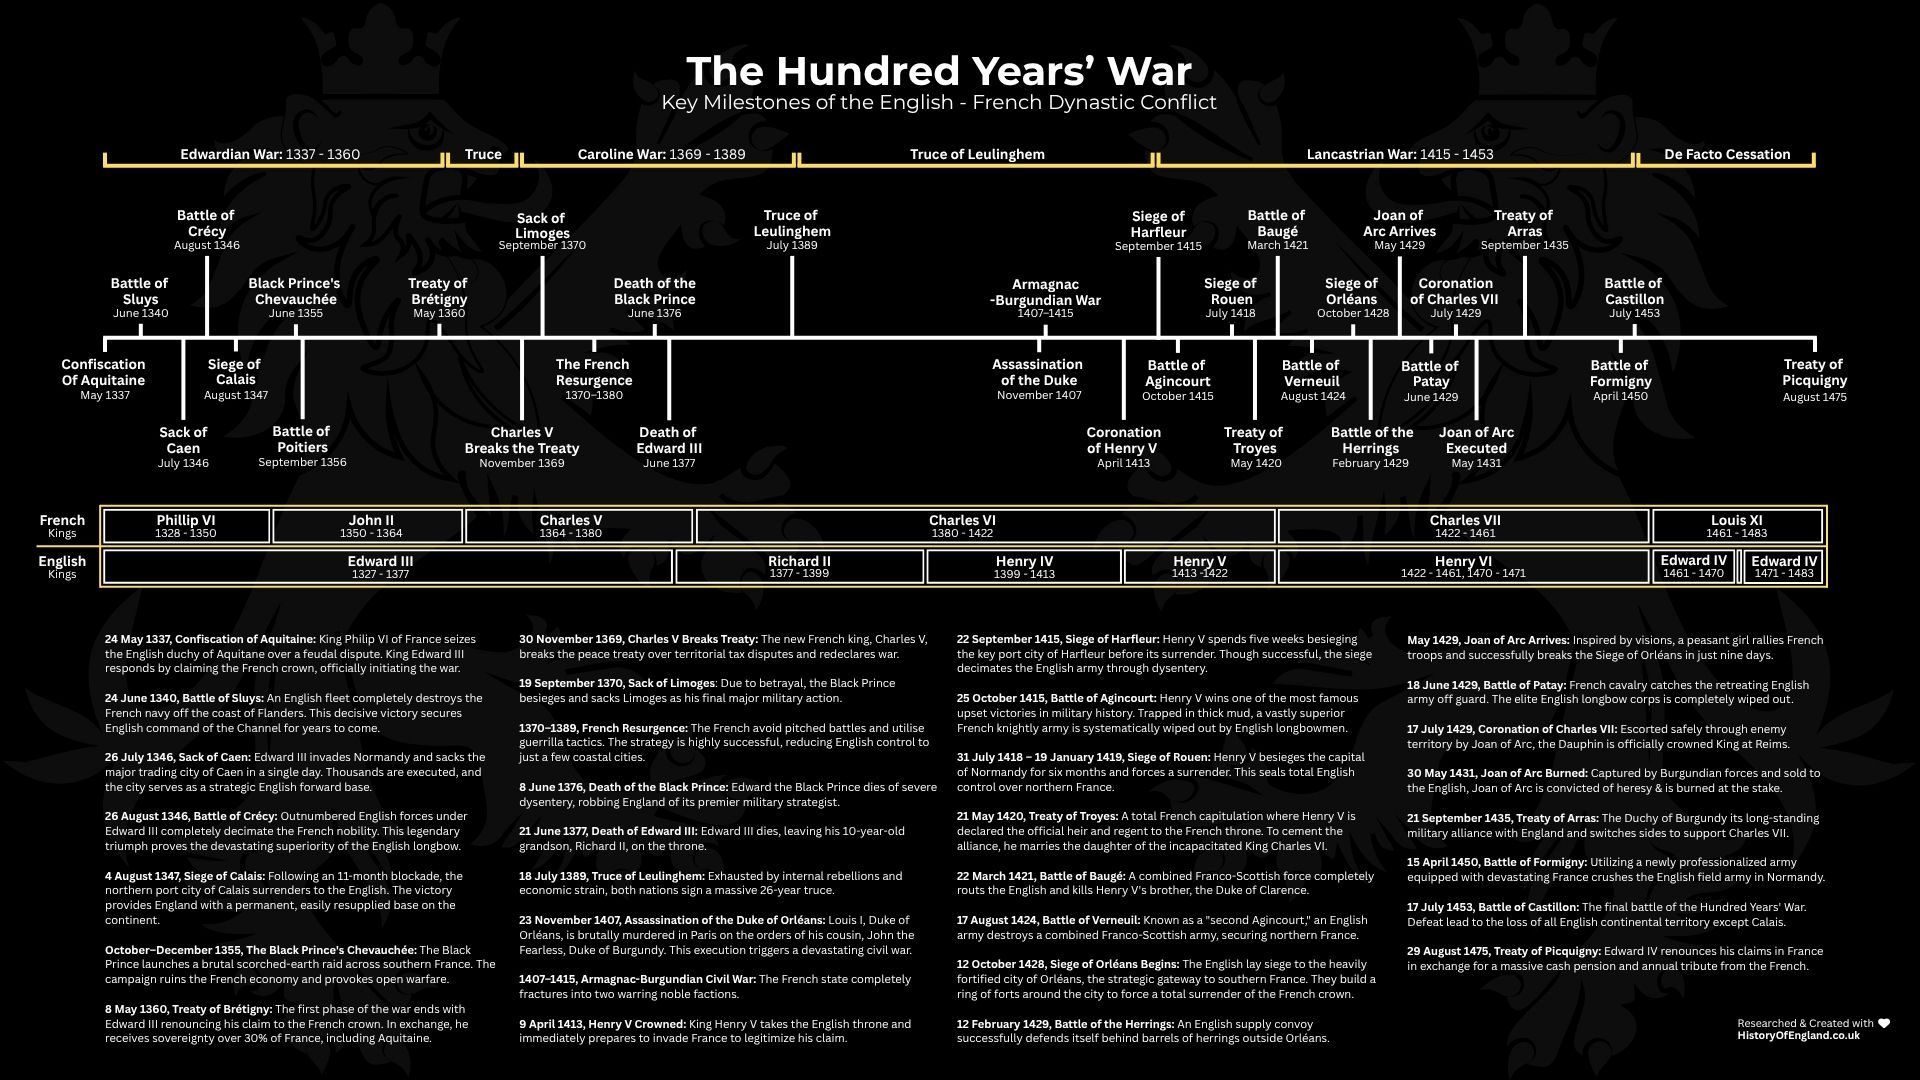
The Battles of Sluys and Crécy
1340 - 1346 AD
The opening phase of the war required the English state to confront a maritime security crisis, as a French fleet assembled off the coast of Flanders to cut off England’s wool trade routes and launch raids against the southern ports. To break this naval blockade, Edward III took command of an armada of roughly one hundred and fifty warships, sailing across the Channel to intercept the enemy on 24 June 1340 at the Battle of Sluys. The French commanders, Admiral Hugues Quiéret and Nicolas Béhuchet, had deployed their fleet of over two hundred vessels, reinforced by Genoese mercenary crossbowmen, in three lines anchored across the mouth of the Zwin estuary. In an effort to block the channel, the French made the operational error of chaining their ships together, a decision that sacrificed their maneuverability.
Edward III turned this immobility to his advantage. The English fleet initially feigned a retreat to gain the advantage of the wind and tide before wheeling around to descend upon the chained French lines. The English formed ship lines where two cogs packed with longbowmen were placed alongside a third vessel filled with dismounted men-at-arms. The high fore-and-aft castles of the English cogs provided a height advantage, allowing longbowmen to rake the enemy decks with arrow storms that out-ranged and overwhelmed the slow Genoese crossbows.
This aerial bombardment defeated the packed French crews, preventing them from mounting a defense before the English cogs grappled and hit their hulls. Dismounted English knights boarded the enemy vessels, converting the sea battle into a hand-to-hand infantry melee across the decks. The engagement ended in a tactical triumph for the Royal Navy, resulting in the capture or destruction of nearly the entire French fleet—including the recovery of the captured English flagship Christopher—and the death of over ten thousand French mariners.
Following this maritime victory, Edward III mobilized his capital in July 1346 to launch an amphibious invasion force consisting of approximately fifteen thousand soldiers. Landing at Saint-Vaast-la-Hougue in Normandy, the English army executed a plundering sweep across northern France, burning urban manufacturing nodes and destroying Valois agricultural logistics before being cornered by a larger French royal host near the forest of Crécy.
On the afternoon of 26 August 1346, the two armies met at the Battle of Crécy, an engagement that proved to be a major triumph for the tactical layout of the English forces. Edward III deployed his forces defensively at the top of a sloped ridge, forcing his knights to dismount and fight on foot to form an infantry shield wall flanked by English and Welsh longbowmen arranged in forward-jutting, wedge-shaped formations. The French King, Philip VI, arrived at the base of the ridge late in the afternoon with an army of approximately twenty-five thousand to thirty thousand men, outnumbering the English force nearly two to one. Ignoring advice to delay the assault until the following morning, Philip ordered his mercenary Genoese crossbowmen, numbering around six thousand under the command of Ottone Doria and Carlo Grimaldi, to advance under the cover of a sudden summer rainstorm.
The wet conditions damaged the strings of the mechanical crossbows, rendering them largely ineffective. In contrast, the English archers had kept their bowstrings dry beneath their hoods, allowing them to unleash an arrow storm that out-ranged and overwhelmed the slow Genoese response. As the mercenaries retreated from the arrows, the impatient French knights mistook their movement for cowardice and charged into their own men, creating a chaotic bottleneck of trapped horses and fallen riders at the base of the hill.
Subsequent waves of heavy French cavalry repeated the frontal charge up the muddy slopes sixteen consecutive times, but each assault was broken before reaching the English lines. The longbows delivered an output of twelve armor-piercing arrows per minute per man, striking down the unarmored horses and leaving the armored knights trapped beneath the weight of their dying beasts. Those few French horsemen who managed to survive the arrow storms were repelled by the steady wall of dismounted English knights, while light infantrymen moved through the lines with long daggers to finish off the fallen enemy.
The battle resulted in the destruction of the French noble elite, claiming the lives of an estimated ten thousand French soldiers, including over 1,500 princes, counts, barons, and knights. Alongside the blind King John of Bohemia, the dead included Louis I, Count of Flanders; Charles II, Count of Alençon—the younger brother of King Philip VI; Rudolph, Duke of Lorraine; Louis II, Count of Blois; and John IV, Count of Harcourt.
The command of the French state collapsed further as both field marshals and the Grand Master of Crossbowmen were killed in the melee. Philip VI himself was wounded in the jaw by an arrow and forced to flee the carnage in the dark to the castle of La Broye. The victory at Crécy proved that an infantry doctrine had turned England into a major military power in Europe, securing a dominance that would run through the rest of the century.
Further Information: The Battles of Sluys and Crécy
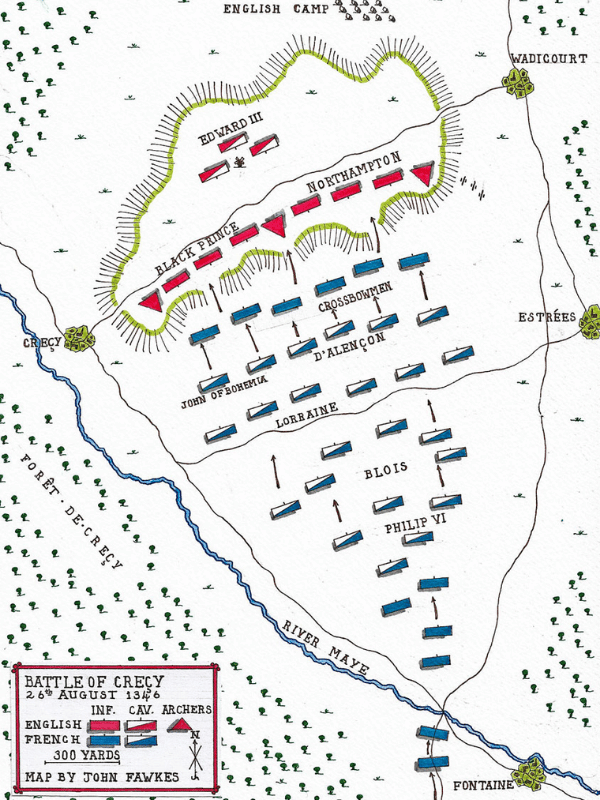
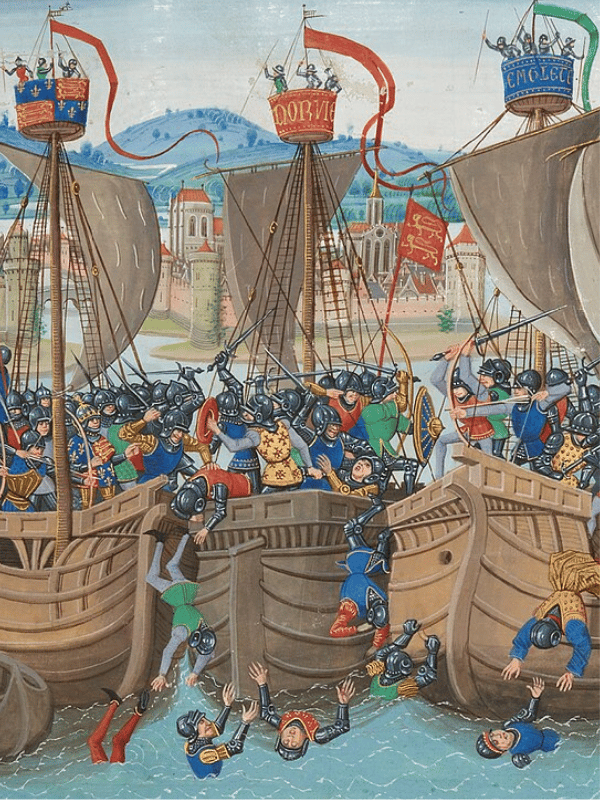
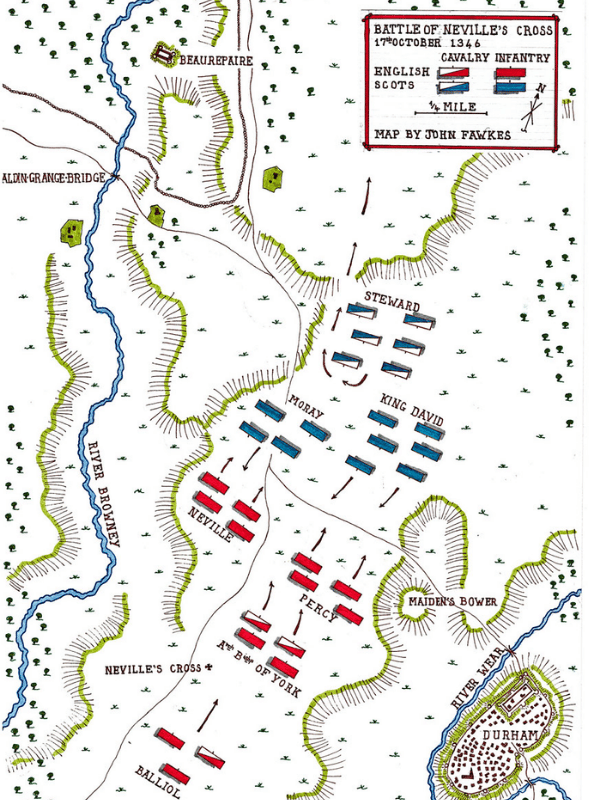
The Scottish Incursion and Battle of Neville's Cross
1346 AD
The Scottish invasion of October 1346 broke the security of the northern English frontier, transforming the borderlands into a secondary theater of the Hundred Years' War. Exploiting the unguarded northern borders while King Edward III and his main field armies were tied down on the continent leading the Siege of Calais, King David II of Scotland launched an invasion of northern England.
This campaign was executed to fulfill Scotland's obligations under the Auld Alliance with the French Crown, following a plea from King Philip VI of France to force a strategic diversion and draw English military resources away from the French theater. King David II assembled an invasion force of over twelve thousand men—including heavy French-armored knights and highland pikemen.
The Scottish army crossed the western border, capturing Liddesdale Castle and launching a campaign of arson and plunder across the shires of Cumberland and Northumberland. David II extracted protection money from Durham and laid waste to monastic estates, bringing life in the northern lands to a standstill. Faced with a security crisis, the northern English barons and clergy organized an independent defense without aid or reinforcements from royal forces overseas.
The defense was directed by William de la Zouche, Archbishop of York, alongside the northern Marcher lords, Henry Percy, 2nd Baron Percy, and Ralph Neville, 2nd Baron Neville of Raby. The Archbishop mobilized a militia of roughly three thousand Yorkshire and Durham longbowmen and one thousand armored northern knights, marching north to intercept the invaders on 17 October 1346 at Neville's Cross, Durham.
The battle was decided by the geography of the terrain and the deployment of English longbowmen. Unaware of the close proximity of the English forces, a Scottish scouting party under William Douglas, Lord of Liddesdale, stumbled into the English advance guard in the morning fog, sustaining casualties and triggering a general deployment. The Scots advanced across a broken landscape divided by deep ravines, stone cattle walls, and thick hedges. This terrain fractured the tight coordination of the Scottish schiltrons, forcing individual units to stall and split open. The English longbowmen exploited this confusion. Positioned on the high flanks, they unleashed a rain of armor-piercing arrows into the packed, immobile ranks of the Scottish infantry, inflicting heavy casualties. As the arrows broke the Scottish cohesion, the English men-at-arms charged down the ridge to engage in hand-to-hand combat.
The Scottish lines collapsed under the combined weight of the arrow storm and the infantry assault. The third Scottish division, commanded by the High Steward of Scotland—the future King Robert II—fled the field, leaving the royal vanguard surrounded. King David II fought with desperation; despite being wounded by two arrows—including one that struck him in the face—he was dragged from beneath a bridge at Merrington and captured alive by an English squire named John de Copeland, whom David punched during the struggle.
The Battle of Neville's Cross was a major defeat for the Scottish kingdom. Alongside their wounded monarch, dozens of Scotland’s premier earls, barons, and clan chiefs—including John Randolph, 3rd Earl of Moray, and Maurice de Moravia, 1st Earl of Strathearn, who were both killed on the field—were either slaughtered or taken as high-status prisoners to be locked inside the Tower of London, neutralizing the Scottish military threat and securing the northern borders of England for a generation.
Further Information: The Scottish Incursion and Battle of Neville's Cross
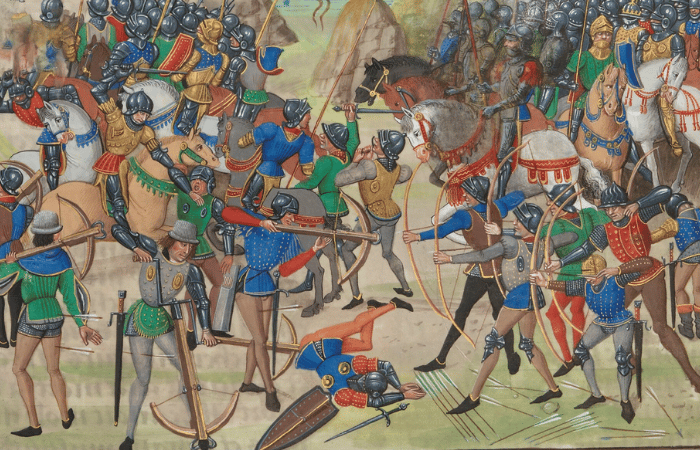
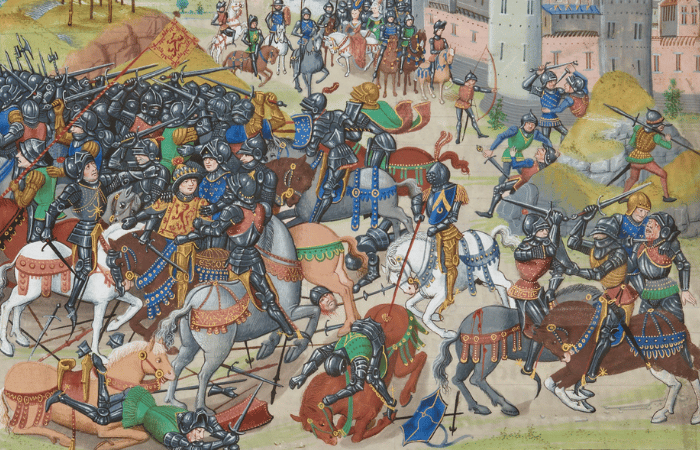
The Order of the Garter
1348 AD
To secure the loyalty and unity of his fractious nobility during his aggressive campaigns in France, King Edward III established the Most Noble Order of the Garter. Instituted around 1348, this exclusive companion society stands as the oldest continuous national order of knighthood in English history.
The creation of the Garter deliberately adapted the medieval legends of King Arthur and the Round Table into a permanent, crown-controlled institution based at Windsor Castle, where the King constructed a dedicated chivalric college and St George’s Chapel. The core membership of the order was strictly restricted to the Sovereign, his eldest son, Edward of Woodstock, the Black Prince, and twenty-four companion knights who had personally demonstrated exceptional military capability on the battlefields of Crécy and Calais.
The twenty-four founding companion knights, known historically as the First Founders, comprised the premier battle commanders of the opening phases of the Hundred Years' War. Alongside the King and the Black Prince, the founders included Henry of Grosmont, 1st Earl of Derby—the future 1st Duke of Lancaster; Thomas de Beauchamp, 11th Earl of Warwick; William de Montacute, 2nd Earl of Salisbury; Roger Mortimer, 2nd Earl of March; Jean de Grailly, Captal de Buch; and veteran field commanders Sir James Audley, Sir John Chandos, and Sir Walter Paveley. These men formed an insular military brotherhood where companions were treated as absolute structural equals regardless of their specific aristocratic rank, a parity visually symbolized by their matching vestments, garter mantles, and identical heraldic stalls within the chapel.
The companions were bound by strict expectations and legal obligations designed to eliminate internal factional baronial rivalries in favor of undivided service to the Crown. Every knight was expected to attend the mandatory annual feast of Saint George at Windsor each April, arriving in uniform blue robes and embroidered garter insignia bearing the French motto Honi soit qui mal y pense, meaning "shame on him who thinks evil of it."
The companion statutes required the knights to vow never to bear arms against one another in private regional wars, to defend the person of the King, and to provide ready military contingents of armed men at their own expense for the King’s foreign expeditions. Furthermore, the order functioned as a binding mutual defense pact; if a companion was captured on the continent, the other members were bound to contribute silver from their own estates to fund his ransom. By converting the combative energy of the aristocracy into a shared pride in the military achievements of the monarchy, the Order of the Garter successfully turned the nobility away from domestic conflict to focus on continental conquest.
Further Information: The Order of the Garter

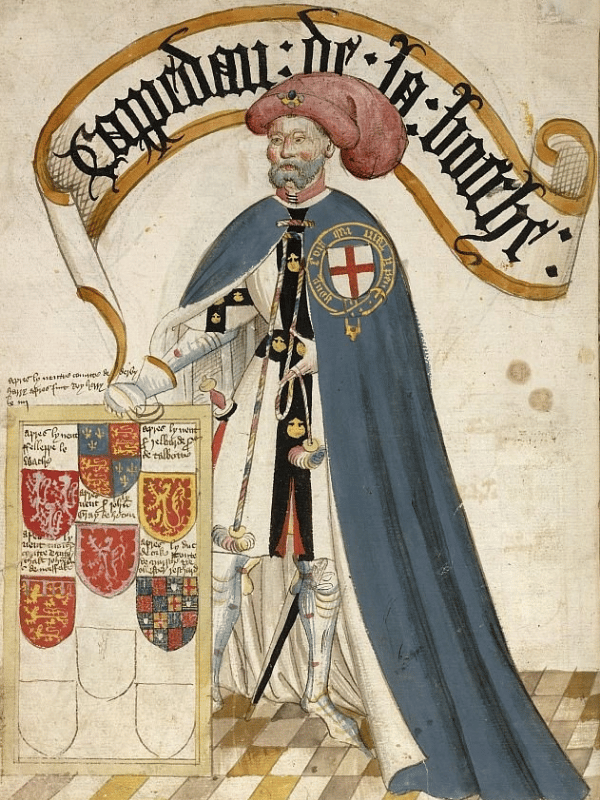
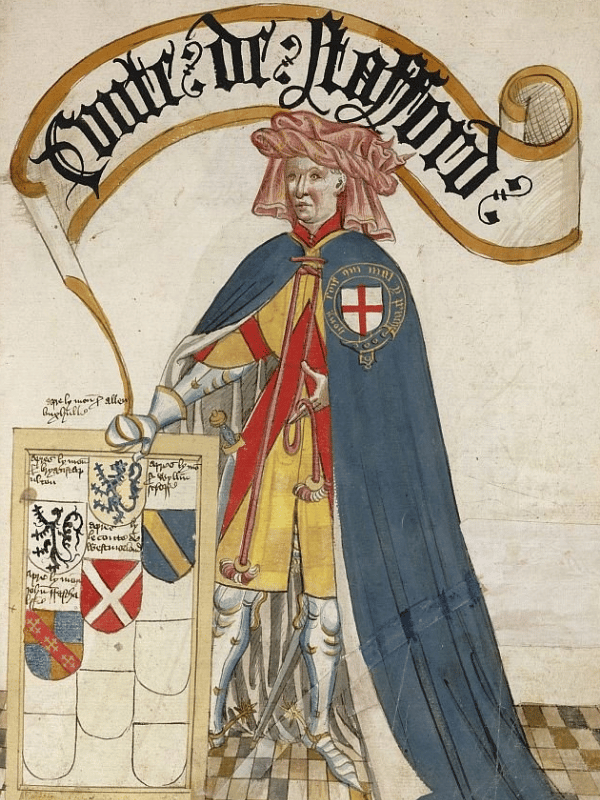
The Black Prince and the Battle of Poitiers
1356 AD
The military dominance of England during the mid-fourteenth century reached a peak under the command of the King's eldest son, Edward of Woodstock, the Black Prince. The prince operated as a tactician and commander who focused on executing chevauchées—cavalry raids designed to burn French cities, loot rural manufacturing centres, destroy agricultural resources, and drain the Valois treasury while avoiding siege warfare. In September 1356, during a raid extending out of Gascony across central France, the Black Prince’s army of approximately six thousand troops was intercepted near Poitiers by a French army of over fourteen thousand men-at-arms led by King John II.
On 19 September 1356, the two sides met at the Battle of Poitiers. Utilizing a defensive layout similar to the one deployed at Crécy, the Black Prince grouped his dismounted knights behind a natural hedge line, using his longbowmen to channel the advancing French infantry columns into narrow spaces. When the French advance stalled under the arrow storms, the Black Prince ordered a hidden cavalry division under Jean de Grailly, Captal de Buch, to launch a flanking charge directly into the rear of the enemy lines. This surprise assault broke the French lines, causing a panic that split the army.
The French defeat deteriorated into a defeat of the Valois military hierarchy, resulting in the loss of an estimated 2,500 to 3,000 French knights and men-at-arms killed or captured, contrasted against English casualties of fewer than five hundred men. Among the dead left on the field were the Constable of France, Walter VI of Brienne, Marshal Jean de Clermont, and the bearer of the Oriflamme, Geoffroi de Charny, who was cut down while shielding the body of his sovereign. As the French lines broke, English forces swept through the panic to capture the nobility of the French realm, securing King John II alongside his fourteen-year-old son Philip the Bold, Archbishop Guillaume de Melun of Sens, and James I of Bourbon, Count of Ponthieu.
This capture of the leadership of France was completed in the melee by Denis de Morbeke, an exiled French knight fighting for Edward III, who accepted the surrender of the Valois King before English commanders carried him back to London as a hostage, demanding a ransom.
Further Information: The Black Prince and the Battle of Poitiers

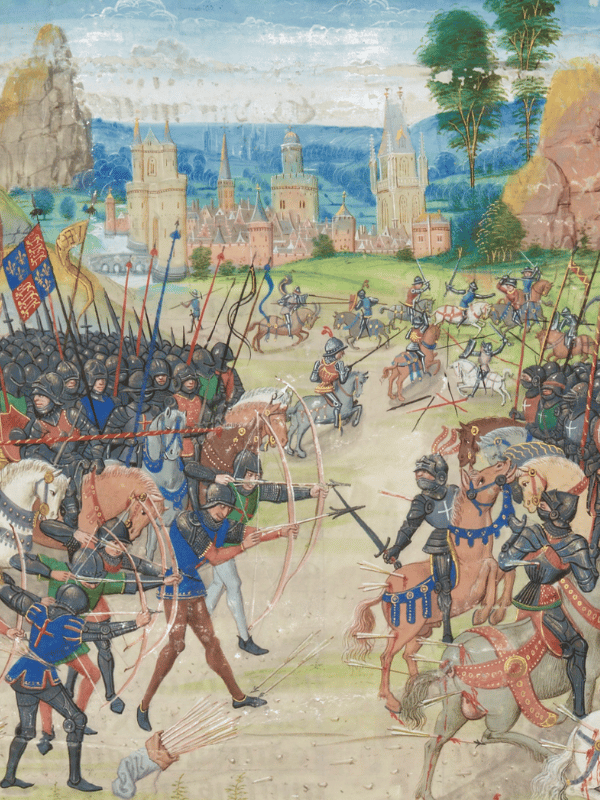

The Treaty of Brétigny
1360 AD
The captivity of King John II in London caused a political vacuum within the French government, leaving the Valois court unable to resist the territorial demands of the English Crown. Compounded by the civil unrest of the Jacquerie and the Parisian revolt under Étienne Marcel, this crisis forced the French regency council under the Dauphin Charles to open diplomatic negotiations. These parleys culminated in May 1360 with the drafting of a peace settlement at the hamlet of Brétigny near Chartres.
To secure the release of their monarch and end English cavalry raids, the French negotiators—led by Jean de Dormans, Bishop of Beauvais—agreed to the financial and territorial conditions of the accord, which was ratified by both sovereigns at Calais on 24 October 1360. The terms of this treaty reordered the political landscape of western Europe, ending the first phase of the Hundred Years' War.
Under the parameters of the Brétigny settlement, the French Crown agreed to release its sovereignty over an expanded block of provinces covering a third of the French landmass. King Edward III secured sovereignty over this territory, which included the cessions of Poitou, Saintonge, Agenais, Périgord, Limousin, Rouergue, Quercy, Bigorre, and the northern counties of Ponthieu and Calais, to be held by the English Crown without performing feudal homage, swearing fealty, or being subject to appeals to the French monarch.
In exchange for this sovereign territory, Edward III agreed to drop his claim to the French crown and withdrew his occupying armies from the northern provinces of Normandy and Anjou. Furthermore, the treaty set the royal ransom for King John II at the sum of three million gold crowns, a financial burden that required the implementation of the gabelle—a tax on salt—and new merchandise levies across France to fund the initial payments, while requiring the Valois court to deliver forty high-status hostages, including the King's sons Louis, Count of Anjou, and John of Valois, 1st Duke of Berry, to London to guarantee compliance.
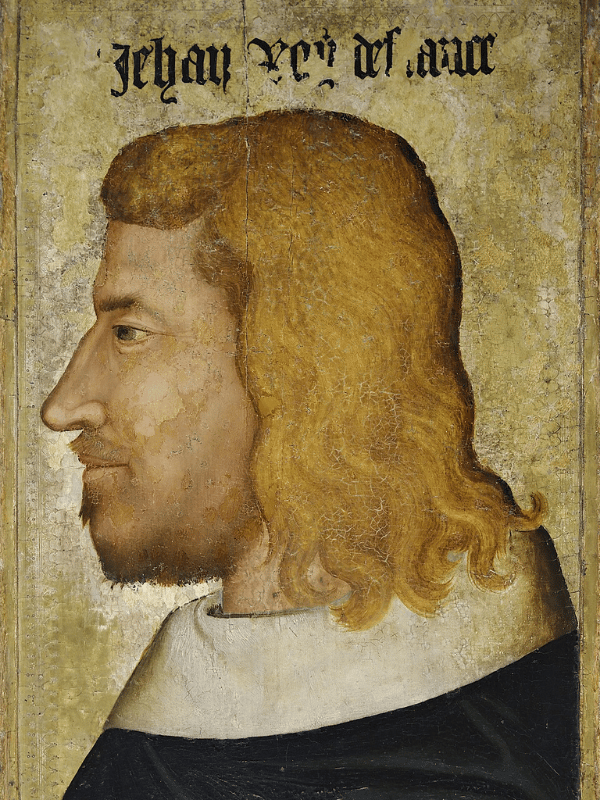
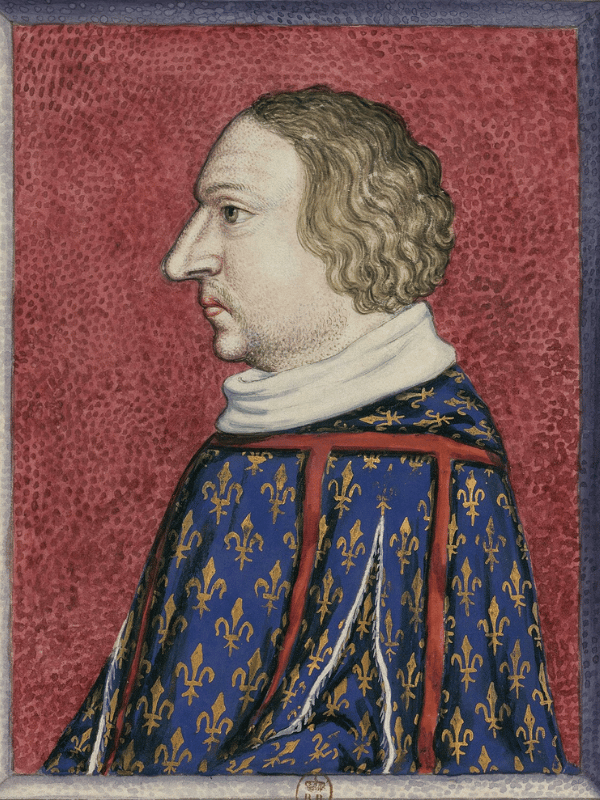

The Black Death
1348 - 1351 AD
Additional Information: The Genetic History of the English people / The Black Death and High Medieval Genetic Stasis
The military campaigns of the Plantagenet Crown were abruptly halted in the summer of 1348 by a catastrophic pandemic that permanently altered medieval society. Recorded historically as the Black Death, the bubonic and pneumonic plague arrived on the southern coast of England at the port of Melcombe Regis in Dorset via merchant ships from Gascony, spreading rapidly through every county, town, and village. The contagion was carried by black rats infested with Yersinia pestis-bearing fleas, finding an ideal vector in the crowded, unhygienic timber tenements of the era.
The resulting mortality was devastatingly sudden, killing an estimated 40% to 60% of the English population within eighteen months. Major urban centres like London, Bristol, and Norwich faced catastrophic casualties, requiring the immediate excavation of mass plague pits—such as those at East Smithfield and Charterhouse—to bury thousands of victims outside traditional, individual church ceremonies. This colossal loss of life caused total disruption to agricultural production; fields were left unploughed and ripe harvests rotted in the ground as entire rural settlements were abandoned to the disease.
The Black Death fundamentally dismantled the traditional feudal system by creating an acute, unprecedented shortage of agricultural labour across the country. Because surviving peasant farmers were suddenly scarce, they achieved immense economic leverage over the landowning class, flatly refusing to work for their traditional, legally bound low wages. By aggressively demanding increased pay and abandoning their ancestral manors to seek higher compensation from rival lords, these labourers directly challenged the economic dominance of the nobility.
To protect the shrinking incomes of the landowning elite, the government passed the Ordinance of Labourers in 1349, followed by the more punitive Statute of Labourers in 1351. This legislation attempted to freeze wages at pre-plague 1346 levels and made it a punishable crime for any able-bodied labourer to refuse agricultural work. By establishing a rigid system of price controls, the Crown created deep, lasting resentment throughout the shires, permanently fracturing social relations and directly laying the groundwork for the Peasants' Revolt.
Further Information: The Black Death

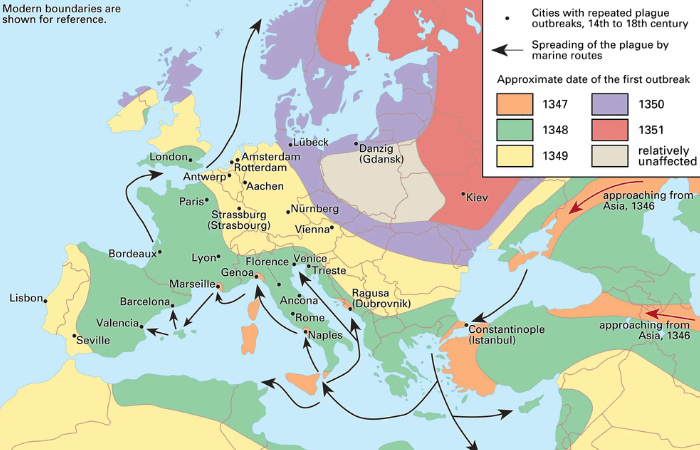
The Good Parliament
1376 AD
The political crisis that paralyzed the Westminster court in the spring of 1376 was the direct consequence of a decade of catastrophic military reversals and total fiscal exhaustion. Under the terms of the Treaty of Brétigny of 1360, King Edward III had secured sovereign, tax-yielding territories across southwestern France in exchange for renouncing his historic claim to the French crown. However, when King Charles V of France broke the peace in 1369, he unleashed a devastating strategy of defensive attrition and naval raiding that systematically dismantled the English continental empire.
Led by the brilliant French constable Bertrand du Guesclin, the Capetian armies successfully captured English-held strongholds without ever risking a pitched battle, while a combined Franco-Castilian fleet achieved absolute naval supremacy in the English Channel, brutally raiding coastal English towns like Rye and Winchelsea. By 1375, the English Crown had been stripped of nearly all its ancestral conquests, retaining only the isolated coastal enclaves of Calais, Bordeaux, and Bayonne.
This complete military collapse occurred precisely as the executive leadership of the House of Plantagenet disintegrated from within. Edward III descended into advanced senility and physical decay, retreating entirely to his private estates at Eltham and Sheen. The resulting power vacuum was filled by a corrupt court faction directed by his third surviving son, John of Gaunt, 1st Duke of Lancaster, and the King’s calculating mistress, Alice Perrers. This insular court circle used their proximity to the failing monarch to systematically hijack the state apparatus. While the Westminster exchequer extracted heavy financial taxes from the shires to fund failing continental campaigns, the Duke of Lancaster and his allies redirected public revenues into their private purses, buying up the King's personal debts at a fraction of their value and manipulating the wool markets for their own enrichment.
The domestic anger generated by this administrative corruption reached a climax in April 1376 when the government was forced to summon a new assembly to Westminster to request an emergency tax subsidy. Remembered historically as the Good Parliament, this session became a watershed moment in English constitutional history. Recognizing that they held critical financial leverage, the knights of the shire and the borough burgesses of the House of Commons refused to meet in traditional, fragmented regional groupings. Instead, they convened collectively within the Chapter House of Westminster Abbey, establishing a formidable, unified political block. To give their resistance formal legal backing, the Commons secured the vital patronage and protection of Edward III’s eldest son, Edward, Prince of Wales (the Black Prince). He was wasting away from a chronic illness contracted during his Iberian campaigns and sought to secure the upcoming succession of his son, the future Richard II, from the political ambitions of the Duke of Lancaster.
To articulate their grievances directly to the Crown, the Commons elected Sir Peter de la Mare, a wealthy knight from Herefordshire, to act as the first official Speaker of the House. On behalf of the unified Commons, de la Mare entered the Parliament chamber before the assembled peers and delivered a blistering indictment of the royal administration, flatly refusing to grant a new subsidy on raw wool or a renewal of tunnage and poundage duties until a rigorous audit of state expenditure was conducted. When the court faction attempted to dismiss the protest by claiming the King’s ministers were answerable only to the Crown, the Commons responded by initiating an unprecedented judicial process known as impeachment. Acting as a grand jury, the Commons brought criminal charges before the House of Lords against the King’s financial advisors and officials.
The primary targets of this constitutional strike were the wealthy financier Richard Lyons and the Lord Chamberlain, William Latimer, 4th Baron Latimer. The Commons produced irrefutable evidence proving that Lyons and Baron Latimer had orchestrated a massive network of financial monopolies. They had purchased the King’s debts from desperate creditors at steep discounts and used their court influence to collect the full value from the royal treasury while charging usurious interest rates. Furthermore, they were convicted of taking bribes from foreign merchants, embezzling loans meant for the defense of the Breton frontiers, and illicitly exporting English wool to continental ports outside the official royal staple at Calais to evade customs duties.
Confronted by the unified front of the Commons and the backing of the Black Prince, the House of Lords yielded. Baron Latimer and Lyons were stripped of their administrative offices, had their vast estates confiscated, and were imprisoned inside the Tower of London, while Alice Perrers was banished from the court under threat of excommunication.
The triumph of the reform party was cut short by tragic timing. On 8 June 1376, during the height of the parliamentary sessions, the Black Prince died at Westminster, stripping the Commons of their primary protector and leaving the succession vulnerable. Following the dissolution of Parliament in July 1376, the Duke of Lancaster executed a swift political counter-coup. He used his immense influence to declare all the parliamentary statutes void, releasing Lyons and Baron Latimer from custody. To punish the leadership of the assembly, the Duke of Lancaster had Sir Peter de la Mare arrested and imprisoned without a trial inside Nottingham Castle, packing the subsequent assembly of 1377 with his own loyalists.
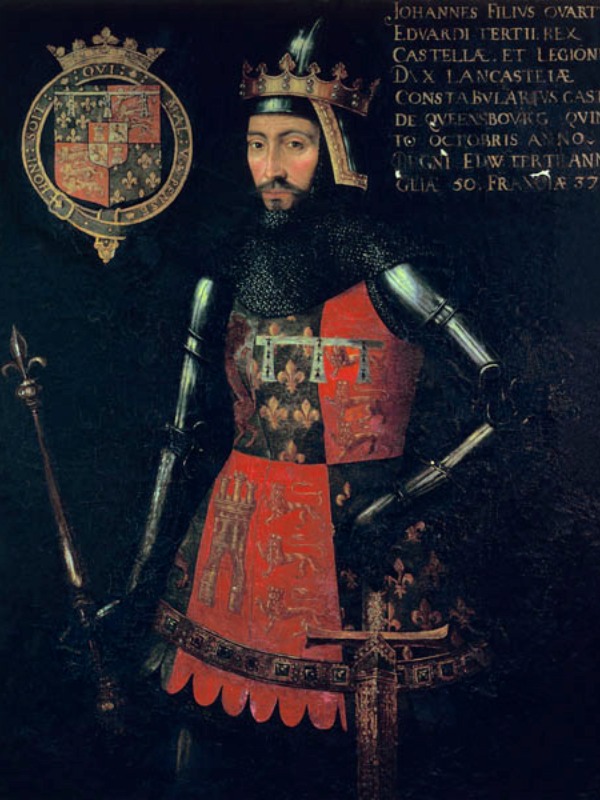
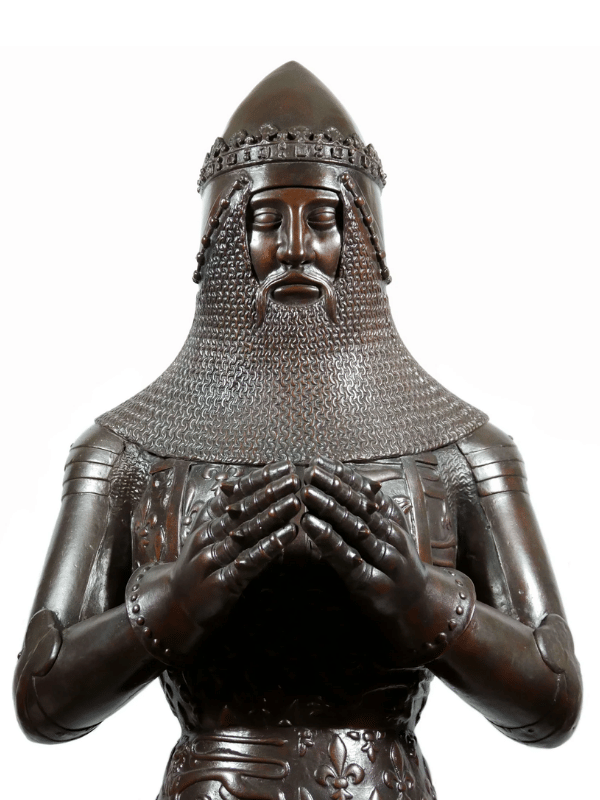
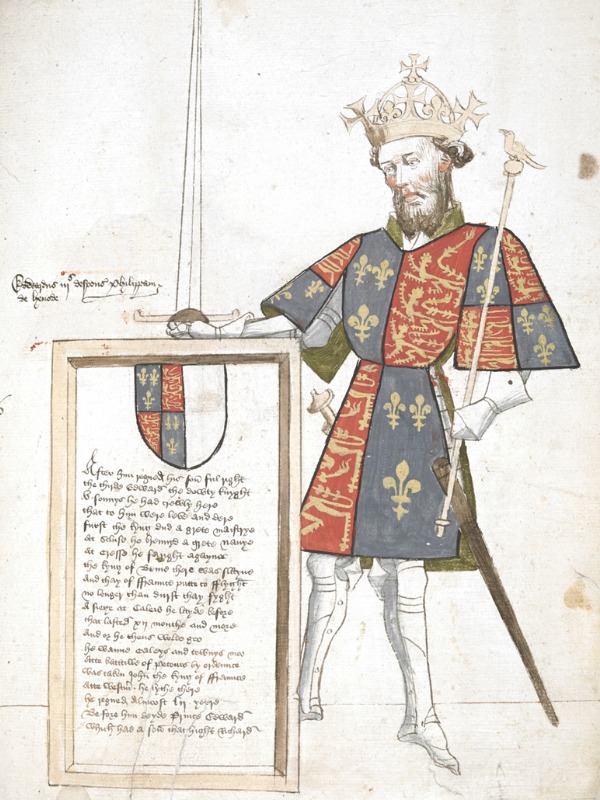
Wat Tyler and the Peasants' Revolt
1381 AD
Additional Information: The Chronicles of Britain / Thomas Walsingham and the Lancastrian Triumph
The implementation of a third successive poll tax in June 1381 triggered an agrarian uprising across southeastern England, known as the Peasants' Revolt. Driven by economic frustration following the demographic shocks of the Black Death, the catalyst for this insurrection was the royal regency council's attempt to extract revenue to fund the failing war with France. Unlike traditional medieval taxes that scaled with land holdings, this regressive levy was extracted from every individual over the age of fifteen, placing an economic burden onto the working and laboring classes of the shires.
The resistance began in late May 1381 when royal tax commissioners attempting to enforce collection were driven out of villages in Essex and Kent. Within days, the local tax strike transformed into a disciplined marching column led by the tactician Wat Tyler and the cleric John Ball, who used sermons to challenge the legal basis of the feudal class hierarchy. The rebel army increased to an estimated sixty thousand men, marching on the capital while burning manorial court rolls, judicial indictments, and prison houses to destroy the legal records of their subjection.
On 13 June 1381, sympathetic citizens inside the city opened the gates, allowing the rebel columns to enter London unopposed. The insurgents looted and burned the Savoy Palace, the residence of the King's uncle, John of Gaunt, 1st Duke of Lancaster, before overrunning the outer walls of the Tower of London. The rebels dragged the King's administrators out of the royal chapel, executing Simon Sudbury, Archbishop of Canterbury and Lord Chancellor, alongside Sir Robert Hales, Lord High Treasurer, placing their severed heads onto pikes across London Bridge. Driven by necessity, the fourteen-year-old King, Richard II, negotiated in person, meeting Tyler and the rebel leadership at Mile End and Smithfield. Richard II agreed to their demands, promising the abolition of serfdom, the removal of feudal labour monopolies, and the granting of royal pardons to all insurgents.
However, during the negotiations at Smithfield on 15 June 1381, a dispute escalated into violence. The Mayor of London, William Walworth, drew his blade and wounded Wat Tyler, who was cut down by the King's retinue. Seeing the rebel archers draw their bows to avenge their leader, the young King displayed tactical presence, riding toward their front ranks while shouting, "I am your captain, follow me!", leading the company away from the city centre into the open fields of Clerkenwell while royalist forces mobilized to encircle them.
Once the leaderless rebel forces dispersed to the shires, the Crown executed a counter-offensive. Backed by commissions of trailbaston judges, the government deployed armed units across the home counties to pursue, indict, and execute regional rebel leaders, including the hanging, drawing, and quartering of John Ball. Parliament passed decrees revoking every concession made by the King, ensuring the legal and military frameworks of the Plantagenet state remained committed to enforcing the strict boundaries of the feudal system.
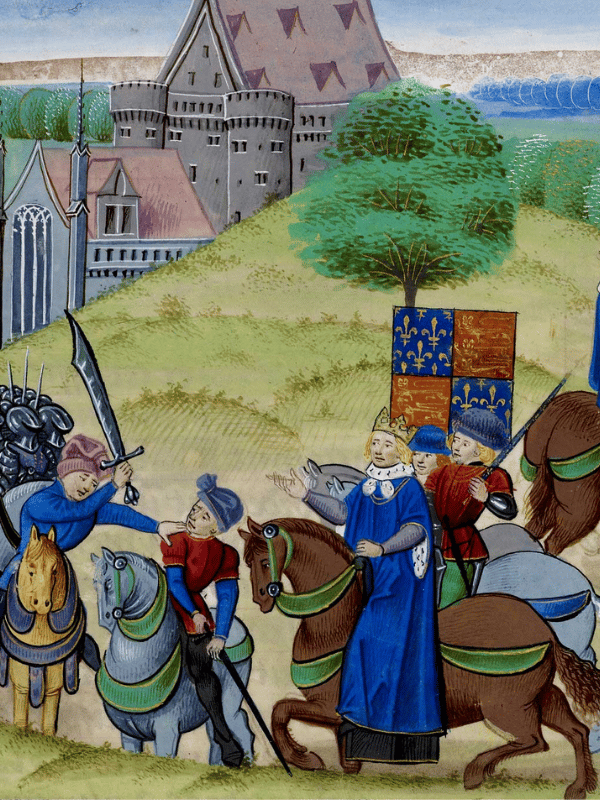
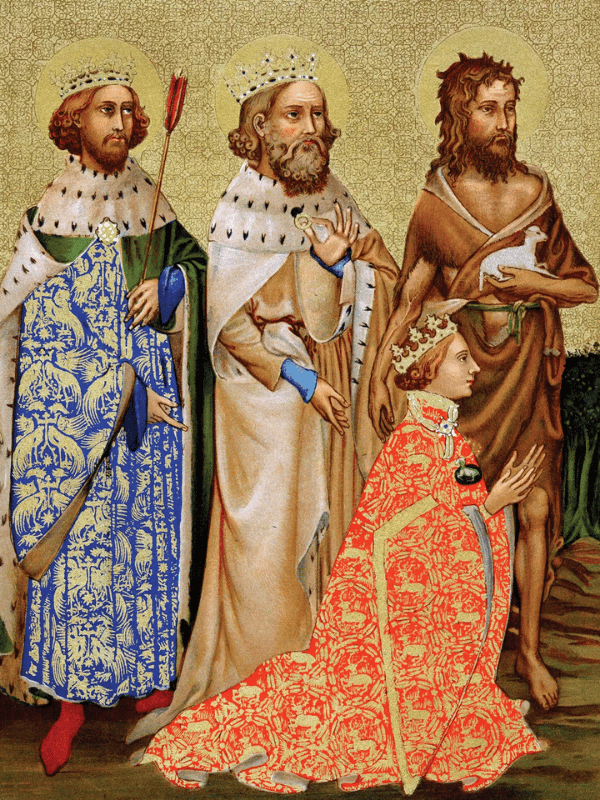
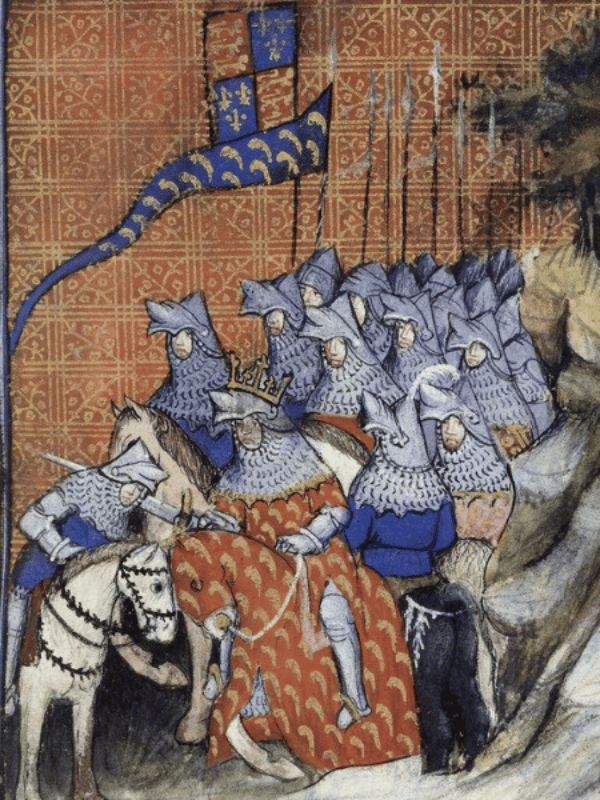
The Lords Appellant and the Merciless Parliament
1387 - 1388 AD
The political fallout from the 1381 insurrection rapidly accelerated a profound constitutional crisis within the Westminster court, culminating in an aggressive baronial coup against the Crown. As King Richard II attained his majority, he deliberately attempted to bypass the traditional baronial elites to rule exclusively through an insular circle of court favourites. Led by Robert de Vere, 1st Duke of Ireland, and Michael de la Pole, 1st Earl of Suffolk, who served as Lord Chancellor, this faction entirely monopolised royal patronage, mismanaged vital military funds, and advised the King to pursue an unpopular peace policy with France.
In November 1387, a coalition of five senior magnates—known historically as the Lords Appellant—launched a coordinated armed campaign to remove this court faction from power by force. Led by the King’s ambitious uncle, Thomas of Woodstock, 1st Duke of Gloucester, alongside Richard Fitzalan, 11th Earl of Arundel; Thomas de Beauchamp, 12th Earl of Warwick; Thomas de Mowbray, 1st Earl of Nottingham; and Henry Bolingbroke, 2nd Earl of Derby, the Appellants formally "appealed" (prosecuted) the favourites on charges of high treason. When Richard II attempted to counter this legal challenge by raising a royalist force in Cheshire under the Duke of Ireland, the Appellants intercepted and routed the cavalry on 20 December 1387 at the Battle of Radcot Bridge in Oxfordshire, forcing de Vere to flee into continental exile.
With the King's military support decisively broken, the Appellants marched on London, took absolute possession of the capital, and effectively detained Richard II inside the Tower of London. In February 1388, the victorious barons convened an assembly remembered as the Merciless Parliament to carry out a brutal judicial reordering of the royal administration. The Appellants used Parliament to try the King's inner circle in absentia, sentencing the Duke of Ireland and the Earl of Suffolk to death while executing senior officials who remained in custody.
The ruthless enforcement of these judgments stripped the Crown of its remaining administrative independence. The Appellants executed Sir Nicholas Brembre, former Mayor of London, and publicly hanged Sir Robert Tresilian, Chief Justice of the King's Bench, at Tyburn. Despite the King's desperate personal pleas, the barons also executed his former childhood tutor and chamberlain, Sir Simon de Burley. Before dissolving in June, the Merciless Parliament forced Richard II to publicly renew his coronation oath under the explicit threat of deposition, while collecting a massive subsidy of £20,000 to fund their own administration.
This absolute humiliation deeply damaged the royal prerogative, locking a bitter resentment into the mind of the monarch and establishing a bloody precedent of legislative executions that defined the remainder of his reign.
Further Information: The Lords Appellant and the Merciless Parliament
The Tyranny of Richard II
1397 - 1399 AD
A political crisis enveloped the kingdom in July 1397, when King Richard II launched a campaign to break the power of his baronial opposition. Having spent a decade waiting to avenge the humiliations inflicted upon him by the Merciless Parliament of 1388, Richard utilized a royal banquet in London to strike a blow, ordering the arrest of the leading Lords Appellant.
The King ordered the execution of Richard FitzAlan, 9th Earl of Arundel, seized the land portfolio of Thomas de Beauchamp, 12th Earl of Warwick, to send him into exile, and had his uncle, Thomas of Woodstock, Duke of Gloucester, smothered to death while in custody at Calais. To strengthen this personal rule, Richard II altered the functions of the Westminster Parliament.
In 1398, he coerced a submissive legislature meeting at Shrewsbury to delegate its lawmaking powers to a committee of royal favourites, granting the Crown the authority to pass decrees and collect taxes without parliamentary consent. He raised a private bodyguard of ten thousand men recruited from Cheshire, requiring them to wear his personal White Hart badge to intimidate critics, attempting to rule outside the established boundaries of English common law.
The primary error of his reign occurred in February 1399 following the death of the King’s uncle, John of Gaunt, 1st Duke of Lancaster. Gaunt’s wealth, castle networks, and estates functioned as an economic center within the kingdom. Seeking to eliminate this rival power, Richard II issued a decree that bypassed inheritance laws and property protections to enforce the permanent confiscation of the entire Lancastrian estate, disinheriting Gaunt's exiled son, Henry Bolingbroke.
This breach of property law alienated the English landowning class and the nobility, who realized that no hereditary title or estate was secure from Crown seizure while Richard II remained on the throne.
To compound this alienation, Richard II decided to leave England in May 1399, taking his army and his Cheshire archers across the Irish Sea to conduct a campaign in Leinster against the Irish chieftain Art MacMurrough-Kavanagh. This departure left the kingdom without an active defender just as Henry Bolingbroke capitalized on the King's absence.
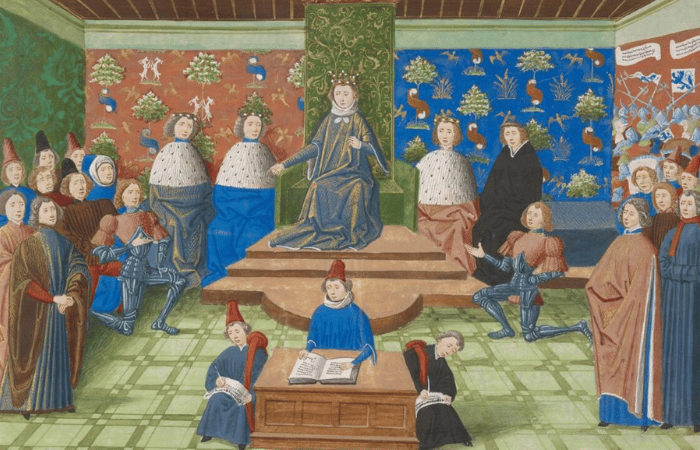
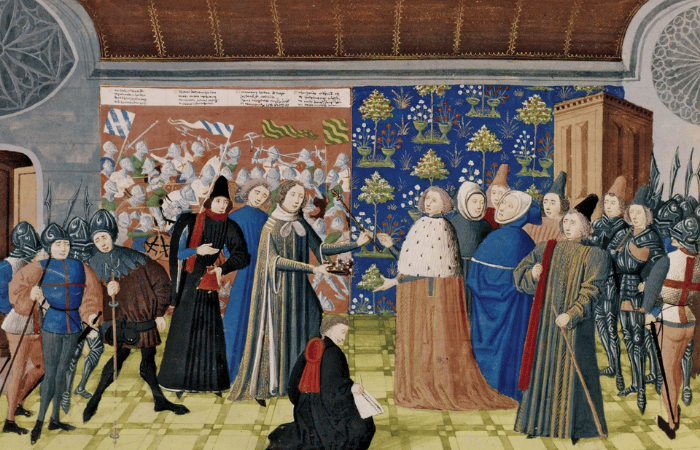
The Bolingbroke Coup, and Rise of Lancaster
1399 - 1400 AD
The collapse of the patriarchal line of the House of Plantagenet occurred in July 1399, when Henry Bolingbroke capitalized on King Richard II’s military absence in Ireland to launch an invasion of the country.
Landing at the headland of Ravenspur in Yorkshire with a company of fellow exiles, Bolingbroke initially issued a proclamation announcing that his return was solely to reclaim his inheritance as the Duke of Lancaster, which had been seized by the Crown following the death of his father, John of Gaunt. However, the public and aristocratic anger generated by Richard II's rule caused an immediate groundswell of baronial support. The northern magnates, led by Henry Percy, 1st Earl of Northumberland, mobilized their regional armies to join Bolingbroke's banner, transforming a private property dispute into a political revolution.
Richard II returned from his Irish campaign to find his military support dissolved, his administration paralyzed, and three of his court favorites captured and executed by Bolingbroke’s agents. Abandoned by his forces, the isolated King retreated through Wales and was cornered at Flint Castle. He was captured under a promise of safe passage negotiated by the Earl of Northumberland, who swore an oath that Richard would retain his crown.
Escorted back to London amidst public hostility, the King was detained inside the Tower of London to await his removal. To grant this dynastic change legal validity, Bolingbroke's advisers convened an assembly of the estates at Westminster Hall on 30 September 1399. Operating as a Convention Parliament, the assembly listened as officials read aloud the Record and Process of the Renunciation and Deposition of Richard II, which incorporated an indictment composed of thirty-three separate articles of deposition.
These thirty-three articles, which cited Richard’s original coronation oath of 1377, convicted the King of tyranny. The indictment targeted his breaches of common law property protections, his imposition of arbitrary taxation, his use of an armed personal Cheshire bodyguard to intimidate Parliament, and his declaration that the law resided within his own mouth. Faced with this indictment and acknowledging his military helplessness, Richard signed an instrument of abdication. Bypassing the closer hereditary claim of the eight-year-old Edmund Mortimer, 5th Earl of March—who descended from Edward III’s second surviving son through the female line—Henry Bolingbroke stepped forward into the center of Westminster Hall. He claimed the vacant throne in the English tongue by right of conquest and male-line descent, declaring himself monarch as King Henry IV.
This usurpation terminated the unbroken line that had governed the realm since 1154, inaugurating the Lancastrian dynasty. To prevent a counter-insurgency by remaining loyalist factions, Henry IV had the deposed monarch transferred into secret confinement at Pontefract Castle in Yorkshire. Deprived of communication and subjected to starvation, the former King died in captivity in February 1400, ensuring that the new Lancastrian regime secured administrative control over the kingdom.
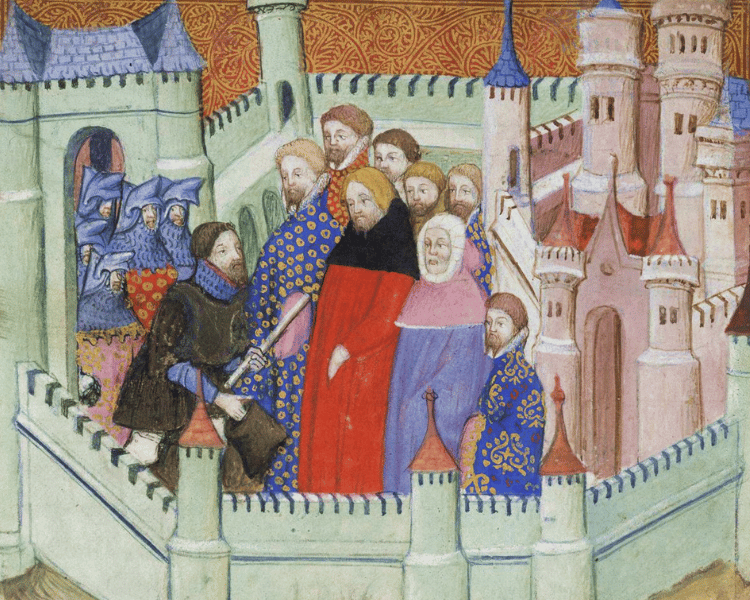
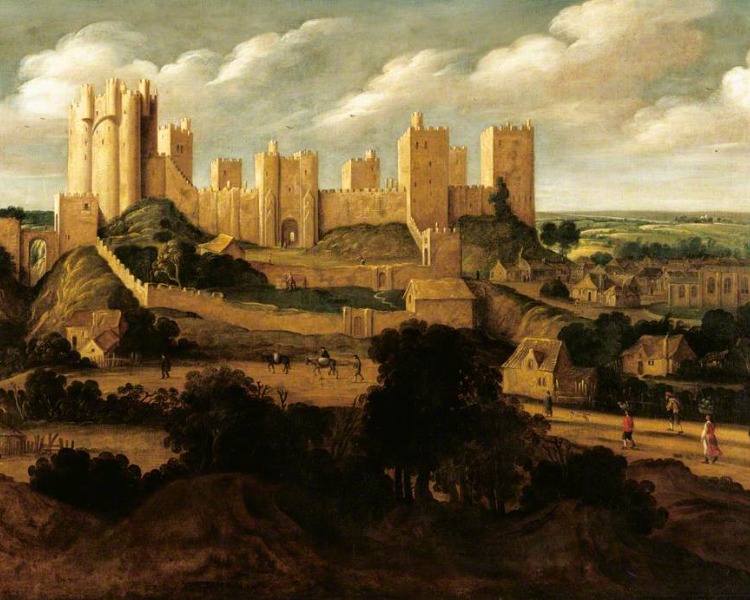
Growth of the Commons
1399 - 1422 AD
The continuous, ruinous demands of the Hundred Years' War forced a profound structural shift across the domestic governance of England, compelling the Crown to summon Parliament to Westminster with unprecedented frequency to request emergency grants of taxation on wool, cloth, and land values. This deep financial dependence allowed the House of Commons—composed of elected county knights and town burgesses—to aggressively expand its authority over the executive decisions of the monarchy.
Between 1401 and 1414, the Commons systematically turned this fiscal leverage into permanent legislative power. They successfully established the binding precedent that the King could not levy national taxes without their explicit consent, while rigidly requiring the Crown to resolve domestic political grievances before any agreed tax revenues were released. Legal clerks and advisors standardised the process of passing laws through common petitions, requiring both houses to agree on the exact, immutable written text of a statute before it could receive the royal assent, thereby preventing royal officials from secretly altering laws after Parliament dissolved.
The Commons also introduced unprecedented, aggressive controls over royal expenditure, appointing independent treasurers for war to audit exactly how the Crown spent public revenues. This ensured that funds were directed strictly toward national defence, border garrisons, and Channel coastal protection rather than the private pockets of court favourites. To strengthen this oversight, the landmark Parliament of 1406—which sat for an unprecedented 171 days—forced a cash-strapped King Henry IV to accept a radical council of reform. This statute mandated that the names of all royal councillors be publicly announced in Parliament, made those councillors legally accountable to the realm, and bound the King's personal household to a strict, audited budget of £10,000 annually for his domestic expenses.
This institutional growth fundamentally transformed Parliament from a temporary advisory council into a permanent legal counterweight to the Crown. It cemented a sophisticated system of legislative oversight that defined the relationship between the Lancastrian kings and the political community of the realm, ensuring that the king could no longer rule entirely of his own will.
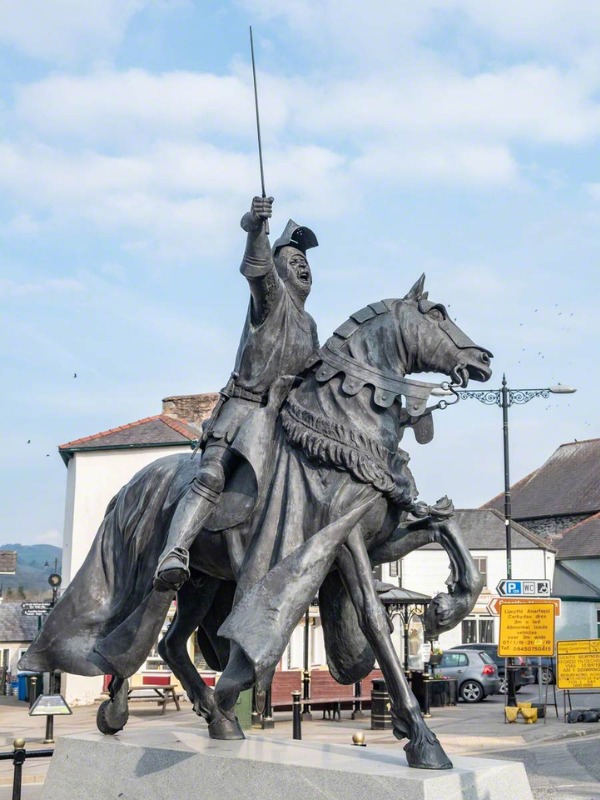

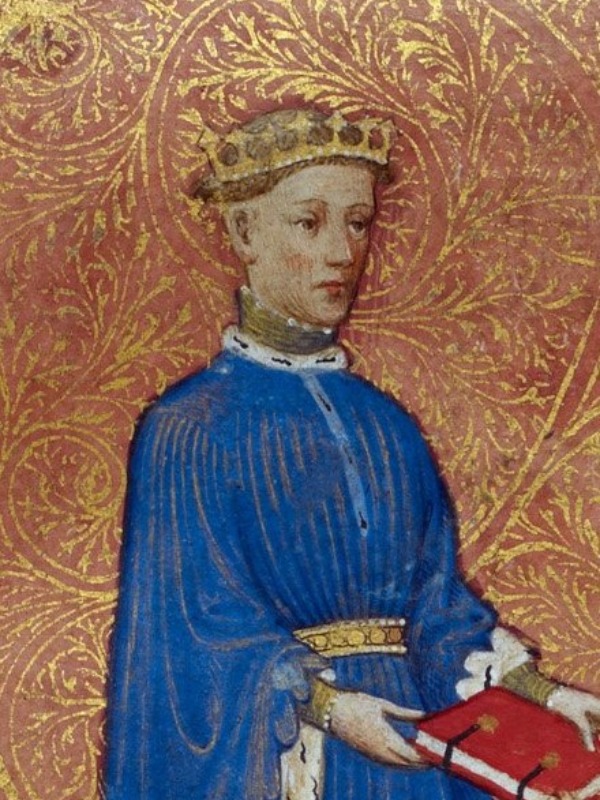
The Tripartite Border Crisis and Battle of Shrewsbury
1400 - 1405 AD
The usurpation of 1399 led to a lack of political stability for the new Lancastrian line, bringing the early reign of King Henry IV into conflict. The initial rebellion began along the western border in September 1400, triggered by a territorial dispute between the Welsh magnate Owain Glyndŵr—a landowner descended from the native princes of Powys and Deheubarth—and his neighbor, the marcher lord Reginald Grey, 3rd Baron Grey de Ruthyn.
When Baron Grey de Ruthyn withheld Glyndŵr's royal summons to serve in the Scottish campaign, Henry IV declared the Welshman a traitor in default, allowing Grey to seize Glyndŵr's ancestral lands at Croesau. Outraged by this action and channeling local resentment against English administrative rule, Glyndŵr was proclaimed Prince of Wales by his followers at Glyndyfrdwy on 16 September 1400, launching a campaign against the marcher lords. Utilizing mountain ambush tactics within the Snowdonia massif and destroying resources across Wales, Glyndŵr’s forces bypassed English border garrisons and captured strongholds, including Harlech and Conwy castles, while establishing a Welsh parliament at Machynlleth.
The conflict intensified in 1403 when Henry IV's northern allies—the Percy family of Northumberland—rebelled against the Crown. Having served as the architects of Henry IV's ascension to the throne and the deposition of Richard II in 1399, the family grew disaffected by the King's financial insolvency. Led by the warrior Henry "Hotspur" Percy and his father, Henry Percy, Earl of Northumberland, the dynasty broke with the Crown over unpaid royal war debts incurred while defending the Scottish Marches, alongside a dispute regarding the ransom rights of Scottish prisoners captured at the Battle of Homildon Hill in 1402. Furthermore, the King's refusal to allow Hotspur to ransom his brother-in-law, Sir Edmund Mortimer, from Welsh captivity ended their remaining loyalty.
Turning on their former beneficiary, the Percys allied with the Scottish Earl of Douglas and Owain Glyndŵr. The conspirators formalised this anti-Lancastrian coalition through the Tripartite Indenture, a secret treaty to depose Henry IV and partition the entire English landmass into three separate, sovereign principalities: a southern and eastern realm for Mortimer, an expanded northern domain for the Percy family, and an independent Wales extending to the Severn and Mersey rivers for Glyndŵr.
The monarchy was preserved on the afternoon of 21 July 1403 through a military march that led to the Battle of Shrewsbury. Henry IV and his vanguard, led by the Prince of Wales, cut off Hotspur’s northern column before it could join Glyndŵr’s Welsh army. The engagement was a close-quarters infantry battle characterized by longbow duels that inflicted high casualties on both sides. The rebellion ended when Hotspur Percy was struck in the face and killed in the melee, causing a retreat of the rebel lines.
Despite the defeat at Shrewsbury, the government faced a second conspiracy in 1405. Richard Scrope, Archbishop of York, coordinated an armed northern uprising alongside Thomas Mowbray to protest against royal taxation and protect local liberties. Henry IV responded by marching his army north, where he arrested the conspirators and required a temporary court to sentence Archbishop Scrope to be executed by beheading outside the walls of York.
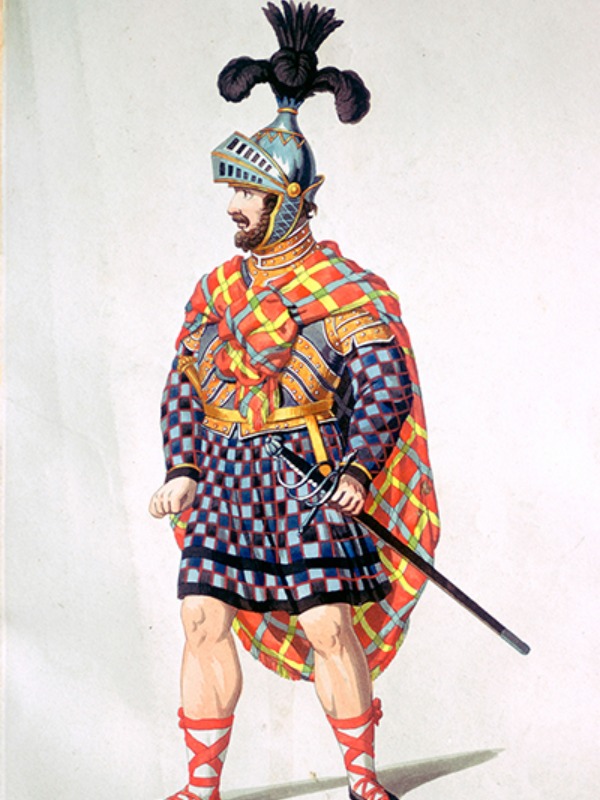
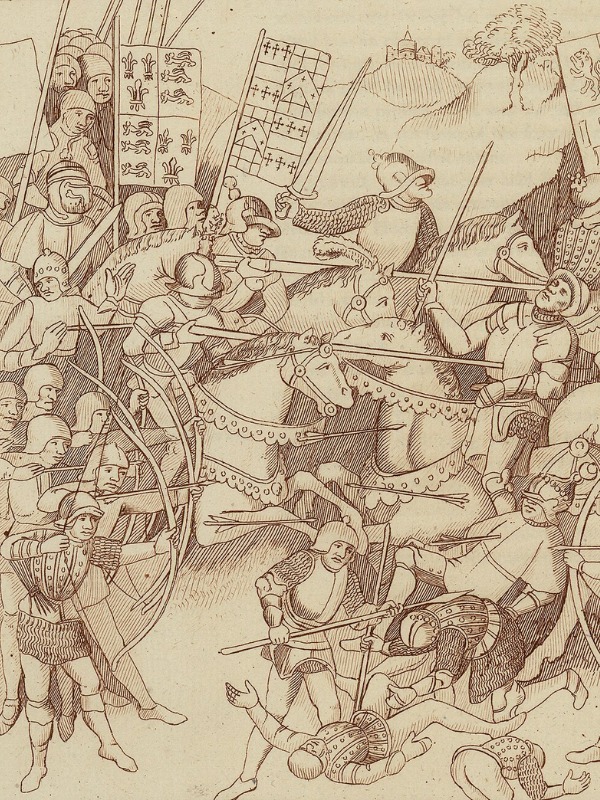
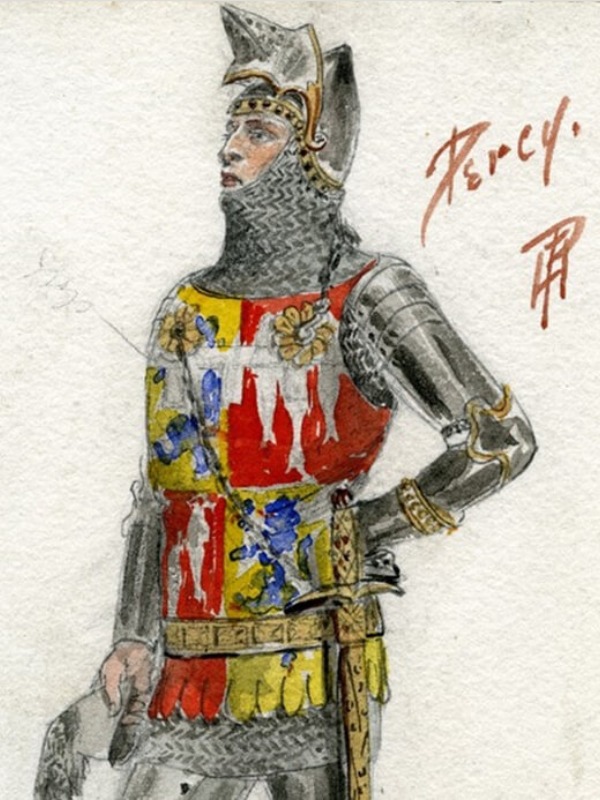
The Regency Crisis: Henry IV’s Decline
1406 - 1413 AD
The final phase of the reign of Henry IV was marked by a bitter, polarizing internal political dispute at Westminster. Beginning in 1405, King Henry IV was afflicted by a disfiguring, debilitating illness that contemporary chroniclers widely recorded as a swift divine punishment for his controversial execution of Richard le Scrope, Archbishop of York. This severe physical decline left the monarch incapacitated for long intervals, triggering a fierce factional struggle within the royal council to control the daily operations of government. The resulting political vacuum was filled by an aggressive alliance led by the King’s eldest son, Henry, Prince of Wales, and his half-uncles, the ambitious Beaufort brothers—John Beaufort, 1st Earl of Somerset, and Henry Beaufort, Bishop of Winchester.
By January 1410, this baronial bloc took absolute command of the Privy Council, managing the realm as a de facto regency government while the sick King remained confined to his private apartments. The Prince of Wales utilized this period of executive dominance to radically reorder the financial administration, install Thomas Beaufort as Lord Chancellor, and alter foreign policy by deploying English troops into the civil war in France.
This administrative takeover led to an aggressive counter-reaction from the King and his remaining loyal advisers. In late 1411, Henry IV experienced a sudden, unexpected recovery, enabling him to dynamically reassert his royal authority. He dismissed the Prince of Wales from the council, stripped the Earl of Somerset and the rest of the Beaufort family of their administrative positions, and promptly reappointed his conservative advisor, Thomas Arundel, Archbishop of Canterbury, as Lord Chancellor to entirely reverse the prince's interventionist foreign policy. This factional dispute brought the court to the absolute brink of open warfare, with both the King and the Prince of Wales gathering heavily armed retinues in London during the sessions of Parliament.
The political deadlock ended abruptly on 20 March 1413 when Henry IV suffered a final, fatal collapse while praying at the shrine of Edward the Confessor inside Westminster Abbey. Transferred hastily to the adjacent abbot's lodgings, the King died inside the Jerusalem Chamber, satisfying a long-held prophecy that he would die in Jerusalem. The Prince of Wales immediately ascended the throne unopposed as King Henry V, unifying the court factions and inheriting a highly stable administrative and military system prepared to resume the war across the Channel.

The Accession of Henry V
1413 - 1415 AD
Unlike his father, who spent his entire reign fighting exhausting internal baronial rebellions, Henry V inherited a pacified realm and a secure treasury. He possessed immense personal magnetism, a clinical dedication to administrative efficiency, and a driving determination to unify his domestic ruling class.
Henry V used his executive power to systematically heal lingering political wounds, restoring lands and ancestral titles to the families of prominent rebels who had fought his father. He returned the Earldom of March to Edmund Mortimer, 5th Earl of March, and restored the heirs of the executed Percys and Holands.
By uniting this younger generation of English barons beneath his military banner, he successfully shifted their combative energy away from domestic civil war toward foreign conquest.
Exploiting a fracturing civil war between the Armagnac and Burgundian factions within the French royal court of King Charles VI, Henry V formally renewed the historic Plantagenet claim to the crown of France, demanding the immediate return of all territories granted under the Treaty of Brétigny.
To fund his cross-Channel offensive, Henry V mobilized the shipping infrastructure of the country, seizing all merchant vessels over twenty tons to construct a massive military transport fleet of 1,500 ships. He also commissioned the mass manufacture of hundreds of thousands of iron-tipped arrows, longbows, and heavy artillery pieces, converting the English shires into a total wartime industrial machine.
By the summer of 1415, he gathered an invasion army of nearly 12,000 contract soldiers—comprising 2,000 heavy men-at-arms and 10,000 disciplined longbowmen—on the Hampshire coast at Southampton, fully equipped to cross the sea and launch the campaign.
The Agincourt Campaign and Treaty of Troyes
1415 - 1420 AD
In August 1415, King Henry V launched his campaign to conquer France, landing an invasion force of 12,000 soldiers at Chef-de-Caux in Normandy. His opening strategic objective was the fortified port of Harfleur, which fell to the English army after a brutal, five-week siege. However, this costly victory was instantly compromised. A devastating epidemic of camp dysentery swept through the sodden trenches, killing thousands of men and reducing the active English fighting force by over a third.
Determined to demonstrate administrative and military dominance before returning to winter quarters, Henry V flatly rejected his council's advice to retreat safely by sea. Instead, he led his remaining, exhausted force of roughly 6,000 men on a daring, 260-mile march across northern France toward the English enclave at Calais. In mid-October, this retreating column was successfully cut off near the village of Agincourt by a massive French royal army numbering over 20,000 men-at-arms, led by the French Constable Charles d'Albret.
On the morning of 25 October 1415, the two hosts met at the Battle of Agincourt, an engagement that resulted in the complete tactical destruction of the French heavy cavalry. Henry V advanced his lines to position his army at the narrow bottleneck of a freshly plowed valley bordered on both sides by dense woods, a brilliant deployment that entirely neutralized the French numerical advantage. He ordered his longbowmen to drive sharpened, six-foot wooden stakes into the earth at an angle to form a defensive palisade against cavalry charges.
When the packed French vanguard advanced across the deep, heavy mud, their mobility was utterly destroyed. The English longbowmen unleashed a relentless storm of bodkin-tipped arrows that decimated the forward columns, panicking the horses and forcing the charging lines to collapse backward into the advancing rear divisions. As the French mass became a paralyzed bottleneck of suffocating men, Henry V ordered his unarmoured archers to discard their bows and enter the melee with lead mallets, swords, and daggers. They rapidly liquidated the remaining enemy lines, killing thousands of French nobles—including Constable d'Albret—while English casualties remained phenomenally low.
The total victory at Agincourt broke the central administrative control of the French state. Over the subsequent four years, Henry V ruthlessly exploited this power vacuum, executing a methodical, castle-by-castle conquest of Normandy, which culminated in the unconditional surrender of Rouen in January 1419 after a horrific, six-month blockade. Faced with total military defeat and an ongoing civil war between the Burgundian and Armagnac factions, the French court was forced to submit to the Treaty of Troyes in May 1420.
Under the terms of this sweeping settlement, the French King Charles VI legally disinherited his own son, the Dauphin, and married his daughter Catherine of Valois directly to Henry V. The treaty declared the Lancastrian King as Regent and sole heir to the Throne of France, achieving a dual monarchy and marking the absolute peak of English imperial power on the European continent.
Further Information: The Agincourt Campaign and Treaty of Troyes
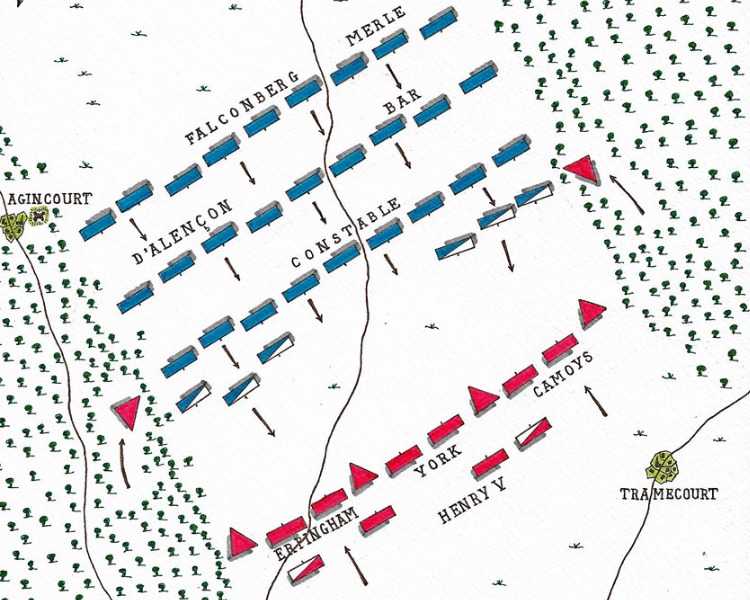

The Battle of Verneuil
1424 AD
The vast territories inherited from the dual monarchy of Henry V were systematically lost during the disastrous reign of his infant son and successor. Henry V died unexpectedly of illness at Vincennes in August 1422, leaving his nine-month-old infant son, King Henry VI, as the formal monarch of both England and France under the rigid provisions of the Treaty of Troyes. While a minority regency council—led by the King's ambitious uncle, John of Lancaster, 1st Duke of Bedford—managed the increasingly costly continental war during the 1420s, the adult Henry VI grew into a weak, hyper-pious, and reclusive monarch who completely lacked the military capacity and administrative determination of his dynamic predecessors.
The massive military expenditures of the French campaigns placed an unsustainable financial strain on the English treasury. Facing a growing, structural deficit alongside the urgent need to fund expensive garrisons across the continent, the minority regency administration desperately required bold new revenue streams to avoid total financial exhaustion. This chronic lack of liquid capital directly threatened the dual monarchy's already fragile continental governance, precisely as a combined Franco-Scottish army assembled in Normandy to aggressively challenge the English territorial conquests. To protect these overseas holdings and decisively secure territorial control, the Duke of Bedford mobilized a professional army of longbowmen and battle-hardened men-at-arms, marching into southern Normandy to confront the allied enemy host near the town of Verneuil.
The Duke of Bedford established a strong defensive position across the open plains, deploying his forces in a single, formidable infantry line with disciplined longbowmen stationed on the flanks behind a protective barrier of sharpened wooden stakes. He secured his critical baggage train behind a ring of tethered horses and wagons to prevent a potential encirclement by the allied army, which numbered roughly 15,000 men compared to the English combatants' 9,000.
The structural stability of the English line was severely tested when a division of armored Lombard cavalry, hired by the French Crown, launched a furious, unexpected charge that broke through the archery positions on the flank to plunder the rear lines, causing a temporary panic. Remaining remarkably disciplined, the English men-at-arms under the command of the Duke of Bedford held their center, while the archers quickly reformed their ranks and combined with the baggage guard to launch a decisive counter-offensive that trapped the Scottish infantry.
The engagement devolved into a brutal, bloody melee that ended in a complete, devastating defeat for the Franco-Scottish coalition, resulting in the total destruction of the Scottish contingent under the command of Archibald Douglas, 4th Earl of Douglas. The battlefield casualties claimed the lives of the Earl of Douglas, John Stewart, 2nd Earl of Buchan (the Constable of France), and John VIII, 3rd Count of Aumale, alongside roughly 6,000 allied soldiers, while English losses were limited to approximately 1,000 men.
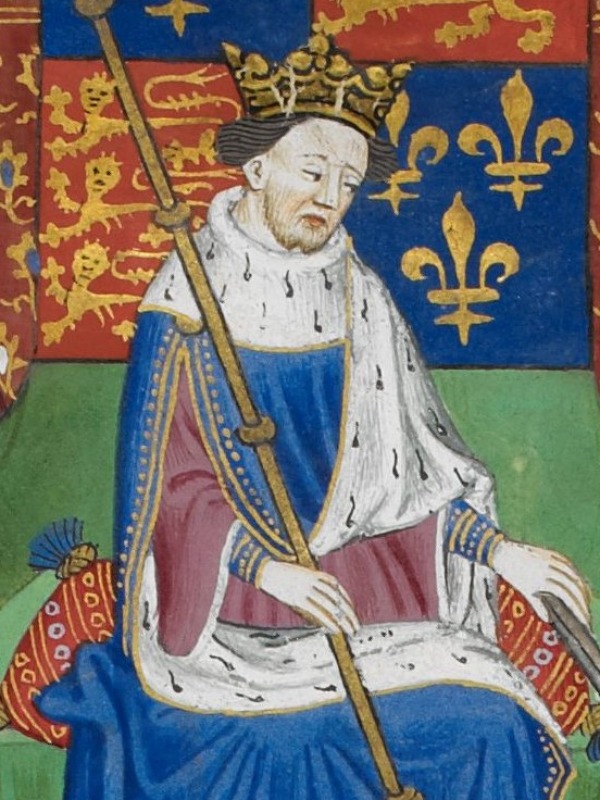
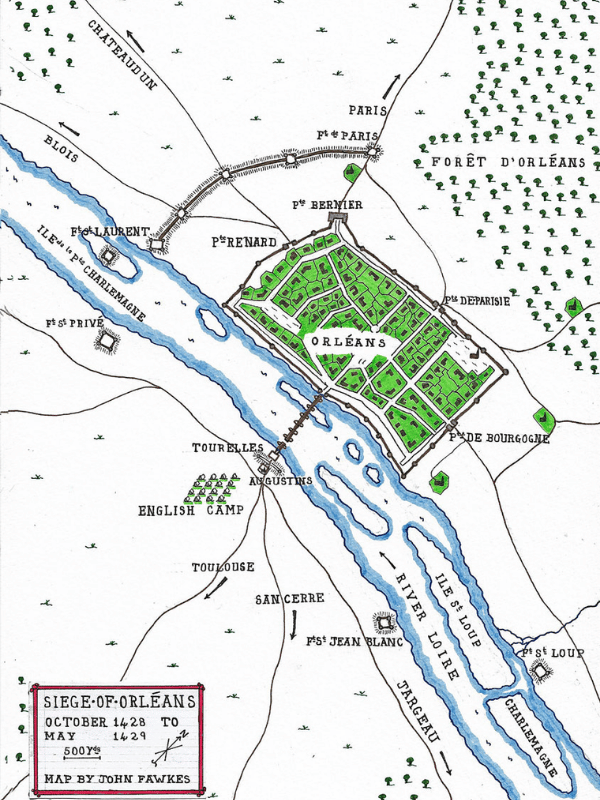
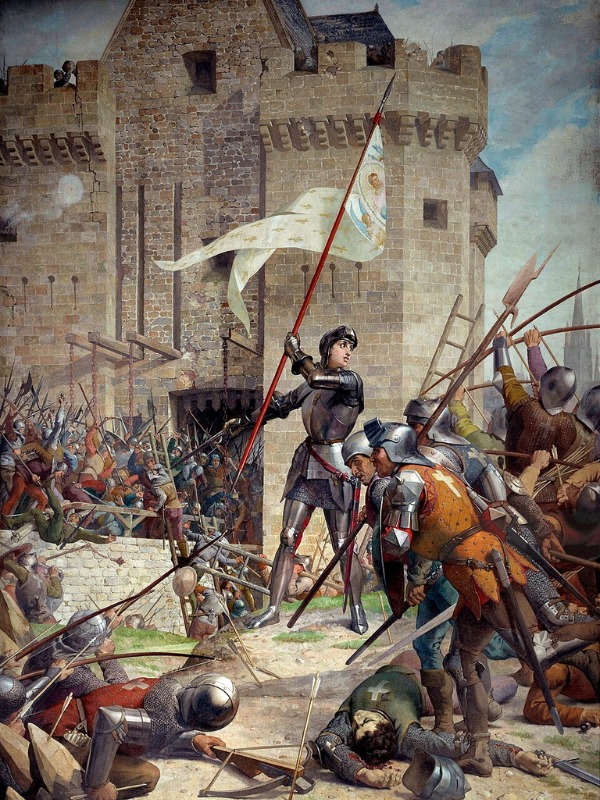
The Siege of Orléans and the Capetian Revival
1428 – 1429 AD
The military supremacy of the English in France reached its peak, yet also its breaking point, in October 1428, when Thomas Montagu, 4th Earl of Salisbury, began an investment of the strategic city of Orléans. As the northern gateway to the loyalist lands of the Dauphin, the city was the key to the south of France. The Earl of Salisbury’s engineers constructed a ring of eleven fortified outworks, known as bastides, to isolate the city, but the operation suffered a blow when the Earl was mortally wounded by a stray artillery shot while inspecting the captured Tourelles gatehouse tower.
Command shifted to William de la Pole, 1st Earl of Suffolk, who struggled to maintain the blockade through a winter of attrition. Despite defeating a French relief caravan at the Battle of the Herrings in February 1429—where English longbowmen used barrels of salted fish from their supply wagons as a makeshift defensive barricade—the besieging garrison of roughly 5,000 men became overstretched and financially depleted.
The turning point of the war arrived in May 1429 with the appearance of Joan of Arc, a visionary peasant girl who galvanized the French resistance after convincing the Dauphin of her divine mission. Wearing a suit of white plate armour and carrying a personal banner, she bypassed eastern English outworks via boats on the Loire River to enter the starving city. Her arrival shattered the psychological reputation of English longbow invincibility. Joan led a series of assaults against the isolated English siege forts, capturing the strongholds of Saint-Loup and the Augustins within days. On 7 May, she led the final storming of the fortified Tourelles gatehouse, scaling the ramparts despite being struck in the shoulder by an English crossbow bolt.
Outmanoeuvred and with their primary fortresses reduced to ruins, the Earl of Suffolk and his chief field commander, John Talbot, 1st Earl of Shrewsbury, broke the nine-month siege on 8 May 1429, executing a retreat northward. Joan's momentum cleared the Loire Valley of its overstretched English garrisons. To compound the English disaster, the pursuing French vanguard pounced on the retreating columns as they attempted to reform at the village of Patay.
On 18 June 1429, at the Battle of Patay, French heavy cavalry blindsided the English vanguard before they could plant their traditional protective wooden stakes, resulting in a rout that led to the capture of the Earl of Shrewsbury and the death of over 2,000 English veterans. This campaign cleared the road to Reims, allowing Joan to guide the Dauphin through enemy territory to his formal coronation as King Charles VII of France on 17 July 1429, a crowning that invalidated Henry VI's dynastic claims to the French throne.
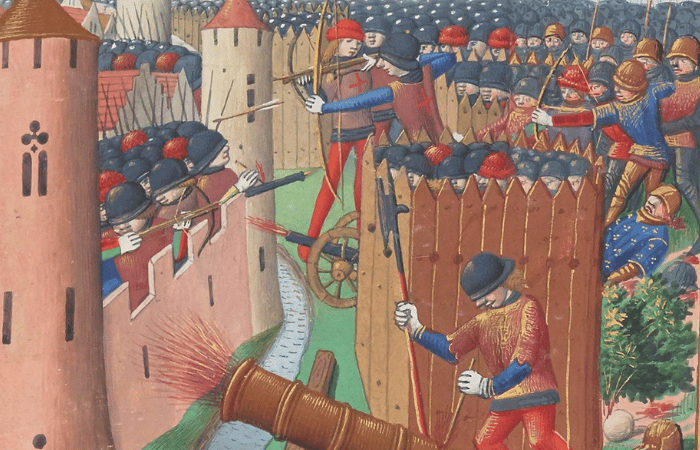
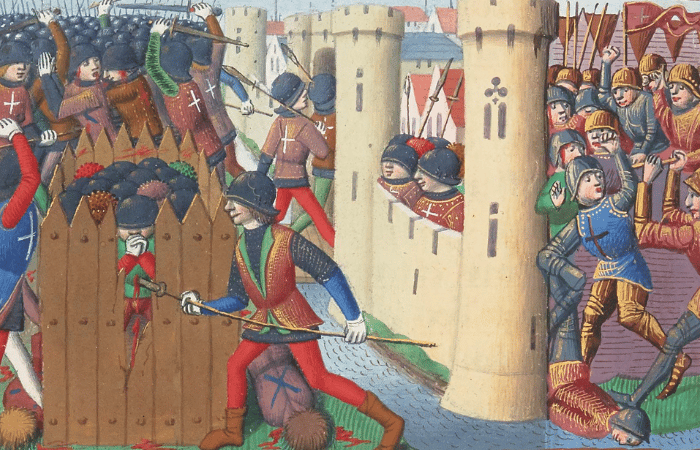
The Artillery Revolution and the Loss of Normandy
1430 – 1450 AD
Over the subsequent two decades, the French military executed a sweeping operational reorganization, transforming a fractured feudal host into the first permanent standing war machine in Europe. King Charles VII introduced the compagnies d'ordonnance, which established professional cavalry units and mounted archer divisions under direct royal pay. Simultaneously, the French Crown developed the most formidable mobile artillery train in Christendom under the direction of the master gunners Jean and Gaspard Bureau. The Bureau brothers altered contemporary siege logistics, replacing obsolete stone-throwing bombards with standardized cast-bronze and iron field pieces that fired heavy iron cannonballs capable of shattering thick stone fortifications within hours.
While the French state aggressively modernized its military infrastructure, Henry VI’s court in London descended into paralyzing factional infighting and severe financial mismanagement under William de la Pole, 1st Duke of Suffolk, and Edmund Beaufort, 2nd Duke of Somerset. Desperate to secure a peace, the Duke of Suffolk clandestinely negotiated the Treaty of Tours in 1444, which included a secret provision surrendering the strategic province of Maine directly to the French Crown without parliamentary consultation. When this provision was exposed, it triggered widespread domestic fury and completely dismantled the prestige of the Lancastrian regime, while the cash-strapped Westminster exchequer failed to supply pay, provisions, or reinforcements to the remaining frontier garrisons.
The modernized French army launched a swift counter-offensive in 1449, utilizing an unauthorized English raid on the neutral Breton town of Fougères as a convenient pretext to break the existing truces and invade the duchy of Normandy. The French artillery train conducted a blitzkrieg campaign, utilizing their high-velocity siege guns to systematically reduce seventy English-held strongholds—including the major administrative centers of Rouen, Harfleur, and Caen—within a twelve-month period.
The century-long English occupation of Normandy ended decisively on 15 April 1450 at the Battle of Formigny. A small English relief army of 4,000 men under the command of Sir Thomas Kyriell was intercepted near Caen by the advancing French forces. The engagement was decided when the French deployed two long-range bronze culverins to brutally out-range the English longbow lines from the flank. When the English infantry broke their defensive formation to charge and capture the guns, they were hit by a devastating, unexpected cavalry charge led by Arthur de Richemont, Constable of France.
The defeat resulted in the total destruction of the English army, leaving over 3,800 men killed on the field and Kyriell captured. This cleared the English entirely out of Normandy, allowing French forces to capture the final stronghold of Cherbourg by August 1450.
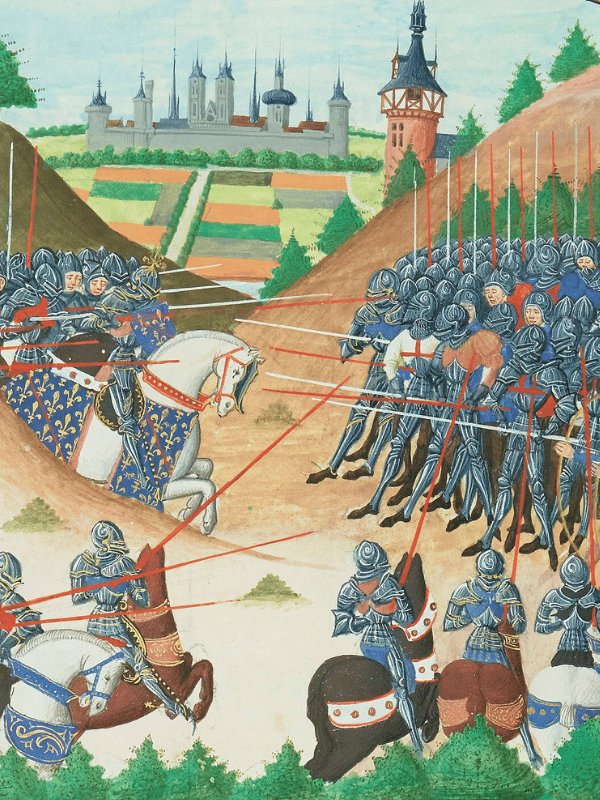
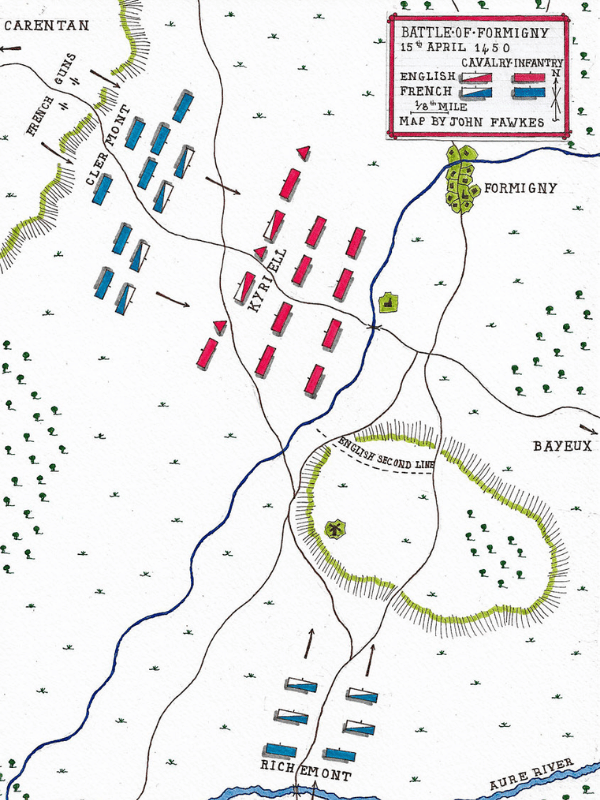
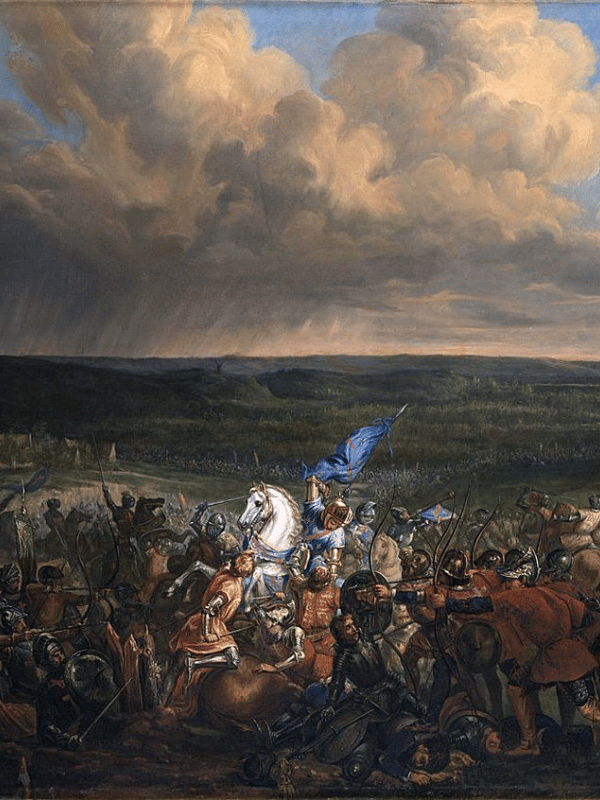
The Battle of Castillon and the Catatonic Regency
1451 – 1453 AD
The collapse of the French territories occurred on 17 July 1453 at the Battle of Castillon in Gascony, where the English commander John Talbot, 1st Earl of Shrewsbury, led a cavalry assault against a fortified artillery encampment. The Earl of Shrewsbury had been lured out from Bordeaux by messages from the citizens of Castillon, who reported that a French army was surrounding their town. Believing a report that the French were in retreat, the Earl of Shrewsbury refused to wait for his main infantry and artillery columns, charging his vanguard knights toward an entrenched position designed by the master gunner Jean Bureau.
The assault resulted in heavy casualties. The French camp was defended by a trench, an earthwork rampart, and a force of roughly 7,000 men. The Earl of Shrewsbury was killed in the melee when a bombardment from over three hundred field guns hidden behind the earthworks shot his horse beneath him, trapping the commander before a French archer killed him. His army was broken by artillery fire and a flank assault by Breton cavalry, resulting in over 4,000 English casualties. This defeat allowed French forces to capture Bordeaux on 19 October 1453, stripping the English Crown of its Gascon holdings and leaving only the enclave of Calais in English hands.
The loss of the French lands triggered a political and constitutional crisis within the Westminster government. In August 1453, while staying at the hunting lodge of Clarendon in Wiltshire, Henry VI received the news of the defeat at Castillon and the death of his general. The news caused the King to suffer a mental breakdown, falling into a catatonic state. For eighteen months, the monarch remained unresponsive, unable to speak, walk, or recognize his newborn son and heir, Prince Edward of Westminster.
This emergency paralyzed the government, leaving the state without a head to authorize patents, distribute patronage, or sign judicial writs. The vacuum sparked a power struggle between rival noble factions to control the regency council, splitting the peerage into two factions: the court faction loyal to the Queen, Margaret of Anjou, and Edmund Beaufort, 2nd Duke of Somerset, contrasted against the opposition led by Richard Plantagenet, 3rd Duke of York.

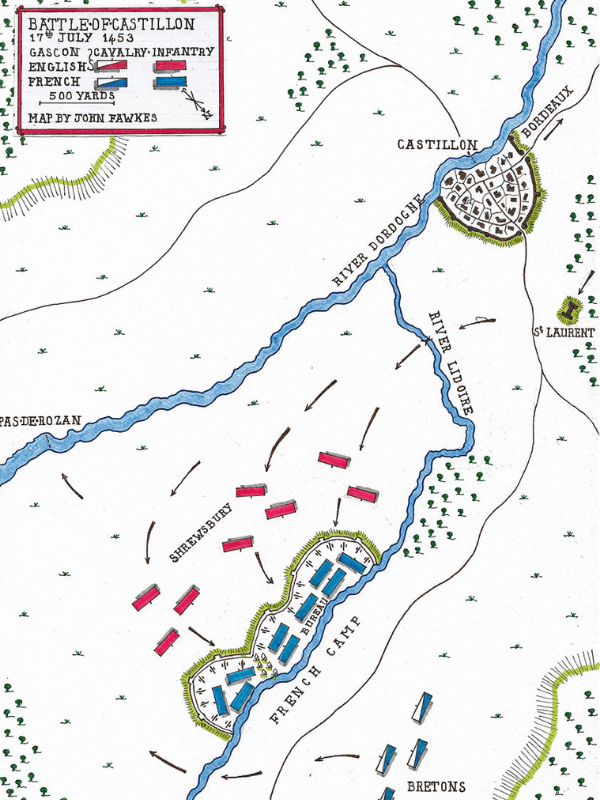
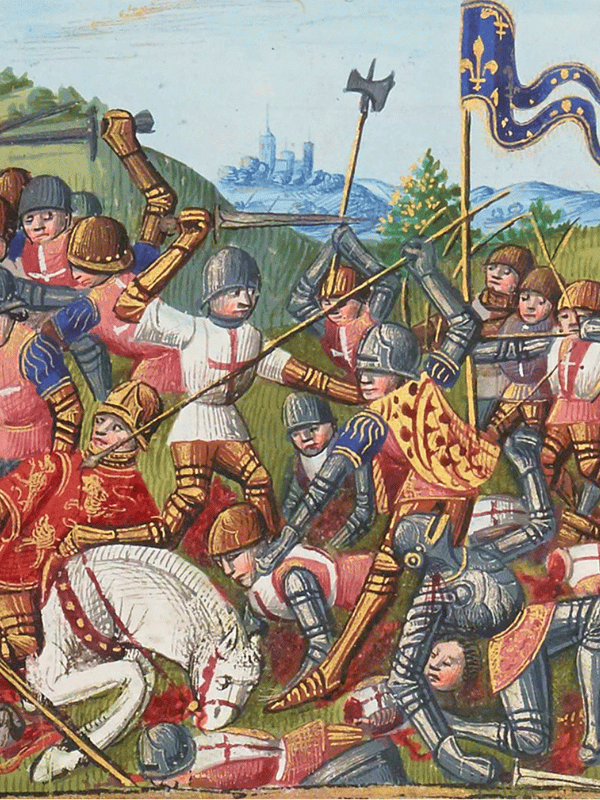
The Wars of the Roses and the Battle of St Albans
1455 - 1487 AD
Confronted with a financial crisis driven by court patronage, military failure in France, and the breakdown of King Henry VI, central authority collapsed, triggering wars across the shires. Most notable was the inheritance feud in the north between the Percy and Neville dynasties, driven by a clash over land and power between Henry Percy, 2nd Earl of Northumberland, and Richard Neville, 5th Earl of Salisbury, culminating on 24 August 1453 when an armed force under the Earl's son, Thomas Percy, Lord Egremont, ambushed a Neville wedding party at Heworth Moor.
To preserve public order, Parliament bypassed the King’s queen, Margaret of Anjou, and appointed the country's relative and prince of the blood, Richard Plantagenet, 3rd Duke of York, to serve as Lord Protector of England. As the grandson of Edmund of Langley, 1st Duke of York, and the descendant of King Edward III via an unbroken male line, Richard Plantagenet was a cousin to Henry VI and possessed a pedigree that made him the heir presumptive to the Crown, prior to the birth of Prince Edward of Westminster in October 1453.
York used his office to target his rival, Edmund Beaufort, 2nd Duke of Somerset, committing him to the Tower of London and stripping the court faction of its influence over the treasury. Somerset, a descendant of Edward III through the legitimized Beaufort line of John of Gaunt, was the leader of the court party and York's competitor for control of the state. Their feud stemmed from York's resentment over being replaced by Somerset as Lieutenant-General of France, a command that resulted in the loss of Normandy, while the Crown defaulted on paying York's personal loans. This governance shift created a divide. When Henry VI regained his health in January 1455, the Lancastrian court faction dismantled York's reforms. The King dismissed York from the protectorate, stripped him of his captaincy of Calais, and restored the Duke of Somerset to control over the administration.
Fearing that Somerset and Queen Margaret would use a council in Leicester to indict them for treason, the Duke of York and his northern Neville allies, Richard Neville, 5th Earl of Salisbury, and his son, Richard Neville, 16th Earl of Warwick, fled the court to raise their retainers. The Yorkist lords marched south with an army of northern marcher men, intending to intercept the King's retinue before the Lancastrian court could gather forces.
On the morning of 22 May 1455, the two sides collided within the town of St Albans, where the royal forces, numbering around two thousand men, established barriers across the streets. The King hoisted his standard at the market square, where Somerset took command. The Yorkist assaults up Holywell Street and Fishpool Street were repelled by the Lancastrian defenders under the command of James Butler, 5th Earl of Ormond.
The deadlock was broken by the Earl of Warwick. Commanding the reserve, Warwick led his men through town gardens, smashing through house walls to launch a flank assault into the market square. Charging into the rear of the royal lines, his archers shot into the ranks of the Lancastrian nobility. The assault threw the royal forces into panic, resulting in the death of York's enemies. The Duke of Somerset was killed outside the Castle Inn. Alongside him fell the 2nd Earl of Northumberland and Thomas Clifford, 8th Baron de Clifford. King Henry VI was captured after being wounded by an arrow.
This encounter forced the monarchy to reappoint York as Lord Protector, but the deaths in the town square created a blood feud among the families of the fallen lords that prevented future reconciliation.
Further Information: The Wars of the Roses and the Battle of St Albans
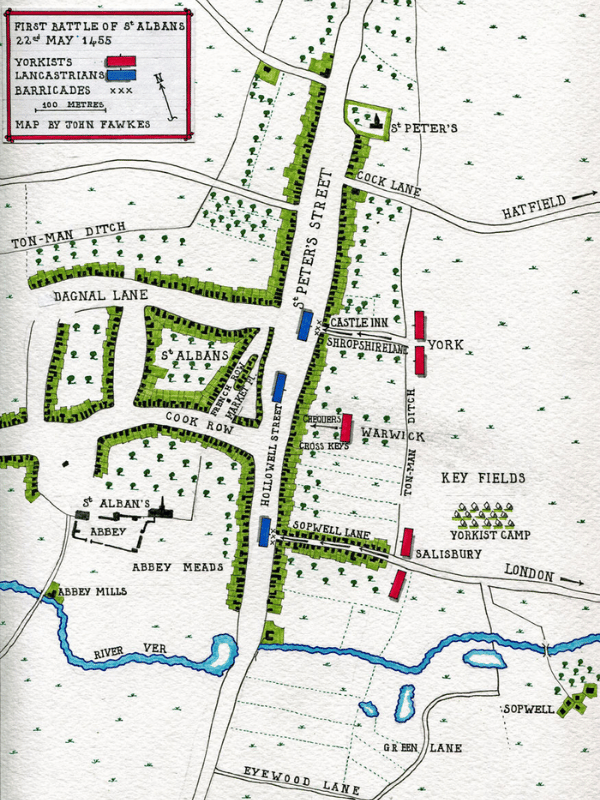
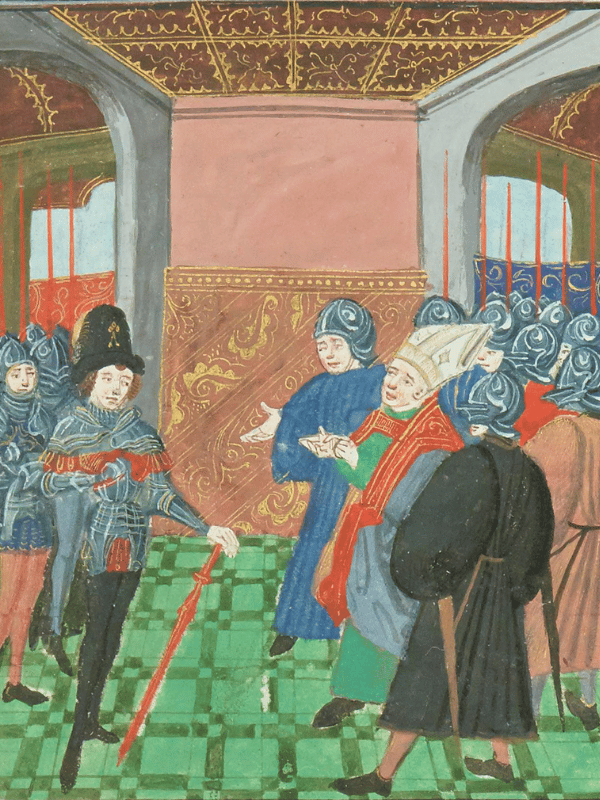
The Yorkist Coup and the Act of Accord
1459 – 1460 AD
The peace following the battle at St Albans did not last, as factional warfare broke out across the Midlands, weakening the authority of the central government. The Lancastrian court, directed by Queen Margaret of Anjou, moved its administrative base to the stronghold of Coventry and summoned an assembly in November 1459, known as the Parliament of Devils. This assembly branded the Yorkist leaders as traitors and confiscated their estates, leaving the exiled lords to launch a counter-offensive from their bases in Calais and Ireland.
Landing in Kent in June 1460, Richard Neville, 16th Earl of Warwick, and York's eldest son, Edward, Earl of March, secured London before marching north to confront the royal army at the Battle of Northampton on 10 July 1460. A summer downpour flooded the trenches and disabled the Lancastrian artillery. During the engagement, the treachery of Edmund Grey, 4th Baron Grey de Ruthyn, who commanded the Lancastrian vanguard and ordered his men to assist the attackers, allowed the Yorkist infantry to overrun the fortifications. The battle resulted in the deaths of Humphrey Stafford, 1st Duke of Buckingham, John Talbot, 2nd Earl of Shrewsbury, and Thomas Percy, Lord Egremont, leading to the capture of King Henry VI.
This victory led to a political crisis in October 1460 when Richard, 3rd Duke of York, returned from Ireland, entered Westminster Hall, and claimed the crown by right of hereditary descent. The assembled lords refused to break their oaths of allegiance to Henry VI, forcing a compromise known as the Act of Accord on 25 October 1460 to prevent an immediate conflict in the capital.
Under the terms of this statute, Henry VI retained the crown for the remainder of his life, but his son, Prince Edward of Westminster, was disinherited, naming the Duke of York and his descendants as the legal heirs to the throne. This adjustment of the succession altered the political landscape, prompting Queen Margaret to travel to Scotland and the north of England to gather a loyalist army to challenge the Yorkist regency and restore her son's inheritance.
Further Information: The Yorkist Coup and the Act of Accord
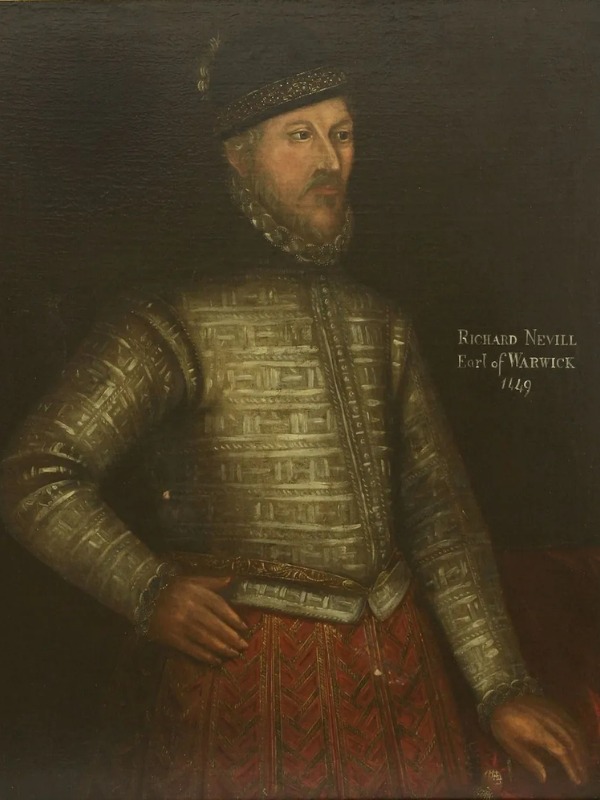


The Lancastrian Counter-Offensive
1460 – 1461 AD
The implementation of the Act of Accord in October 1460 divided the country, as Queen Margaret of Anjou rejected the disinheritance of her son, Prince Edward of Westminster. Fleeing to Scotland to secure alliances and rallying her noble support across the north, the Queen gathered a loyalist army in Yorkshire. This northern mobilization threatened the Yorkist administration in London, forcing Richard Plantagenet, 3rd Duke of York, to march north in December 1460 to defend his estates and establish a winter base at Sandal Castle near Wakefield.
The engagement that followed, known as the Battle of Wakefield, was fought on 30 December 1460. The Lancastrian commanders, Henry Beaufort, 3rd Duke of Somerset, and Henry Percy, 3rd Earl of Northumberland—both driven to avenge the deaths of their fathers at St Albans—deployed a portion of their army in the open fields to act as bait, drawing the Yorkist garrison down from the castle fortifications. As the Duke of York led his forces down from the heights, hidden Lancastrian units under John Clifford, 9th Baron de Clifford, advanced from the surrounding woods to launch a pincer assault that trapped the Yorkist army against the banks of the River Calder.
The ambush resulted in a defeat for the Yorkists, causing heavy casualties and the deaths of their leaders. The Duke of York was killed in the combat on the field. His second son, Edmund, Earl of Rutland, was overtaken by cavalry while fleeing toward the town and killed at Wakefield Bridge by Lord de Clifford. York's military ally, Richard Neville, 5th Earl of Salisbury, was captured during the night and executed the following day at Pontefract Castle. Lancastrian captains removed the heads of the three fallen lords, placing a paper crown on Richard's head in mockery of his royal ambitions, before displaying the trophies on the gates of Micklegate Bar in York.
This escalation altered the nature of the conflict, transforming a legal dispute over the succession into a war of survival that left York's eldest son, Edward, Earl of March, as the leader of the Yorkist cause.
Further Information: The Lancastrian Counter-Offensive
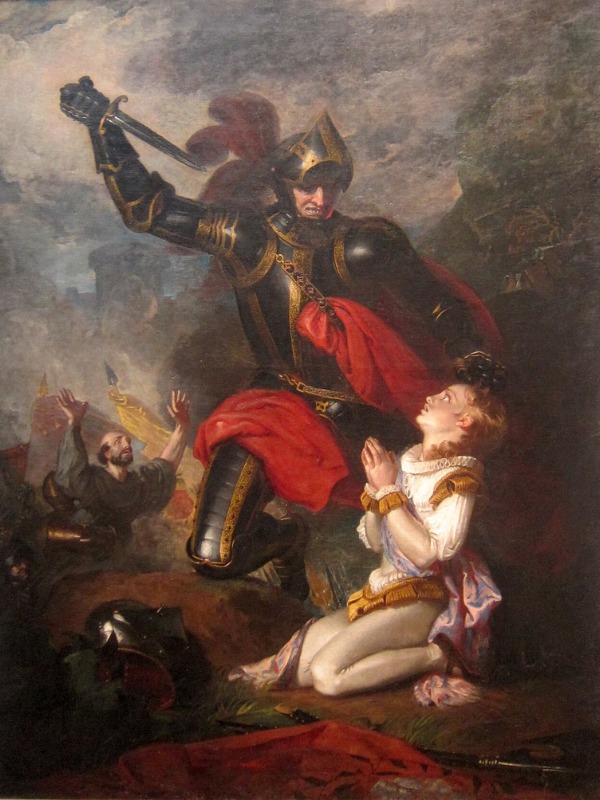
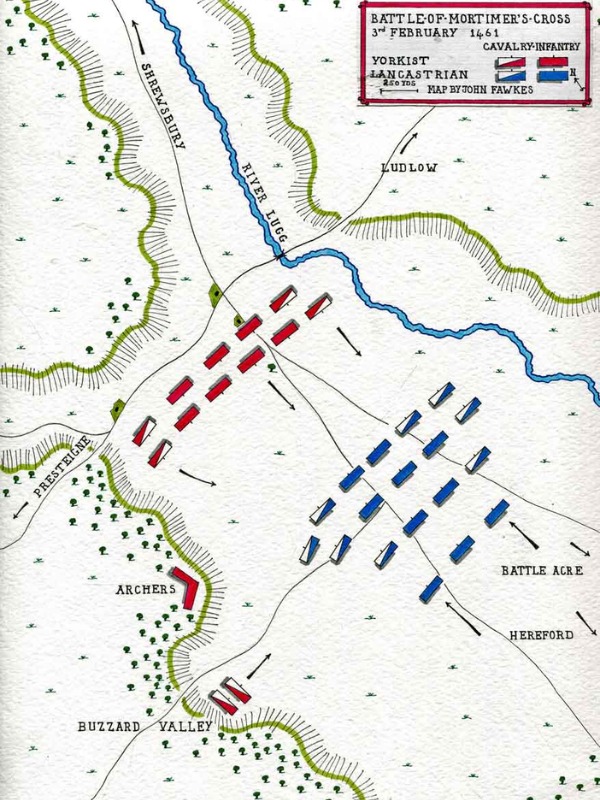
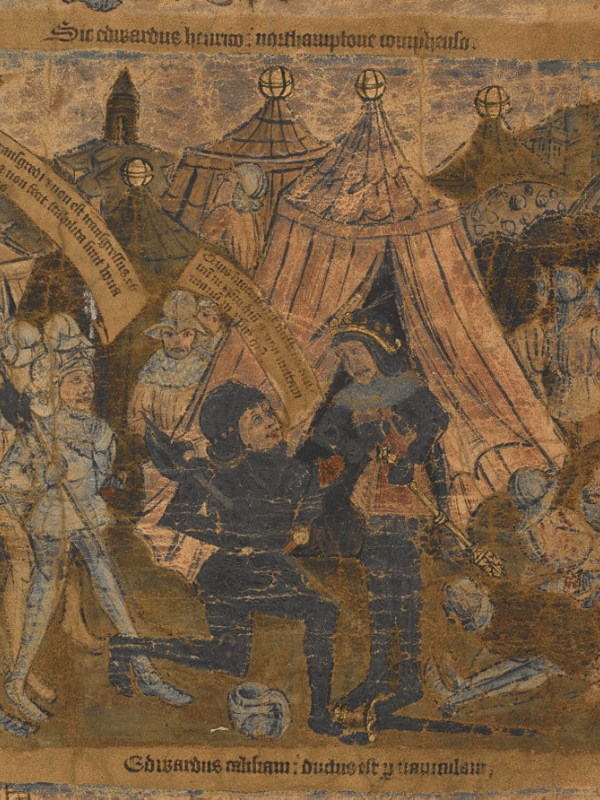
The Battles of Mortimer's Cross and Second St Albans
1461 AD
Following the defeat at Wakefield, Edward, Earl of March, moved to secure the western borders against a Lancastrian force of mercenaries under Jasper Tudor, 1st Earl of Pembroke. Jasper Tudor was the half-brother of King Henry VI, born from the marriage of Queen Catherine of Valois to the Welsh courtier Owen Tudor. Created an earl as a Lancastrian loyalist, Pembroke held authority over the royal castles of South Wales and operated as a military commander for the Crown across the Principality.
Driven by loyalty to the House of Lancaster, Pembroke landed a contingent of mercenaries at Milford Haven and marched inland to defeat Yorkist resistance. The opposing armies met on 2 February 1461 at the Battle of Mortimer's Cross in Herefordshire. On the morning of the engagement, a parhelion caused three suns to appear in the sky, a sight that panicked the Yorkist archers. Edward reinterpreted the vision, declaring that the three suns represented the Holy Trinity and the three surviving sons of York, a move that restored morale.
Edward deployed his forces along the banks of the River Lugg to block the crossing at Wigmore Bridge. Commanding the Lancastrian vanguard was James Butler, Earl of Ormond, alongside the prince's father, Owen Tudor. When the Lancastrian center launched an assault across the river, Edward's longbowmen broke their lines with a hail of arrows. Edward then launched a cavalry charge that broke Pembroke's flanks and routed the army, causing many to drown in the marshes. The battle ended in a victory for the Yorkists, resulting in over three thousand Lancastrian casualties. While Pembroke and Ormond fled the field, Owen Tudor was captured, taken to Hereford, and beheaded, ending the founder of the Tudor line. This victory secured the western shires, allowing Edward to turn his focus toward London to claim the crown.
While Edward consolidated his position, the Lancastrian army under Queen Margaret of Anjou marched south, plundering towns along the Great North Road. To block her advance, Richard Neville, 16th Earl of Warwick, deployed a Yorkist force outside St Albans on 17 February 1461, establishing barriers and defenses across No Man's Land and Bernard's Heath. Commanding the Yorkist positions was his brother, John Neville, 1st Baron Montagu, alongside Burgundian handgunners. Warwick relied on a static plan, deploying artillery, but his scouting network failed, missing the speed of the Lancastrian advance and their change of route. Commanded on the field by Henry Beaufort, 3rd Duke of Somerset, and Henry Percy, 3rd Earl of Northumberland, the Lancastrian forces moved with velocity, outmaneuvering the Yorkist screen before Warwick could move his artillery.
Queen Margaret's forces bypassed defenses by executing a march, entering the town through a side lane and attacking the Yorkist flank. This assault threw Warwick's forces into panic, forcing a retreat and leading to the recapture of King Henry VI, who had been left under a tree during the melee. Although this second battle of St Albans ended in a victory for the Lancastrians, the citizens of London refused to open the gates to Margaret's army, allowing Edward and Warwick to unite their forces in the capital and proclaim Edward as King Edward IV.
Further Information: The Battles of Mortimer's Cross and Second St Albans
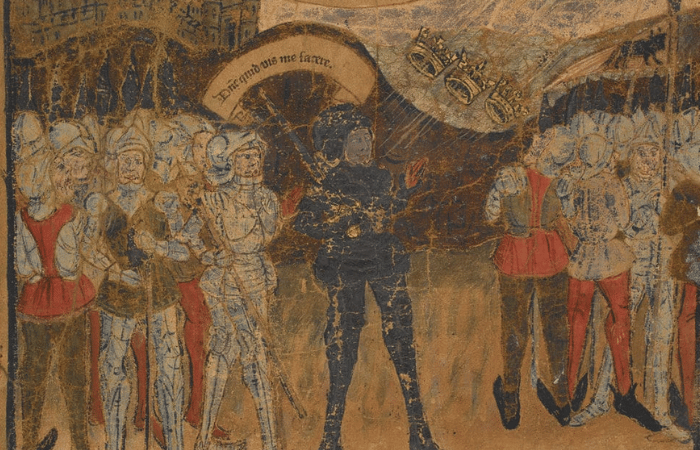
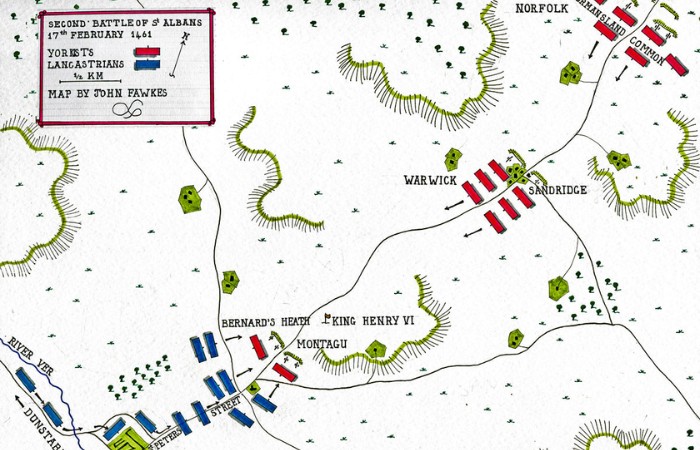
Edward IV and the Battle of Towton
1461 AD
The advance of the Lancastrian army left the southern counties in panic, as Queen Margaret of Anjou’s forces plundered towns along their route and threatened the capital. To secure his cause, Edward, Duke of York, marched his divisions into London, where the citizens welcomed him and proclaimed him King Edward IV on 4 March 1461.
Edward immediately marched his army north along the Great North Road to confront the main Lancastrian force in Yorkshire, forcing a crossing of the River Aire at Ferrybridge on 28 March 1461. This preliminary engagement was marked by a dawn ambush by the Lancastrian cavalry under John Clifford, 9th Baron de Clifford, which killed the Yorkist vanguard commander before Richard Neville, 16th Earl of Warwick, launched a counter-attack and trapped Clifford's force at Dinting Dale, where Lord Clifford was killed.
The two main armies—encompassing over fifty thousand men, representing the largest number of soldiers assembled on British soil—collided on Palm Sunday, 29 March 1461, near the village of Towton. The forces faced each other across a plateau, with the Lancastrians numbering roughly thirty thousand under the command of Henry Beaufort, 3rd Duke of Somerset, and Henry Percy, 3rd Earl of Northumberland, against twenty-six thousand Yorkists commanded by Edward IV.
The battle opened in a snowstorm and gale-force wind that blew directly into the Lancastrian lines, a disadvantage that the Yorkist commander, William Neville, 1st Baron Fauconberg, exploited. Fauconberg ordered his longbowmen to step forward, loose a single volley of arrows into the blizzard, and step back. This ruse tricked the snow-blinded Lancastrians into believing the Yorkists were in range, forcing them to waste their ammunition supply on empty ground, short of the Yorkist lines.
The engagement turned into a ten-hour combat as the Lancastrian infantry rushed down the valley and up the slope in a hand-to-hand melee. The armies locked shields across the freezing snow, fighting in a melee so dense that fields became choked with corpses, requiring pauses to clear the dead. The deadlock was broken late in the afternoon when the Yorkist rear guard under John Mowbray, 3rd Duke of Norfolk, arrived via the Old London Road to strike into the exposed Lancastrian flank.
The Lancastrian lines broke into a retreat toward the flooded waters of the Cock Beck, where the bridge collapsed. Fleeing knights drowned in the river or were cut down across the downs, creating a "Bridge of Bodies" that turned the waters red. The victory was complete, resulting in an estimated twenty-eight thousand casualties. While the Earl of Northumberland died of his wounds and Ranulph de Dacre, 6th Baron Dacre, was killed, Henry VI, Queen Margaret, and the Duke of Somerset fled into exile in Scotland. This defeat of the Lancastrian army allowed Edward IV to return to London for his coronation, establishing the Yorkist restoration.
Further Information: Edward IV and the Battle of Towton
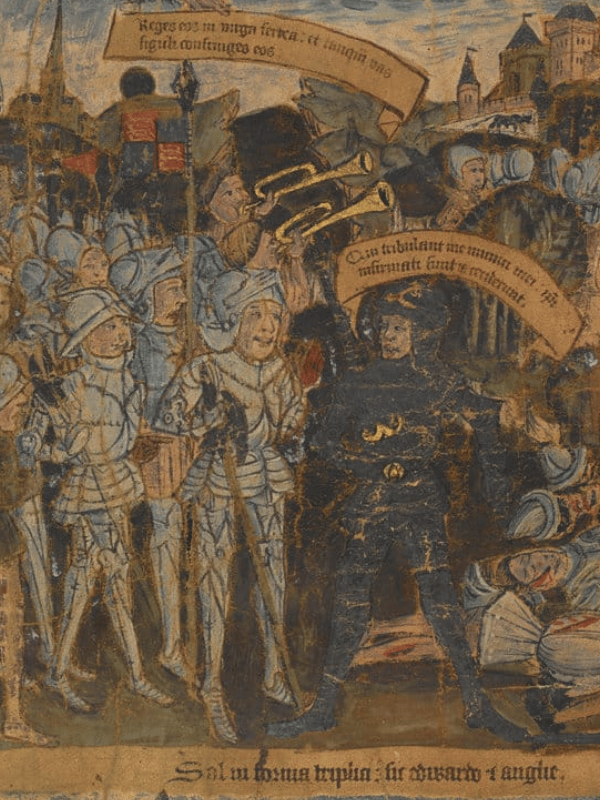

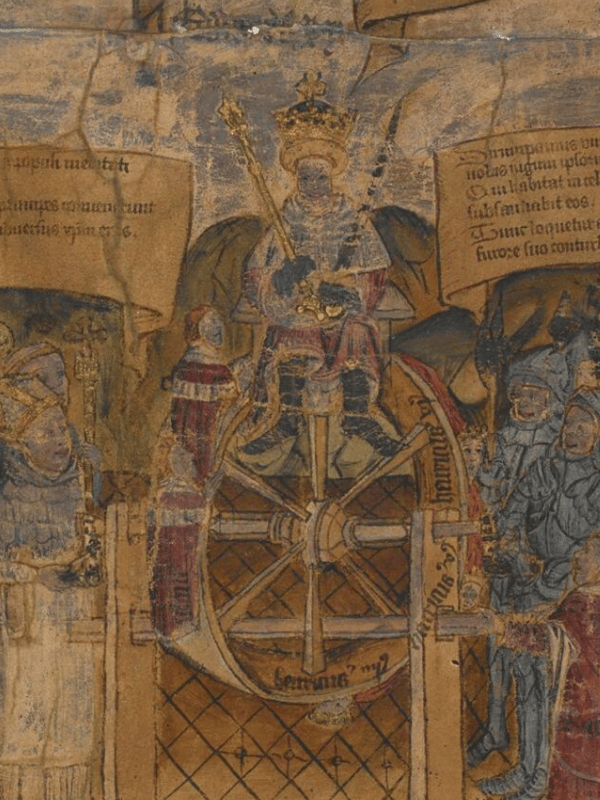
The Yorkist Restoration
1461
The accession of Edward IV launched a period of administrative, legal, and financial reordering known as the Yorkist Restoration. Edward IV operated as an administrator who recognized that a cause for the mid-century collapse was the bankruptcy of the treasury. To prevent the deficits of his predecessor, Edward altered the fiscal framework of the Crown, bypassing the Exchequer to manage the revenues of royal estates directly through the Chamber system. This change turned the King into a merchant, as Edward utilized his capital to buy and export wool, cloth, and tin on fleets, selling to the markets of Flanders and the Mediterranean.
By collecting these commercial profits, the King paid off the Crown’s debts, enabling him to manage the government without requesting taxes from Parliament. Simultaneously, the Yorkist administration addressed lawlessness across the country, executing bands of thieves and enforcing statutes that banned the nobility from maintaining private, livery armies of retainers to influence local courts.
This stabilization led to a commercial expansion across England. Trade routes re-opened, and the wealth generated by the wool trade allowed a class of urban merchants and independent farmers to prosper. Edward also supported new technologies, funding the merchant William Caxton to establish the first printing press in England at Westminster in 1476, which began the production of vernacular literature.
To secure the wealth of the Crown, the King concluded the Treaty of Picquigny with Louis XI of France in 1475, which granted the English treasury a down payment of fifty thousand crowns and an annual pension of fifty thousand crowns in exchange for the withdrawal of English troops from French soil. This system of revenue extraction and administrative oversight stabilized the monarchy, transforming the Crown into a self-funding institution.
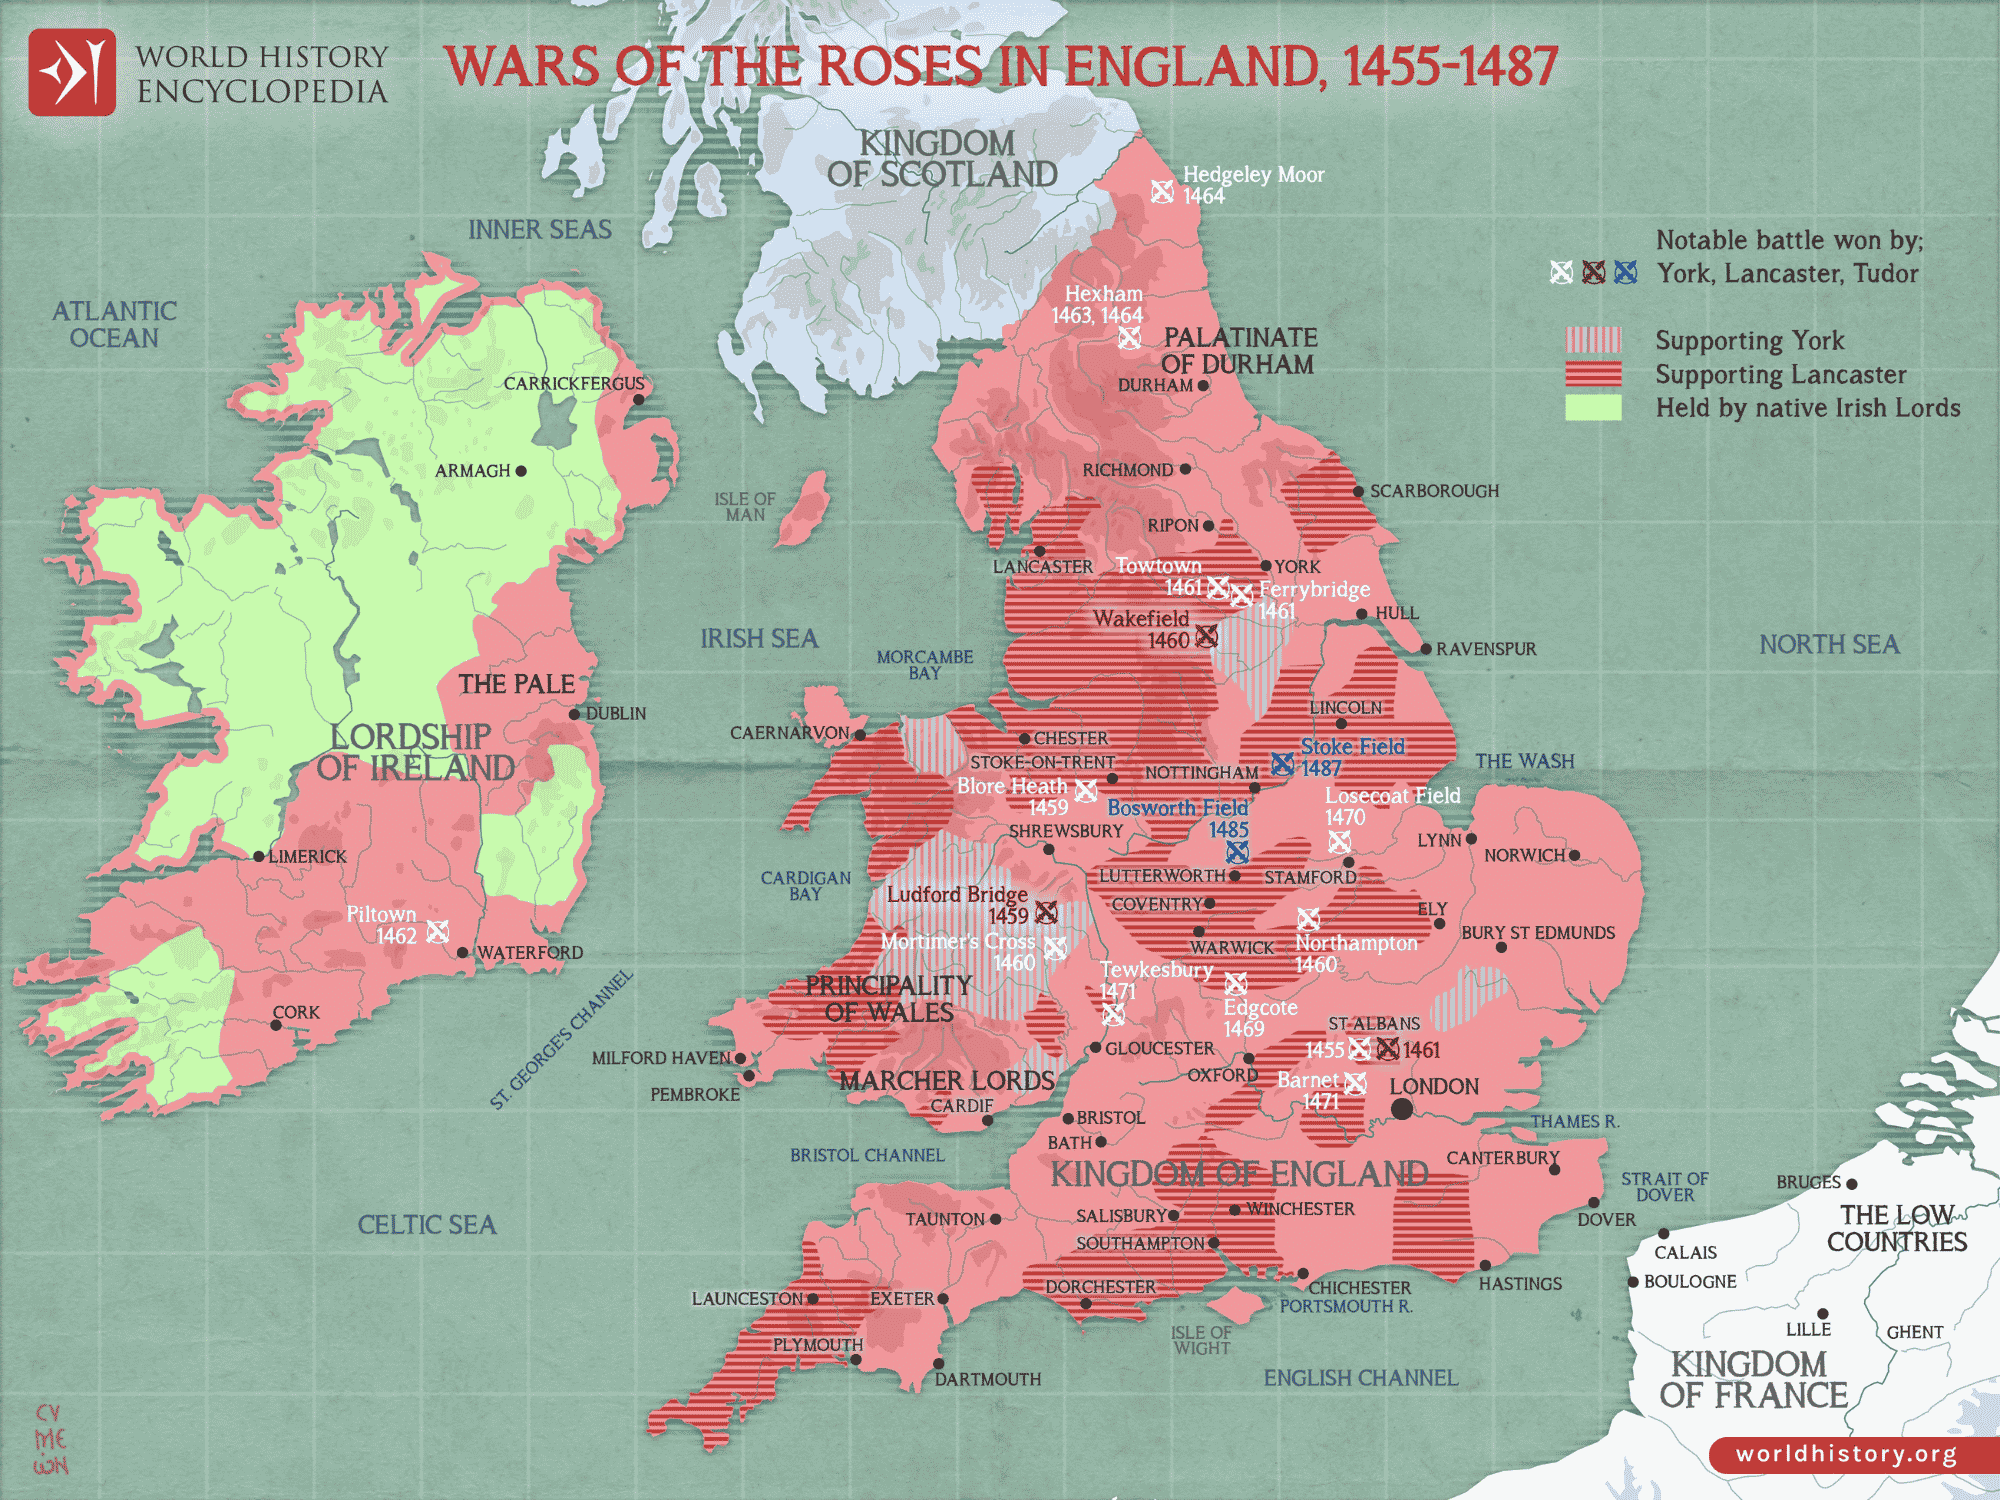
The Warwick Rebellion and the Lancastrian Readeption
1469 – 1471 AD
The political consensus of the Yorkist Restoration fractured in 1469 due to a rift between Edward IV and his advisor, Richard Neville, 16th Earl of Warwick. The Earl of Warwick grew alienated by the King's marriage to the Lancastrian widow Elizabeth Woodville and the elevation of her family to titles and marriages that isolated the established nobility. Partnering with the King's younger brother, George, 1st Duke of Clarence, the Earl of Warwick launched a rebellion in July 1469, utilizing an uprising in Yorkshire under the pseudonym Robin of Redesdale to draw the King's forces away from the capital.
The rebel coalition intercepted and defeated a royalist vanguard under William Herbert, 1st Earl of Pembroke, at the Battle of Edgecote on 26 July 1469. Following the rout, the Earl of Warwick executed the Earl of Pembroke and the Queen’s father, Richard Woodville, 1st Earl Rivers, before taking Edward IV captive at Middleham Castle. However, the Earl of Warwick failed to secure baronial cooperation to rule in the captive King's name, forcing him to release the monarch and flee across the Channel to France in the spring of 1470.
While in exile, the Earl of Warwick executed a political realignment under the mediation of King Louis XI of France, forming an alliance with his enemy, the exiled Queen Margaret of Anjou. To formalize this pact, the Earl of Warwick betrothed his daughter Anne Neville to Margaret’s son, Prince Edward of Westminster, before launching an invasion of England in September 1470. Caught unprepared by the defection of the Earl of Warwick’s brother-in-law, John Neville, 1st Marquess of Montagu, Edward IV fled the country, sailing from King's Lynn to seek refuge in Flanders with his brother-in-law, Duke Charles the Bold of Burgundy. The Earl of Warwick entered London unopposed, removing the frail Henry VI from the Tower of London to restore him to the throne on 3 October 1470, a restoration known as the Readeption.
The Lancastrian restoration was broken months later when Edward IV returned in March 1471, landing at Ravenspur with financial support and a mercenary force provided by the Duke of Burgundy. Marching south, Edward IV reunited with the Duke of Clarence, who abandoned the Earl of Warwick and defected back to the Yorkist cause, allowing Edward to enter London and recapture Henry VI.
On 14 April 1471, Easter Sunday, the two hosts clashed at the Battle of Barnet in a dense morning fog. The confusing weather conditions caused the Earl of Warwick's right wing under John de Vere, 13th Earl of Oxford, to be mistaken for the Yorkists as they returned to the field, causing the Earl of Warwick's own center under the Marquess of Montagu to assault them in the mist. This friendly fire sparked a cry of treason that broke the Lancastrian lines; the Marquess of Montagu was cut down, and the 16th Earl of Warwick was killed in the melee while attempting to reach his horse, ending the career of the Kingmaker.
Further Information: The Warwick Rebellion and the Lancastrian Readeption


The Battle of Tewkesbury and Fall of Lancaster
May 1471 AD
The victory at Barnet eliminated the Earl of Warwick, but Edward IV was forced to march west to intercept Queen Margaret’s landed reinforcements before they could retreat into Wales to link up with Jasper Tudor, Earl of Pembroke. Moving at a pace across the Cotswolds, the King’s army cut off the Lancastrian line of march, forcing the forces under Edmund Beaufort, 4th Duke of Somerset, to turn and stand on 4 May 1471 at the Battle of Tewkesbury. The Lancastrians deployed their lines in a position outside the town, using ditches and lanes to block the Yorkist approach.
The battle was decided by aggression and a breakdown in Lancastrian coordination. The Yorkist vanguard, commanded by the King's younger brother Richard, 1st Duke of Gloucester, used an artillery bombardment to provoke the enemy lines. Losing his patience, the Duke of Somerset led his division down from the high ground, but the maneuver failed when Gloucester’s line held. Simultaneously, an ambush force of two hundred Yorkist spearmen charged out from the nearby woods into the exposed Lancastrian flank. Believing he had been betrayed by his fellow commanders who had failed to support his charge, Somerset retreated, killing John Wenlock, 1st Baron Wenlock, for his hesitation.
The collapse turned the fields into a rout, remembered as the Bloody Meadow. The Lancastrian lines dissolved toward the River Severn, resulting in the death of Prince Edward of Westminster, who was cut down while fleeing the field—marking the only time a Prince of Wales was killed in battle.
The Duke of Somerset and several Lancastrian holdouts sought sanctuary inside Tewkesbury Abbey, but Edward IV broke sanctuary on 6 May 1471, executing Somerset after a trial. Following this victory, Edward IV returned to London on 21 May 1471. That same night, to prevent a Lancastrian resurgence, King Henry VI was executed inside the Tower of London, extinguishing the line of the House of Lancaster and leaving Edward IV on the throne.
Further Information: The Battle of Tewkesbury and Fall of Lancaster
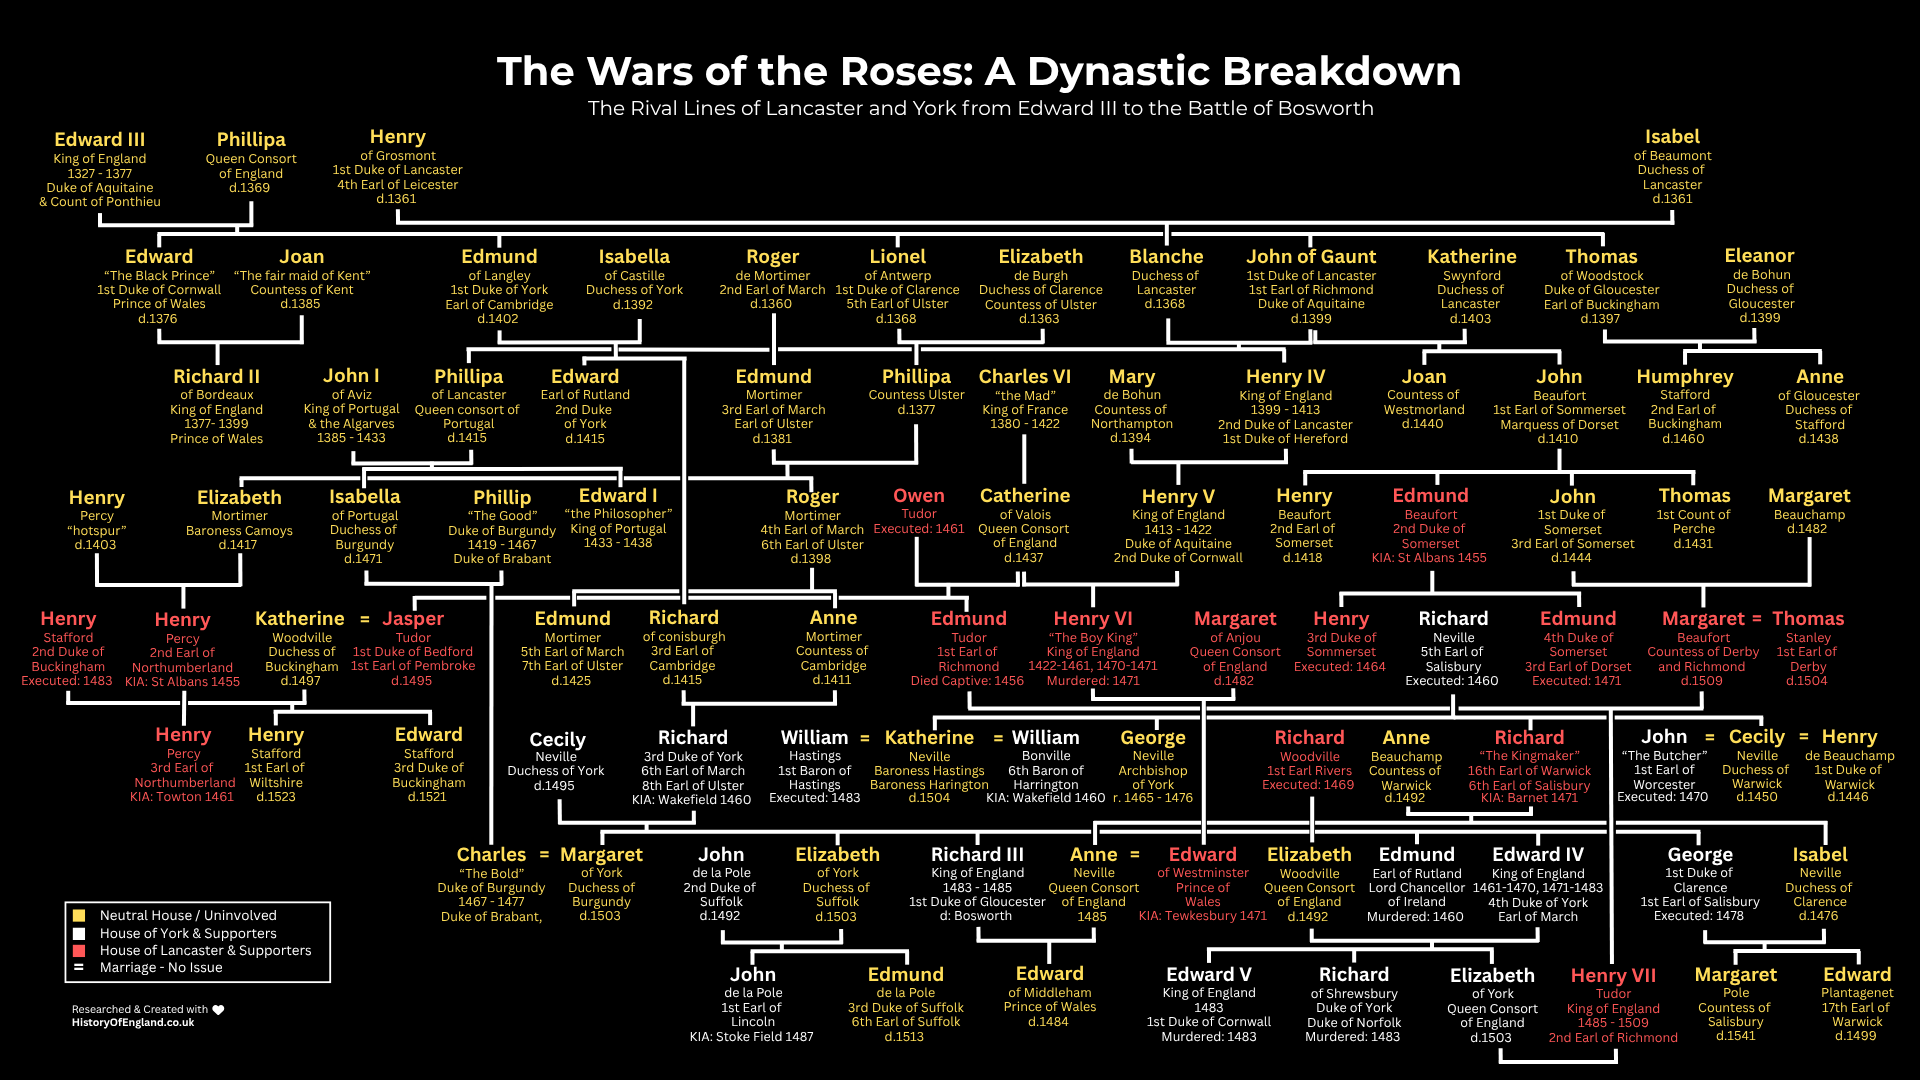
Richard III and the Princes in the Tower
1483 - 1485 AD
The death of King Edward IV on 9 April 1483 ended the peace of the Yorkist Restoration, leaving the throne to his twelve-year-old son, King Edward V. Because the new monarch was a minor, a dispute erupted over control of the royal council between the Queen Mother’s family, the Woodvilles, and the late King’s brother, Richard, Duke of Gloucester. Richard intercepted the King’s entourage at Stony Stratford on 30 April 1483, arrested his Woodville guardians—including the King's uncle, Anthony Woodville, 2nd Earl Rivers—and assumed authority as Lord Protector. He escorted his nephew into London, placing Edward V and his brother, Richard, Duke of York, inside the Tower of London to await a scheduled coronation.
In June 1483, Richard claimed the crown, producing testimony that Edward IV had been legally pre-contracted to marry Lady Eleanor Butler before his wedding to Elizabeth Woodville. This declaration made the King's marriage bigamous, passing the decree Titulus Regius through Parliament to make the young princes illegitimate. Parliament accepted this dynastic claim, electing Gloucester as King Richard III, who was crowned on 6 July 1483. Shortly after his accession, the two princes disappeared from public view behind the stone walls of the Tower. This disappearance caused a political crisis for Richard's government, alienating the moderate Yorkist nobility who viewed the removal of Edward IV's children as a breach of trust.
The crisis provoked resistance. In October 1483, his ally, Henry Stafford, 2nd Duke of Buckingham, launched a rebellion to overthrow the King. Richard defeated the uprising, executing the Duke at Salisbury, but the conflict reordered the opposition. The remaining Lancastrian supporters, directed by Margaret Beaufort, Countess of Richmond, joined with the exiled Yorkist dissidents. They formed an alliance to back Margaret’s son, the Lancastrian exile Henry Tudor, Earl of Richmond, who was living in Brittany. Henry swore an oath at Rennes Cathedral to marry Edward IV's daughter, Elizabeth of York, joining the factions against Richard III.
By 1484, Richard III’s government was in isolation, and the King spent the financial reserves of the treasury to garrison the southern coast, fund defenses, and deploy informants. This expenditure weakened defenses, ensuring that when Henry Tudor's fleet evaded Channel patrols to land at Milford Haven on 7 August 1485, the country was headed toward a confrontation.
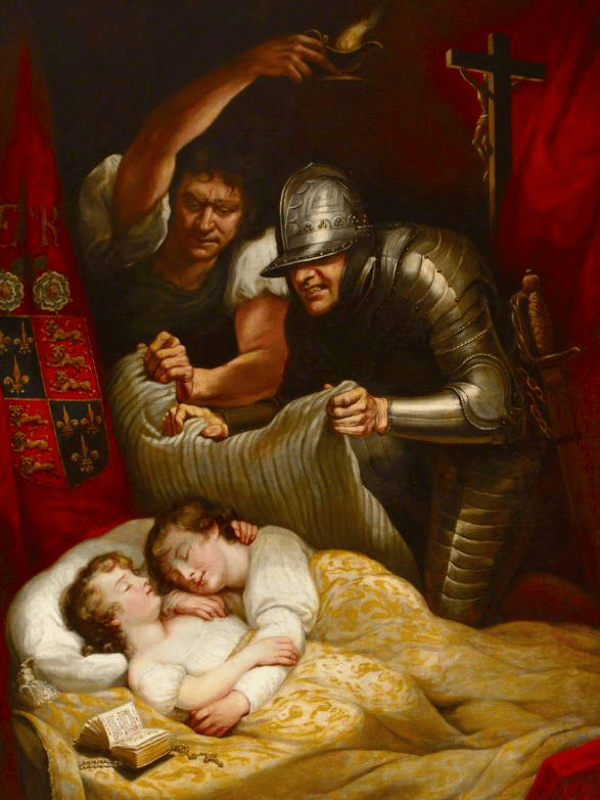
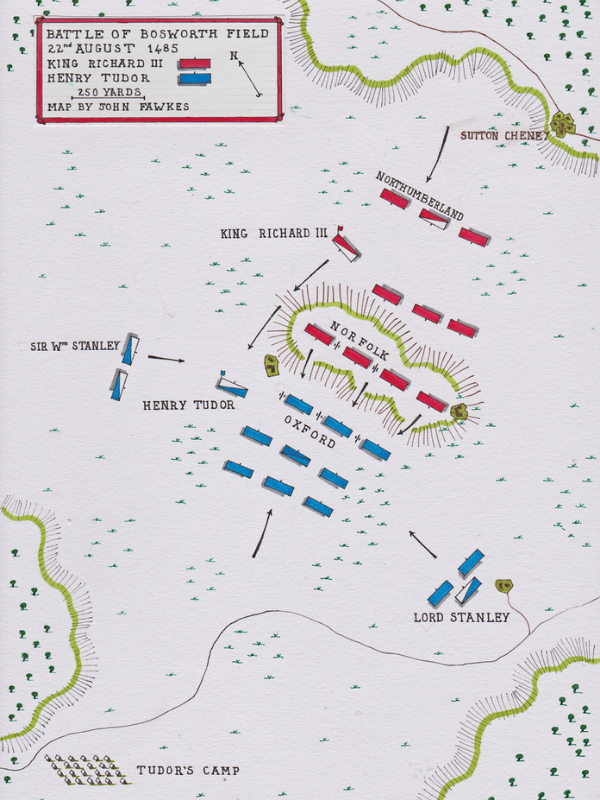
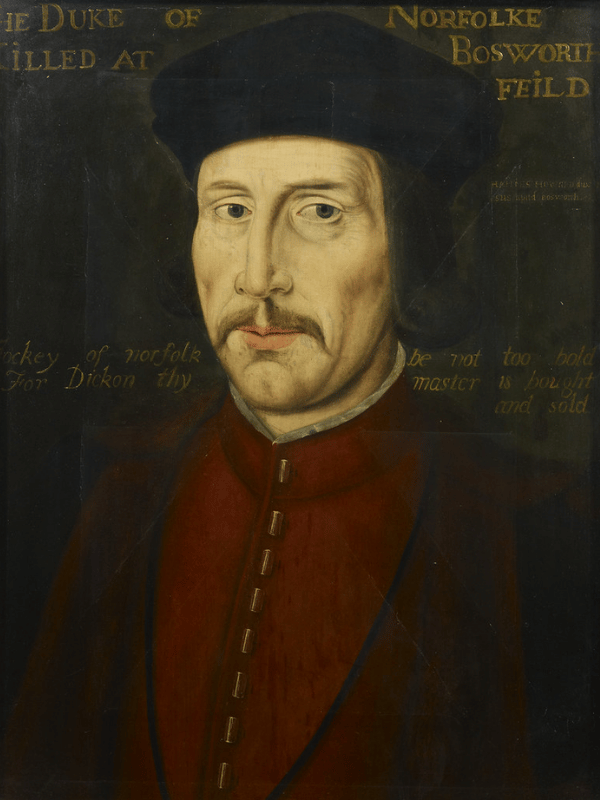
The Battle of Bosworth Field
1485 AD
The conflict over the crown ended on 22 August 1485. Henry Tudor, Earl of Richmond, having sailed from Harfleur with a force of French, Scottish, and Breton mercenaries under Philibert de Chandée, landed at Milford Haven on 7 August 1485. Richmond marched inland through the Welsh valleys, rallying native Welsh chieftains like Rhys ap Thomas before advancing to challenge the royal army with a force of roughly five thousand men.
The two hosts met at Redemore Plain near Market Bosworth in Leicestershire, where Richard III had deployed an army of over ten thousand men, occupying a position atop Ambion Hill with an artillery train. The royal army was organized into a vanguard under John Howard, 1st Duke of Norfolk, and a rearguard commanded by Henry Percy, 4th Earl of Northumberland. However, the King's political position was unstable. Positioned on the northern and southern flanks of the field was a force of approximately six thousand men commanded by Thomas Stanley, 1st Baron Stanley, and his brother Sir William Stanley, who held their troops back to observe which faction would secure an advantage.
The engagement opened with a clash between the vanguards, directed by Richmond's commander, John de Vere, Earl of Oxford, who deployed his archers in a wedge formation to break the frontline. The battle hung in a balance when Richard III spotted Henry Tudor moving across the plain below with an escort heading toward the Stanley lines to request intervention. The King launched a cavalry charge down the slopes of Ambion Hill. Richard’s charge broke Richmond’s lines, unhorsing Edward Woodville and killing Henry's standard-bearer, Sir William Brandon, in combat. The King fought near Tudor himself, striking down Sir John Cheyne. Seeing the claimant on the brink of defeat, Sir William Stanley ordered his force to enter the battle, launching a flank charge into the royal cavalry.
Richard III was surrounded and killed in the melee, becoming the final English monarch to die in battle. His crown was recovered by Sir Reginald Bray and placed onto the head of King Henry VII by Lord Stanley, ending the rule of the Plantagenet dynasty and establishing the House of Tudor.
Further Information: The Battle of Bosworth Field
Stay Connected
Plantagenet Era FAQs